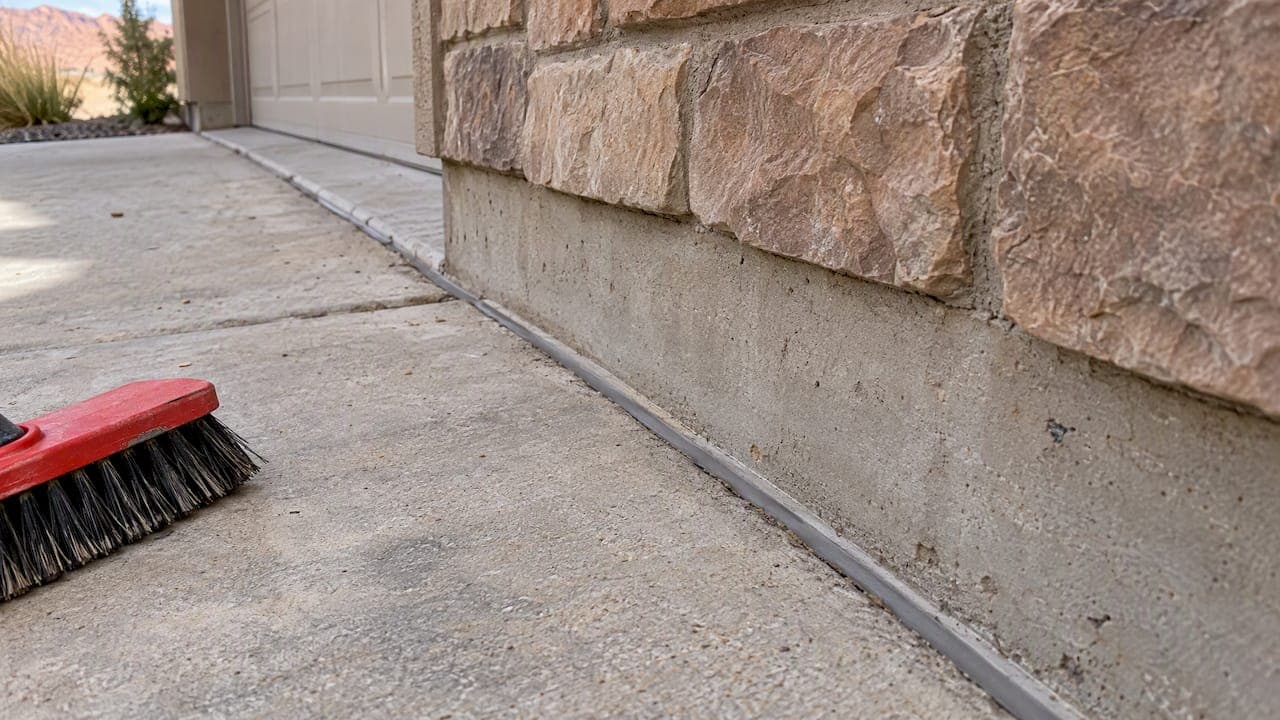
A concrete expansion joint is a full-depth gap between two slabs, or between a slab and a fixed structure, that lets the concrete move as temperatures change without cracking or pushing on your house. Most are filled with a compressible strip and topped with flexible sealant. They matter most where a slab meets something rigid, and they need a fresh seal when the old one cracks, peels or goes missing.
This guide explains where expansion joints belong, how they differ from control joints, what to fill them with, how to do it properly, and when a joint problem is really a concrete problem.
TL;DR
- An expansion joint is a full-depth separation that lets slabs move independently. A control joint is a shallow groove that tells shrinkage cracks where to form.
- Use expansion joints where concrete meets a foundation, a garage slab, steps, posts or another fixed element. On ordinary driveway runs, fewer is usually better.
- Fill with a compressible filler, then seal with a flexible sealant. Joints wider than 1/4 inch need a backer rod first.
- Clean the joint thoroughly before sealing. Poor cleaning is the most common reason sealant fails.
- If the edges are spalled or crumbling, resealing alone will not fix it. The concrete needs repair first.
Table of Contents
- What an expansion joint does
- Expansion joints vs. control joints
- Where you actually need expansion joints
- What goes inside an expansion joint
- How to clean and fill an existing joint
- What it costs to fill or reseal
- Maintenance: when to reseal and when to repair
- What happens when joints are left open or done wrong
- Our take on expansion joints
- Planning a new slab or fixing a failing one
- FAQ
- Sources
What an expansion joint does
Concrete grows slightly when it warms and shrinks when it cools. On a single small slab you never see it. On a long driveway, a patio butted against a house, or a walkway running into a garage apron, that movement adds up. With nowhere to go, the slab pushes against whatever is next to it, and something gives: a corner chips, a slab lifts, or a crack runs across the panel.
An expansion joint is the planned place for that movement. The American Concrete Institute describes these joints as separating adjacent concrete sections to allow movement from dimensional increases and reductions. Think of it as a deliberate gap with a soft, compressible material inside, so the slab can squeeze in on a hot afternoon and pull away on a cold night.
On a house, these joints are also called isolation joints when they separate a slab from a fixed element such as a foundation wall, a column or a catch basin. In everyday talk, contractors and homeowners use "expansion joint" for both.
Expansion joints vs. control joints
The two get mixed up constantly, and they do different jobs.
Concrete shrinks as it cures, and shrinkage cracking is close to unavoidable. A control joint is a weakened plane that regulates where those random shrinkage cracks happen, so the crack forms in a straight line at the bottom of the groove instead of wandering across the slab. An expansion joint is a full-depth separation that allows independent movement between separate elements.
The U.S. Bureau of Reclamation puts it in the same terms: expansion joints separate a structure into segments so they can expand or contract, while control joints regulate the location of cracking.
| Control joint | Expansion joint | |
|---|---|---|
| Purpose | Directs shrinkage cracks into a straight line | Gives slabs room to move |
| Depth | Partial depth, a groove | Full depth through the slab |
| Width | Thin groove or saw cut | Typically a visible gap with filler |
| Filled with | Often left open or sealed | Compressible filler plus sealant |
| Where | Regular grid across the slab | Where concrete meets fixed objects or other slabs |
Control joints can be cut with a hand groover in fresh concrete, or sawcut once the concrete is hard enough to prevent raveling. If you want the details on groove depth, our guide to concrete control joints and the 1/4 depth rule walks through it.
Where you actually need expansion joints
Here is the part most online advice skips: modern concrete pavement design uses far fewer expansion joints than older practice did. The American Concrete Pavement Association notes that expansion joints were historically common, but good contraction joint design has virtually eliminated the need for them in most standard pavement applications.
The same ACPA page lists the situations where they are still needed:
- Panels 60 feet or longer without contraction joints
- Concrete placed when temperatures are below 40°F
- Contraction joints that have become infiltrated with debris
- Materials with high expansion characteristics
There is a reason to be stingy with them. ACPA also warns that expansion joints can cause surrounding contraction joints to open, which leads to spalling and sealant failure. The Federal Highway Administration says the same thing: overuse of expansion joints may let nearby contraction joints open over time, letting in water and hard debris and costing the slab load transfer.
What this means for a home
For a residential driveway, patio or walkway, a sensible layout usually looks like this:
- Isolation joints where the new slab touches the garage slab, the house foundation, steps, a porch, light posts or a mailbox pad.
- Expansion joints between separately poured sections, such as where a driveway meets the sidewalk or the street apron.
- Control joints on a regular grid across each panel, cut or tooled to the right depth.
- Extra attention for pours in cold weather. Our cold weather concrete checklist covers how the 40°F threshold changes the plan.
If someone has proposed a joint every 10 feet across a plain driveway, that is worth questioning. We explain why in our post on driveway expansion joints.
One more note: some pervious concrete pavements are placed with no joints at all and allowed to crack randomly. That is a specialized product, not a model for a standard driveway.
What goes inside an expansion joint
A good joint has two layers: a compressible filler that keeps concrete from touching concrete, and a flexible sealant on top that keeps water out.
Compressible fillers
The Bureau of Reclamation lists corkboard, mastic and sponge rubber as typical expansion joint fillers. In residential work, you will most often see:
- Foam strip: Polyethylene foam in rolls or boards, cheap and easy to set before the pour.
- Fiber or cork-type board: Stiffer, holds its shape against wet concrete, common for long straight edges.
- Rubber or reversible strip systems: More durable, often used where you want a clean finished look.
The job of the filler is to compress and rebound. It should be cut to the full depth of the slab, with its top set slightly below the surface so there is room for sealant.
Sealants
The joint must be sealed with a flexible sealant or an expansion joint strip so water cannot get through and deteriorate the sub-base. For horizontal joints in driveways and patios, a self-leveling polyurethane sealant is the usual choice. Vertical joints, such as where a slab meets a wall, need a non-sag type so it stays in place.
Match the product to the joint. A rigid caulk or a hard filler in a moving joint will crack or tear within a season. Read the manufacturer's data sheet for movement range, cure time and the temperature window for application.
How to clean and fill an existing joint
Most homeowners are not building a new joint. They are looking at an old one that is empty, packed with dirt and weeds, or filled with sealant that has pulled away. Here is the process, drawn from federal highway guidance and manufacturer instructions.
Step 1: Clear out the old material
Remove loose sealant, dirt and debris with a stiff brush and concrete cleaner, then let the joint dry completely. Highway agencies go further on commercial work: joints are flushed with high-pressure water, then cleaned by abrasive cleaning, waterblasting or wire brushing, and blown out with clean, dry air.

Step 2: Check the joint walls
Before you seal, rub a finger along the joint faces. If you pick up dust, old residue, dirt, moisture or oil, clean the walls again. The American Concrete Pavement Association says the faces must be free of dust, dirt, oil and visible foreign material and advises against chemical solvents for washing the joint, because they can carry contaminants into the pores and weaken adhesion.
Step 3: Decide whether the joint is worth filling
Very thin joints are the exception. ACPA guidance says filling is not recommended for joints narrower than 1/4 inch (6 mm), because there is not enough width to clean properly or to inject material.
Step 4: Install a backer rod
For joints wider than 1/4 inch, press in a backer rod to the right depth. Federal guidance says it should be compatible, non-absorptive, and installed right after final cleaning, fitting snugly with a diameter roughly 25% larger than the joint width. It also prevents three-sided adhesion, where the sealant sticks to the bottom as well as both sides and tears when the slab moves. Set it so the sealant depth lands between 1/8 inch and 1/2 inch.

Step 5: Apply the sealant
Work from the bottom up so you do not trap air, and follow the manufacturer's instructions on depth, recess and curing time. Keep foot and vehicle traffic off until it has cured. Do not seal in rain or on damp concrete.
Poor preparation is where most failures start. ACPA calls reservoir cleaning a major problem affecting sealant performance, and says careful preparation is critical to getting any value from the sealing at all. Slow down on step 1 and 2.
What it costs to fill or reseal
Costs depend on joint width, length, access and the material. As a reference point for commercial concrete work, one published unit rate lists $8.17 per linear foot to fill and seal an expansion joint, including backer rod, gun-applied sealant, 5% waste, labor, small tools, overhead and fee. A residential job with short runs, tight access or heavy cleaning can come in higher per foot, because setup time is spread over fewer feet.
For a typical driveway the joint work is a small line item. The bigger cost question is the slab itself. If you are budgeting a whole project, our concrete driveway installation cost guide and slab cost calculator show how the numbers add up.
Maintenance: when to reseal and when to repair
Walk your slabs once or twice a year, ideally after winter. Look for:
- Sealant that is cracked, peeled away from one side, or missing
- Joints packed with soil, gravel or plant growth
- Standing water at a joint after rain
- Chipped or crumbling edges along the gap
FHWA advises you to inspect regularly and keep joints free of debris and water paths. Reseal when the existing sealant is deteriorated, debonded, missing, or letting water and incompressibles in.
The catch is spalling. If the edges are loose, crumbling or structurally unsound, new sealant will not hold. FHWA defines resealing as removal, refacing, pressure cleaning and new sealant installation, and the Bureau of Reclamation says durable repair requires complete removal of deteriorated material and preparation of sound concrete to bond to. The same FHWA technical advisory makes the point: sealing alone will not restore unsound concrete.
If the slab itself is cracking in new places, rather than just the joints failing, read our guide to durable driveway crack repair. A surface sealer can also help protect the slab around the joints, and we compare options in our concrete sealer guide.
What happens when joints are left open or done wrong
- Water gets under the slab. An open or failed joint lets water reach the sub-base. Over time the base softens or washes out, and slabs settle or tilt.
- Debris locks the joint. Grit and small stones that work into the gap stop it from closing, so the slab pushes against its neighbor in summer. That is how corners chip off.
- Pests move in. Utah State University Extension notes that pavement ants are known to nest in expansion joint gaps, and unfilled joints give them an easy home.
- Too many joints cause their own damage. As noted above, excess expansion joints can let nearby joints open and fail.
- Too few joints cost more later. The Bureau of Reclamation observes that contractors may want to space joints as far apart as possible to save effort, but cracks from joints spaced too far apart can greatly increase overall project costs.
The goal is balance: joints where movement is real, and control joints elsewhere.
Our take on expansion joints
We pour a lot of driveways, patios and slabs around southern and northern Utah, where a slab can see hard freezes and hot, dry summers in the same year. The most common mistake we see on other people's work is not a missing joint. It is a joint in the wrong place, or a joint that was never cleaned before it was sealed.
Our approach is simple. We put isolation joints wherever concrete meets something that will not move with it, we lay out control joints so cracks have a clean path, and we keep expansion joints to the places that need them. We do that planning ourselves, from the first estimate to the final pour, because our own crew handles every phase and nobody is guessing at a layout somebody else drew.
If you are looking at an older slab, our advice is to fix the concrete before you worry about the caulk. Sealant on crumbling edges fails fast and homeowners end up paying twice.
— Jake
Planning a new slab or fixing a failing one
If you are planning a driveway, patio or slab, joint layout is decided before the pour, and it is much cheaper to get right then than to correct later. A to Z Construction is a licensed general contractor in Cedar City, Utah. Our in-house crew handles the forming, joints, pour and finishing for concrete driveways, slabs, foundations and decorative flatwork, so you deal with one point of contact from estimate to completion. Our published range for concrete driveways and approaches is $4,000 to $15,000, depending on size and finish.

For a look at what a full driveway job involves, see our homeowner's guide to concrete driveway installation and our article on driveway thickness. When you are ready, you can request a free driveway and patio estimate.
FAQ
Do all concrete slabs need expansion joints?
No. Most residential slabs need control joints across the panel and isolation joints where the slab meets fixed structures. True expansion joints are reserved for specific cases, such as long panels, cold-weather pours or materials that expand a lot. Overusing them can make nearby joints open and fail.
What is the best material to fill expansion joints?
Use two parts: a compressible filler such as foam, fiber board or cork-type board in the joint, and a flexible polyurethane sealant on top. Self-leveling sealant suits horizontal joints, and non-sag suits vertical ones. Add a backer rod when the joint is wider than 1/4 inch.
Should I fill expansion joints in my driveway?
Usually yes, if the joint is wider than 1/4 inch. A sealed joint keeps out water, dirt and ants and helps the slab drain properly. Clean the joint fully and let it dry first. Very thin joints are not recommended for filling.
How much does it cost to fill concrete expansion joints?
One published commercial rate is $8.17 per linear foot, including backer rod, sealant, labor and overhead. Residential jobs can differ with joint length, access and prep work. For a firm number on your property, ask a local contractor for a written bid.
What is the difference between expansion joints and control joints?
A control joint is a shallow groove that guides shrinkage cracks into a straight line. An expansion joint cuts fully through the slab so separate sections can move on their own. Control joints manage cracking, and expansion joints manage movement.
Sources
- American Concrete Institute: difference between contraction, isolation and expansion joints
- ACPA: where do I need to use joints?
- Portland Cement Association: pervious concrete pavements
- Control joint vs. expansion joint glossary entry
- U.S. Bureau of Reclamation: joint spacing for concrete structures
- American Cement Association: working with concrete
- Repairing and sealing horizontal and vertical expansion joints
- FHWA: joint sealing pavements
- FHWA: tech brief on joint sealing
- Pavement joint sealing and filling guidance
- ACPA: concrete pavement joint sealing and filling
- Unit rate for expansion joint fill
- FHWA: technical advisory on concrete pavement joints
- FHWA: concrete pavement preservation guide
- Utah State University Extension: pavement ants