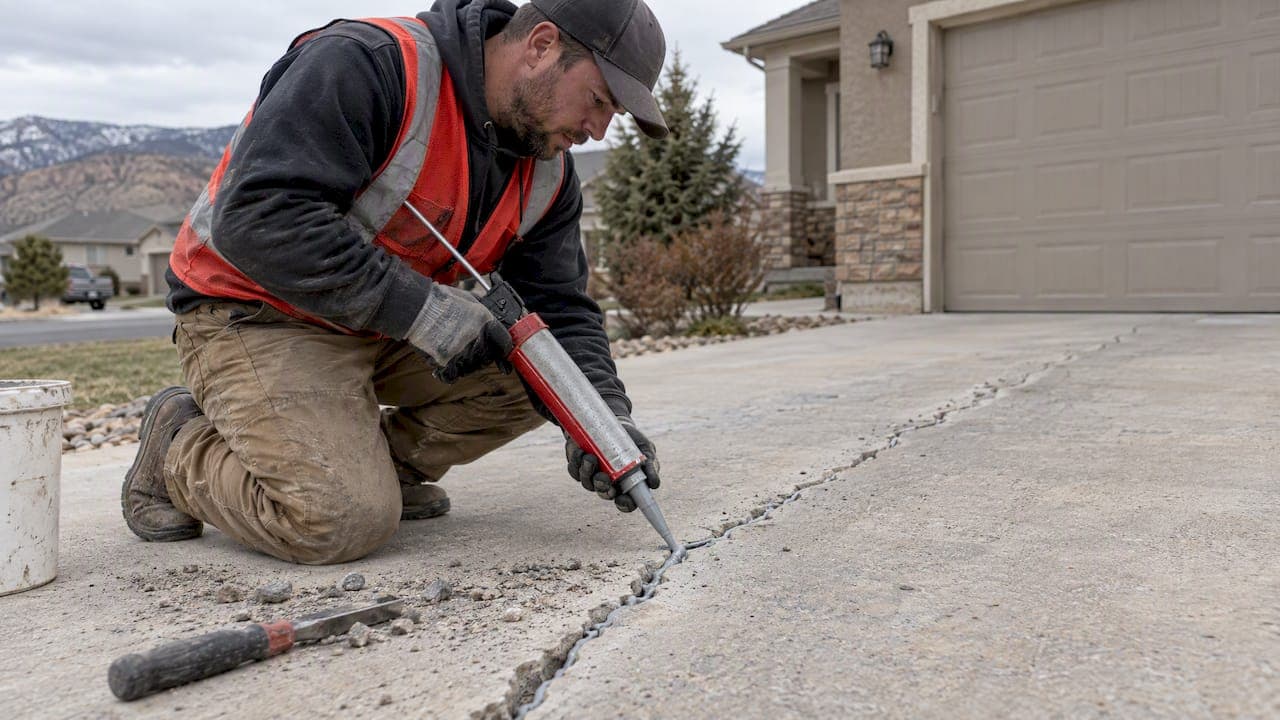
You can repair most hairline and small driveway cracks yourself with the right filler and a little patience; wider, spreading, or alligator-pattern cracks usually point to a structural problem that needs a professional look. Either way, your first move is the same: clean the crack and keep it dry so water stops working its way underneath. Only plan the repair for a stretch of dry weather above 40°F, since most patching materials won't cure properly below that.
TL;DR:
- Cracks wider than 1/8 inch or showing signs of movement require proper preparation and flexible sealants to prevent future failure.
- Deep, structurally compromised, or alligator-pattern cracks typically need professional assessment and repair to address underlying issues.
- Clean, dry conditions above 40°F are essential for any patching material to bond and cure effectively.
- Asphalt cracks should be routed into a reservoir and sealed with rubberized asphalt for better durability in moving joints.
- Regular maintenance like sealing and drainage correction can significantly prolong the lifespan of driveway cracks and prevent costly repairs.
Table of Contents
- Assess the crack: types, width, and whether it's still moving
- Tools, materials, and prep checklist for a durable repair
- Step-by-step concrete driveway repairs, from hairline to spalls
- Asphalt repairs: cold patch, hot sealants, and routing methods
- Preventive maintenance that keeps cracks from coming back
- When to call a professional and what that repair involves
- A contractor's take on DIY versus calling it in
- Need a longer-term fix for your driveway?
- FAQ
- Sources
Assess the crack: types, width, and whether it's still moving
Before buying anything, figure out what kind of crack you're dealing with. Not every crack means the same thing, and the type tells you whether a tube of filler will actually hold.
- Hairline cracks: thin surface cracks, usually cosmetic, caused by shrinkage as concrete cures.
- Transverse cracks: run across the driveway's width, often from heavy loads or missing control joints.
- Longitudinal cracks: run lengthwise, frequently tied to settling or poor base compaction.
- Alligator cracking: a web of interconnected cracks that signals base failure or fatigue, not a simple surface defect.
- Edge cracks and spalls: chipped or flaking spots along edges or joints, often from freeze-thaw damage or deicing salt.
Width gives you a rough sorting rule. Hairline cracks rarely need more than a sealer. Cracks around 1/8 inch can be candidates for filling, and once a crack reaches about 1/4 inch, Caltrans guidance treats it as a sealing candidate, since gaps that size let in enough water to matter. Anything wider than 1/2 inch, or a crack with noticeable height difference between the two sides, deserves a second look before you commit to a DIY fix.
Width alone doesn't tell the whole story. A "working" crack opens and closes slightly with temperature swings, which is why rigid fillers crack back out of them; a "non-working" crack stays put and tolerates a stiffer patch. You can get a rough read on movement by marking the crack width with a pencil line in cold weather and checking it again on a hot afternoon. If you see widespread alligator patterns, a slab edge that's visibly higher or lower than its neighbor, standing water that won't drain, or a crack longer than last month, stop and get a contractor's opinion before patching.

Tools, materials, and prep checklist for a durable repair
Most of these repairs fail not because of a bad product, but because of skipped prep. Gather everything first.
- Wire brush and shop vacuum or air blower for debris removal.
- Crack router or cold chisel for opening narrow or shallow cracks.
- Caulk gun, trowel, and putty knife for applying and finishing material.
- Backer rod sized to the crack's width.
- Gloves and eye protection, since most fillers and patching compounds are caustic.
Material choice depends on the crack. Self-leveling sealant works well for narrow concrete cracks on flat ground; non-sag (gel-type) filler is better for vertical surfaces or wider gaps where you don't want material running. Deeper structural cracks or spalls often call for a polymer-modified patch or a rapid-set repair mortar instead of a basic caulk-tube filler. On asphalt, you're choosing between cold-pour patch for quick, low-cost fixes and hot rubberized sealant for a repair meant to last several seasons.
Prep follows a consistent order: sound out the area by tapping with a hammer to find loose or hollow material, remove anything unsound, and clean down to solid, dry concrete or asphalt on both sides of the crack. For cracks deeper than about 1/2 inch, pack backer rod into the gap before filling. This keeps the sealant at the right depth-to-width ratio so it flexes instead of sinking, a step Family Handyman's DIY guide flags as one of the most commonly skipped steps in home repairs. Routing a shallow reservoir along a working crack, rather than just filling it flush, also gives the sealant something to grip.
Pro Tip: Check the product label for its minimum application temperature; most crack fillers need a dry surface and air temperature above 40°F to bond and cure correctly.
Step-by-step concrete driveway repairs, from hairline to spalls
The repair sequence changes with crack size and depth, so match your method to what you found during inspection.
Hairline cracks:
- Clean the crack with a wire brush and vacuum out dust.
- Let the surface dry completely, ideally after a day without rain.
- Apply a self-leveling concrete filler directly into the crack.
- Tool the surface flush with a putty knife and let it cure per the label.
Small to medium cracks (1/8 to 1/2 inch):
- Rout the crack slightly if it shows signs of movement, creating a clean reservoir.
- Pack backer rod into cracks deeper than 1/2 inch to control fill depth.
- Apply a non-sag polymer filler or polymer-modified patching compound.
- Smooth and feather the edges so the patch sits level with the surrounding slab.
Partial-depth spalls:
- Sound the area to map out all unsound or delaminated concrete.
- Saw-cut a clean perimeter around the damaged section.
- Remove unsound material down to solid concrete, following the removal and bonding steps FHWA's partial-depth repair guidance outlines for this kind of work.
- Apply a bonding agent to the exposed faces.
- Place the repair mix, consolidate it, and finish to match the surrounding texture.
- Cure according to the product's instructions before any traffic.
Testing and troubleshooting: Once cured, press a thumbnail or putty knife edge into the patch. It should feel solid with no give. If the patch pulls away from the sides (debonding), the surface wasn't clean or dry enough during application. If it sinks (settling), the fill likely lacked backer rod support at depth. If the same spot cracks again within a season, that's usually a sign the crack was still "working" and needed a flexible sealant rather than a rigid patch.
Keep expectations realistic: Family Handyman notes that the most frequent DIY mistake is using too much rigid filler in a deep crack instead of building up with backer rod and appropriate layers. Getting that ratio right is the single biggest factor in whether a patch lasts one season or several.
Asphalt repairs: cold patch, hot sealants, and routing methods
Asphalt cracks respond differently than concrete, and picking the wrong fix often means redoing the job within a year.
- Cold-pour patch is the fastest option and works fine for small, low-traffic cracks you want sealed before winter, but it tends to wear out faster than hot-applied material.
- Hot rubberized sealant costs more effort upfront (it typically needs a propane melter) but flexes with temperature swings and holds up longer on cracks that move.
- Routing a working crack into a recessed reservoir, sometimes called a Band-Aid configuration, before filling gives the sealant a better bond and more material to flex with the pavement. FHWA's LTPP performance research found that recessed Band-Aid and reservoir installations with rubberized asphalt generally outlasted simple flush-fill jobs in long-term field trials.
- Cleaning matters as much as the sealant. FHWA's crack seal application guide recommends hot-air blasting when possible to drive out moisture and debris before sealing, since trapped moisture is a common reason sealant fails early.
- Fill from the bottom of the crack upward to avoid trapping air pockets, and keep the sealant slightly below the surface (overbanding only a thin cap) so tires don't pick it up while it's still soft.
If you're resealing the same cracks every year or two, that's usually a sign the pavement has aged past the point where crack sealing alone will hold, and resurfacing is the more cost-effective path.
Preventive maintenance that keeps cracks from coming back
A sealed crack buys you time, but the conditions that caused it are still there unless you address them directly.
- Sealcoat asphalt driveways roughly every two to three years, and seal any new cracks before applying a fresh sealcoat layer so moisture isn't trapped underneath.
- Redirect downspouts and check grading so water drains away from the driveway instead of pooling against the edge or running underneath it.
- Inspect control joints each spring and reseal them if the existing sealant has pulled away, since gaps there let water straight down to the base.
- Rinse off deicing salt residue after winter storms; contractor guidance on deicing salt points out that these chemicals accelerate surface scaling and speed up freeze-thaw damage on concrete.
Moisture is the common thread behind nearly all of this. Water that gets into a crack and then freezes expands and widens the gap, which is why addressing drainage and resealing early matters more than the cosmetic appearance of a patch.
Pro Tip: Walk the driveway after the first hard freeze-thaw cycle each year and again after any heavy rain, since both are when existing cracks tend to reveal new movement.
When to call a professional and what that repair involves
Some situations are outside the scope of a weekend DIY project, and recognizing them early saves money compared to repeated patch jobs that don't hold.
- Widespread alligator cracking across a large section of the slab or pavement.
- Visible slab displacement, where one side sits higher than the other.
- A patch or seal job that fails again within a season or two.
- Signs of drainage or subgrade problems, like persistent pooling or soft spots underfoot.
A professional repair typically goes further than a surface patch. It includes sounding the area to map hidden delamination, saw-cutting a clean perimeter, removing material down to sound concrete or base, correcting subgrade or compaction issues if that's the root cause, and curing the repair properly before reopening it to traffic, the same sequence FHWA outlines for partial-depth concrete repairs. A licensed general contractor can handle everything from initial assessment to finished concrete work with one crew rather than a string of subcontractors.
If you're getting quotes, ask each contractor about their license and insurance, the specific repair method they plan to use, the materials and brand they're installing, what warranty they offer, and a realistic timeline. Vague answers on any of those points are worth a second opinion.
A contractor's take on DIY versus calling it in
Small defects are worth fixing yourself. A tube of filler and an afternoon can stop a hairline crack from turning into a bigger repair down the road, and waiting on a small crack almost always costs more once water and freeze-thaw cycles get involved. What I'd push back on is treating every crack the same way: cosmetic patches that ignore moisture and movement tend to fail within a season, while addressing drainage and crack type first makes any repair, DIY or professional, last longer. If a crack keeps coming back despite your best prep, that's your sign to bring in a contractor rather than buy another tube of filler.
— Jake
Need a longer-term fix for your driveway?
If a crack keeps reopening or you're staring at a section of alligatored concrete, patching it again isn't going to solve the underlying problem. Some contractors handle partial and full-depth concrete repair, driveway replacement, and drainage corrections that stop cracks from coming back, often managing projects with one crew from estimate to finish.

- Share photos of the crack, its approximate width, and how long it's been there so the estimate reflects the actual scope.
- Mention any history of repairs or sealing you've already tried.
- Ask about timeline and whether drainage or subgrade work is needed alongside the concrete repair.
Get a free concrete driveway estimate or browse our driveway and concrete services to see what a full repair or replacement looks like.
FAQ
Can a cracked driveway be repaired?
Yes, most cracked driveways can be repaired rather than replaced, whether the material is concrete or asphalt. Hairline and small cracks respond well to DIY fillers, while wider or structurally compromised cracks typically need professional partial-depth or full-depth repair.
What is the cheapest way to fix a crack in a driveway?
For small, non-working cracks, a basic concrete filler or cold-pour asphalt patch applied by hand is the least expensive option. These products cost little upfront, but they work best on narrow, stable cracks and won't hold up on wider or actively moving ones.
How much does it cost to fix cracks in your driveway?
Costs vary by scope: small crack patch jobs commonly run in the low hundreds of dollars in materials and labor, while resurfacing or more extensive repair work costs significantly more depending on the driveway's size and condition. Our concrete driveway installation cost guide breaks down when replacement becomes more cost-effective than repeated repairs.
Should you fill driveway cracks?
Yes, filling cracks promptly keeps water from reaching the base and freezing, which is what widens most small cracks into bigger ones. Caltrans guidance treats cracks around 1/4 inch and wider as sealing candidates specifically because of this moisture risk.
Sources
- Caltrans FP-MTAG chapter 4 — Joint resealing and crack sealing
- Family Handyman — DIY driveway crack repair