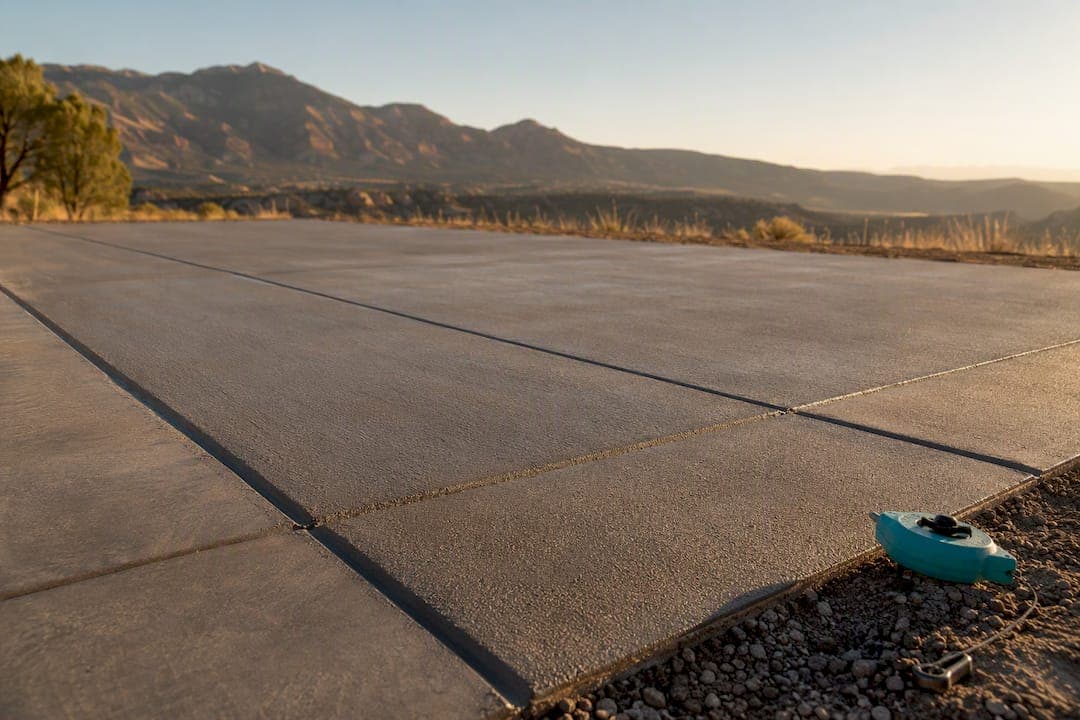
A concrete control joint is a shallow groove, cut or formed into a slab, that creates a weak plane so shrinkage cracking happens in a straight, predictable line instead of a random crack across your driveway. The one rule that governs everything else: cut it to at least one-quarter of the slab's thickness, and space panels so length never exceeds about 1.5 times the width. Get those two numbers right and mark your layout before the pour, and you've solved most of what causes cracked concrete.
TL;DR:
- Proper joint spacing keeps cracks within 8 to 12 feet on 4-inch slabs, with closer spacing recommended for better crack control.
- Control joints should be cut to at least one-quarter of the slab's thickness and placed in panels no larger than 1.5 times their width.
- Timing for saw-cut joints is critical; they should be cut within 4 to 12 hours after finishing, depending on weather conditions.
- For slabs subject to vehicle loads, dowels or keyed joints are necessary to ensure load transfer and prevent cracking.
- Exterior joints exposed to water and freeze-thaw cycles require flexible sealant and proper reservoir shaping for durability.
Table of Contents
- What Concrete Control Joints Actually Do
- Control Joints vs. Expansion and Isolation Joints: Don't Confuse Them
- Joint Spacing, Panel Shape, and Depth: The Numbers That Matter
- When and How to Cut Control Joints
- Load Transfer for Driveways and Trafficked Slabs
- Sealing and Maintaining Control Joints
- Common Joint Mistakes and How to Fix Them
- Jobsite Checklist for Getting Control Joints Right
- A Contractor's Note on Planning Joint Layout
- Get Your Slab Jointed Right the First Time
- Where These Standards Come From
- Sources
- FAQ
What Concrete Control Joints Actually Do
Concrete shrinks as it cures. Water leaves the mix, the paste tightens around the aggregate, and temperature swings pull the slab in different directions at different times of day. All of that generates tensile stress, and plain concrete is weak in tension. Something has to give, and without a plan, it gives wherever the slab happens to be weakest, which is rarely where you want a crack.
A control joint (also called a contraction joint) removes the guesswork. Cutting a groove reduces the slab's cross section at that line, so when stress builds, the concrete cracks along the groove rather than through the middle of your patio. The crack still happens. You just decide where.
You'll see control joints on nearly every flatwork project:
- Driveways and garage slabs
- Patios and pool decks
- Sidewalks and walkways
- Interior floors, including polished concrete and warehouse slabs, require special joint considerations when placing finishes over concrete to ensure proper sealing and durability.
Control Joints vs. Expansion and Isolation Joints: Don't Confuse Them
These get mixed up constantly, and using the wrong one in the wrong place causes real problems. A control joint is a weakened plane cut inside a single continuous pour. It doesn't separate anything. It just tells the slab where to crack as it shrinks.
An expansion joint (also called an isolation joint) is a full physical separation, usually a strip of compressible material, placed between two different pours or between a slab and a fixed structure. Concrete is clear that isolation joints let the slab move independently and prevent the compressive buildup that causes buckling or "blowups" at slab edges.
You need an isolation joint wherever a slab meets:
- A foundation wall or footing
- A column, post, or fixed support
- A different slab pour (like a driveway meeting a garage floor)
Pro Tip: Don't scatter expansion joints across the middle of a residential slab just to be safe. Overusing them lets adjacent control joints open too wide, which creates trip hazards and ongoing maintenance headaches instead of preventing them.
Joint Spacing, Panel Shape, and Depth: The Numbers That Matter
Joint spacing isn't a guess. The NRMCA's technical guidance on slabs on grade puts maximum spacing at 24 to 36 times the slab thickness, and most contractors work toward the tighter end of that range rather than the loose end.
Here's how that plays out on common slab thicknesses:
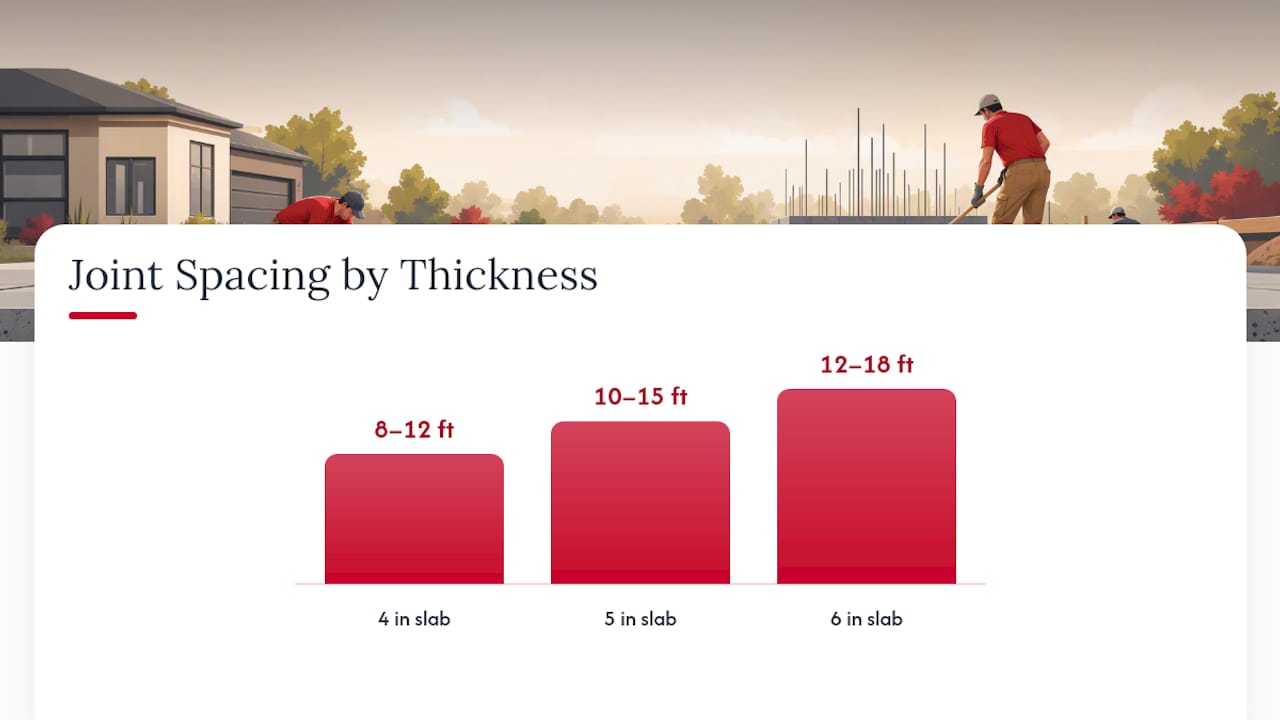
- 4 inch slab: spacing works out to roughly 8 to 12 feet between joints. NRMCA recommends staying closer to that lower number, capping panels around 15 feet even when the math allows more.
- 5 inch slab: you can push panels to roughly 10 to 15 feet.
- 6 inch slab: spacing can reach 12 to 18 feet, though most residential work still favors the tighter end for a cleaner crack pattern.
Depth follows a separate rule. Cut or tool the joint to at least one-quarter of the slab's thickness. On that 4-inch slab, that's a 1-inch cut. Going deeper than about one-third of the thickness doesn't buy you much extra crack control and can weaken load transfer across the joint.
Panel shape matters as much as spacing. Keep each panel close to square, with length no more than 1.5 times the width. L-shaped or T-shaped areas concentrate stress at the inside corner, so add an extra joint running straight into that re-entrant corner rather than letting the panel curve around it. If you're planning a slab and want a sense of how thickness choices ripple into spacing decisions, our guide on how thick your concrete driveway should be walks through the tradeoffs.
When and How to Cut Control Joints
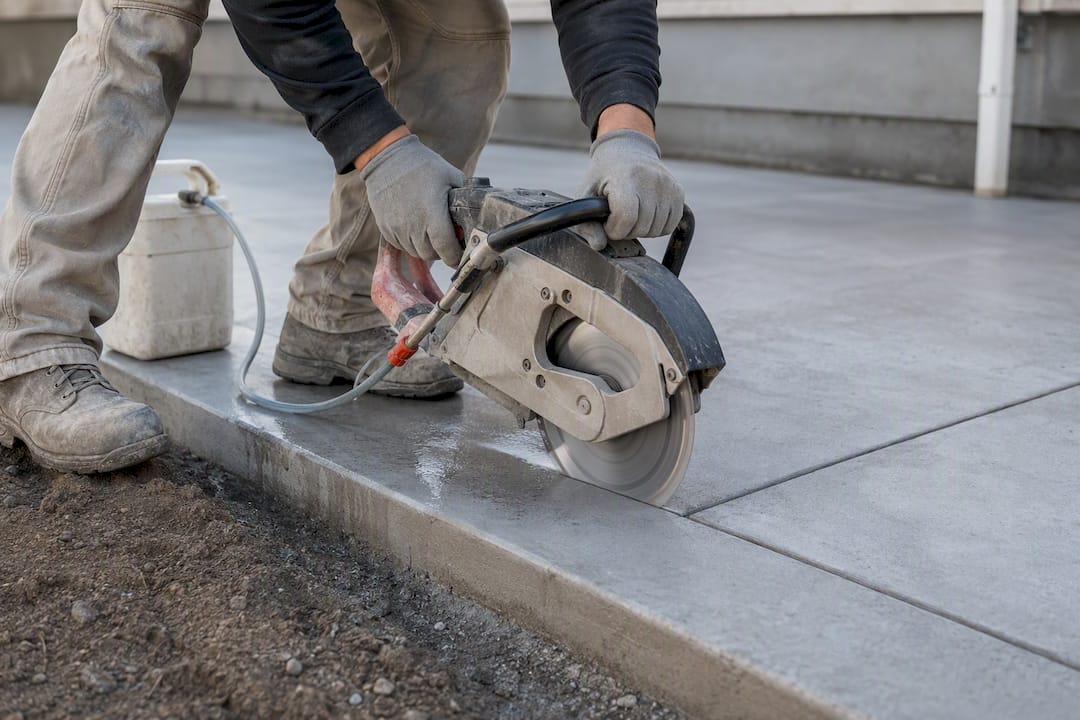
Timing is where a lot of otherwise well-planned slabs go wrong. Tooled joints get formed with a grooving tool during finishing, while you're still working the surface. Saw-cut joints happen later, and the window depends heavily on weather.
- Typical saw-cut window: roughly 4 to 12 hours after finishing.
- Hot weather: ConcreteNetwork's timing guidance notes that fast-curing conditions can shrink that window to 6 to 12 hours, sometimes less.
- Early-entry saws cut a shallower, narrower groove and can go in sooner than conventional wet saws, which need the concrete stronger before they can cut clean.
Cut too early, and the blade drags aggregate loose along the groove edges, a defect called raveling. Cut too late, and the slab has already started cracking on its own terms, which defeats the entire purpose of planning a layout. The FHWA's advisory on pavement joints treats blade width and cut timing as linked design decisions, not just field judgment calls.
Pro Tip: If you're not sure the slab has cured enough to cut clean, do a trial cut in a corner first. A ragged edge means you wait another hour; a clean groove means you're in the window.
Load Transfer for Driveways and Trafficked Slabs
A backyard patio rarely needs anything beyond a plain saw cut. A driveway carrying vehicle weight, or an industrial floor taking forklift traffic, is a different problem. Aggregate interlock, the natural gripping between rough crack faces below the cut, handles light foot traffic fine on its own.
Once vehicles enter the picture, dowels usually enter with them. The FHWA's technical advisory recommends mid-depth dowel placement for pavement joints, with diameter and spacing scaled to slab thickness. In areas that see deicing salt, corrosion-protected or epoxy-coated dowels prevent the bars from failing early.
- Light foot traffic: aggregate interlock alone
- Driveways and vehicle areas: dowel load transfer at mid-depth
- Industrial or warehouse floors: keyed joints or dowel assemblies engineered for wheel loads
Sealing and Maintaining Control Joints
Not every joint needs filling. Interior polished floors and joints under carpet or tile often stay open, since sealant would just interfere with the finish. Exterior driveways and patios are the opposite case: water, grit, and freeze-thaw cycles work their way into an open joint and accelerate edge damage.
- Use a flexible, traffic-rated sealant for exterior driveways and walkways.
- Cut a proper reservoir profile so the sealant bonds well and can flex as the joint opens and closes with temperature.
- Check sealant yearly for cracking, pulling away from the edges, or debris packed into the groove.
- Repair spalled or crumbling joint edges before they widen into a bigger patch job.
The FHWA's advisory treats reservoir shape as a real design factor, not an afterthought, because a poorly shaped groove sheds sealant fast regardless of the product you buy.
Common Joint Mistakes and How to Fix Them
Most joint failures trace back to one of five errors, and they're worth knowing before you're standing over a cracked slab wondering what happened.
- Cutting too late or too early, which causes either uncontrolled cracking or raveled edges. Fix with trial cuts and tighter timing on the day of the pour.
- Spacing panels too wide, letting stress build past what the joint can direct. Add a saw cut mid-panel if cracking shows up between joints.
- Cutting too shallow, under the one-quarter depth minimum, so the crack skips the groove entirely.
- Skipping joints at re-entrant corners, which shows up as diagonal cracking at inside corners of L-shaped slabs.
- Poor subgrade compaction, which causes settlement cracking that no joint pattern can prevent. This one needs fixing before the pour, not after.
Jobsite Checklist for Getting Control Joints Right
Field crews that get this right treat joint layout as a planning step, not a same-day decision. Before concrete trucks show up, confirm the numbers.
- Confirm final slab thickness against the project plans.
- Mark the joint grid on paper before pour day, not while standing on wet concrete.
- Schedule the saw-cutter's arrival around expected finishing time and forecast temperature.
- Verify joint depth meets the one-quarter thickness minimum for the specified slab.
- Flag any area needing dowels or keyed joints for vehicle loads.
A to Z Construction is a licensed general contractor that has handled this exact planning across more than 500 completed projects, and our concrete curing timeline breaks down how curing windows and saw-cut timing interact. Complex geometry, heavy equipment loads, or unusual soil conditions are good reasons to bring in a contractor or structural engineer before the pour, not after the crack shows up.
A Contractor's Note on Planning Joint Layout
The biggest mistake I see isn't a bad cut. It's no plan at all, where the layout gets decided the morning of the pour because nobody marked it on paper beforehand. Joint placement should be settled during design, coordinated with the saw-cutting crew's schedule, and checked against the slab's actual thickness, not left to whoever shows up with a saw that afternoon.
Homeowners tend to assume any crack means bad concrete. Usually it means a missed joint, wrong spacing, or a cut that came a few hours too late. Use the checklist above as your baseline, and loop in a contractor early enough that joint layout is part of the plan instead of a repair conversation later.
— Jake
Get Your Slab Jointed Right the First Time
Getting joint spacing, depth, and timing right on paper is one thing. Getting a saw-cut crew on-site within the right window, on a day when weather and finishing schedules actually line up, is where a lot of DIY pours and multi-subcontractor jobs fall apart. Some contractors handle concrete work with a single in-house crew to coordinate joint layout, pour scheduling, and saw-cutting timing, rather than juggling these tasks between separate companies.

That means no waiting on a subcontractor's saw crew to fit you into their week while your slab cures past the ideal cutting window. The joint grid should be planned before the pour, with cuts executed on schedule, followed by guidance on curing and maintenance. If you're planning a driveway, patio, or foundation slab in Utah, start with our structural remodeling and concrete services page to request a site visit and quote.
Where These Standards Come From
The spacing and depth rules in this guide come from the NRMCA's CIP 6 technical bulletin, the standard reference for slab-on-grade joint design. The FHWA's technical advisory covers dowel load transfer and sealant reservoir design for pavements. ConcreteNetwork offers practical, field-tested timing guidance, and Concrete.org clarifies the distinction between control and isolation joints.
Sources
- CIP 6—Joints in Concrete Slabs on Grade (NRMCA)
- Technical Advisory: Concrete Pavement Joints (FHWA)
- Control Joints in Concrete - When To Cut & Spacing (ConcreteNetwork)
- Concrete
FAQ
How often are control joints needed in concrete?
Joint spacing is commonly recommended as a multiple of the slab thickness, with typical values falling within a range that results in joints approximately 8 to 12 feet apart on a 4-inch slab, generally favoring closer spacing for better crack control.
What are the 4 types of concrete joints?
The main types are control (contraction) joints, expansion (isolation) joints, construction joints between separate pours, and joints for load transfer such as keyed or doweled joints in pavements and industrial floors.
Should I fill concrete control joints?
Fill exterior joints exposed to water, traffic, or freeze-thaw cycles with a flexible traffic-rated sealant; interior polished floors and joints under flooring often stay open since sealant can interfere with the finish.
What are control joints in concrete?
A control joint is a planned weakened plane, cut or tooled into a slab, that directs shrinkage cracking into a straight line instead of letting it crack randomly across the surface.