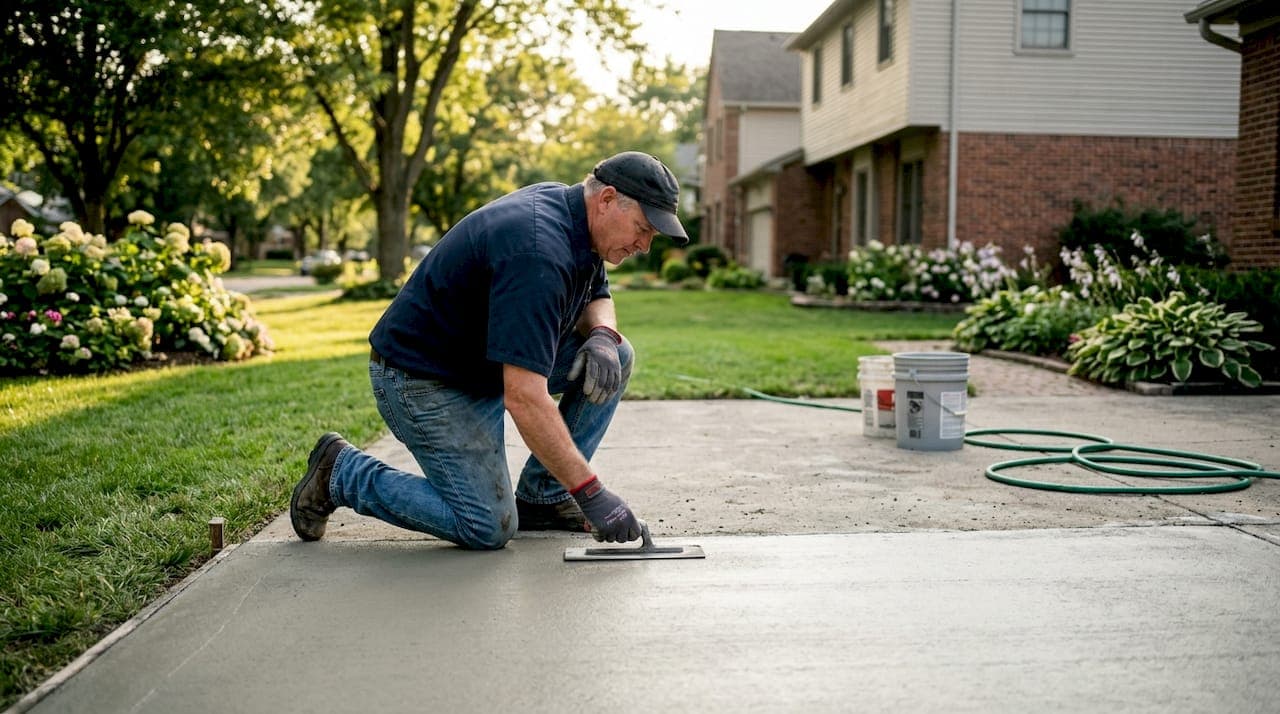
Concrete driveway installation is the process of preparing, pouring, finishing, and curing a concrete slab that serves as a durable, stable access point for vehicles at a residential property. Done right, a concrete driveway lasts 25–50 years. Done wrong, it cracks within five years. The difference comes down to three things: proper subgrade compaction, correct reinforcement placement, and disciplined curing. This guide walks you through every phase, from excavation to the first time you park your car, so you know exactly what to expect and what to demand from your contractor.
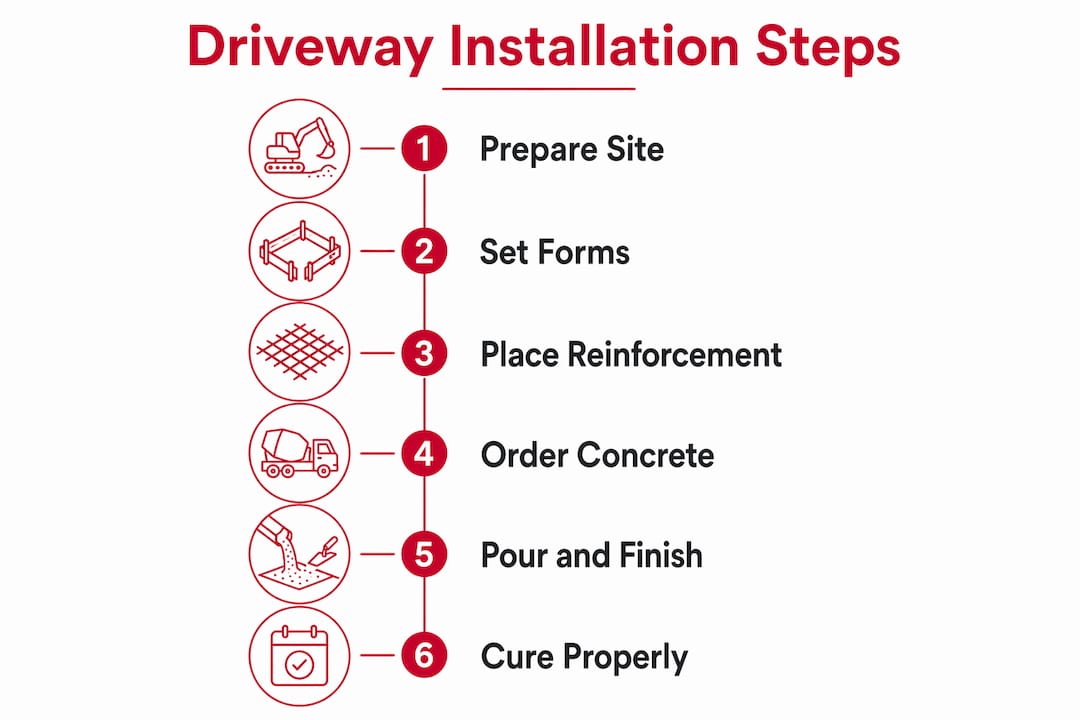
What materials and tools are needed for a concrete driveway?
The right materials determine how long your driveway survives freeze-thaw cycles, heavy loads, and daily wear. Concrete mix, reinforcement, and base materials each play a specific role.
Concrete types and finishes vary widely in both cost and appearance:
- Broom finish: The standard residential choice. Textured lines provide traction and cost the least to apply.
- Stamped concrete: Pressed patterns mimic stone or brick. Costs more but adds significant curb appeal.
- Exposed aggregate: The top layer is washed away to reveal stone texture. Durable and slip-resistant.
- Colored concrete: Pigment added to the mix or applied as a stain. Works well with stamped designs.
For climates with hard winters, air-entrained concrete (4–7% air content) is the correct specification. The tiny air bubbles allow freezing water to expand without cracking the slab surface.
Reinforcement options include wire mesh, rebar (typically #3 or #4 bar), and synthetic fiber mixed directly into the concrete. Wire mesh and rebar add tensile strength to resist cracking under load. Fiber reinforcement reduces shrinkage cracking during curing but does not replace rebar for structural slabs.
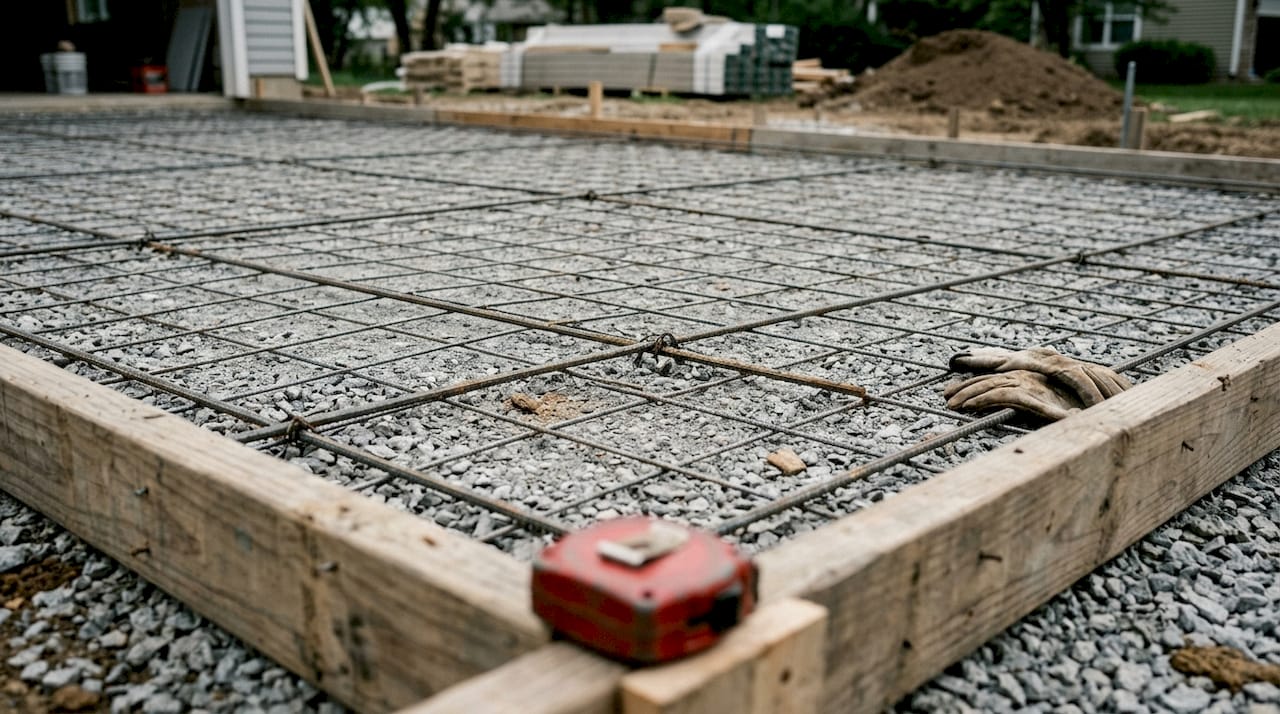
Base materials typically consist of 4–6 inches of compacted crushed gravel. The gravel layer distributes load, promotes drainage, and gives the concrete a stable platform to rest on.
| Material | Purpose | Typical cost range |
|---|---|---|
| Concrete mix (3,000–4,000 PSI) | Structural slab | Included in per-sq-ft price |
| Crushed gravel base | Load distribution, drainage | $0.50–$1.50/sq ft |
| Wire mesh or rebar | Tensile reinforcement | $0.30–$0.80/sq ft |
| Curing compound | Moisture retention | $0.10–$0.25/sq ft |
| Forming lumber | Shape and edge control | $0.15–$0.40/sq ft |
Pro Tip: Ask your ready-mix supplier for the mix design ticket when the truck arrives. It confirms PSI, water-to-cement ratio, and air content before a single yard gets poured.
How is the site prepared before pouring?
Site preparation is the phase most homeowners never see and the one that matters most. Poor base compaction is the leading cause of concrete driveway failure within the first five years. Getting this step right is the single most effective investment you can make for a 25–50 year driveway lifespan.
The preparation process follows a clear sequence:
- Mark the layout. Stake out the driveway footprint and confirm dimensions, slope direction, and edge locations before any digging starts.
- Excavate to depth. Remove topsoil and organic matter to a depth that accommodates both the slab and the gravel base. For a standard residential driveway, that means excavating 8–10 inches below finished grade.
- Address soft spots. Any area that feels spongy underfoot needs additional excavation and fill with compactable material. Soft spots left in place will cause settlement and cracking.
- Install and compact the gravel base. Spread crushed gravel in lifts no deeper than 4 inches and compact each lift with a plate compactor. Industry standards require the subgrade to reach 95% Modified Proctor Density before any concrete is placed.
- Set the drainage slope. Grade the base so water flows away from the house. A minimum slope of 1/8 inch per foot keeps water from pooling and undermining the base over time.
- Verify thickness targets. Standard residential slabs need at least 4 inches of concrete for cars. Heavier vehicles like trucks or RVs require 5–6 inches.
Common signs of poor base prep include gravel that shifts underfoot, visible low spots that collect water, and forms that flex when you press on them. If you spot any of these before the pour, stop and fix them. Concrete placed over a bad base will fail regardless of mix quality.
Pro Tip: Rent a plate compactor rather than relying on hand tamping. Hand tamping achieves a fraction of the density needed and leaves the base vulnerable to settlement.
You can also review site prep mistakes that cost homeowners thousands to understand what cutting corners on this phase actually looks like in practice.
What are the critical steps in pouring and finishing concrete?
Pour day moves fast. Concrete begins setting within 30–90 minutes depending on temperature, so every step needs to happen in the right order without hesitation.
Setting forms and confirming slope
Wooden or steel forms define the driveway's shape and hold the concrete in place during placement. Check that forms are staked firmly, set to the correct height, and sloped for drainage before the truck arrives. A level and a tape measure take five minutes to use and prevent expensive mistakes.
Placing reinforcement correctly
Reinforcement must sit in the middle third of the slab to do its job. Wire mesh or rebar resting on the base provides zero tensile benefit because it ends up below the neutral axis of the slab. Use plastic chairs or dobies to elevate reinforcement to the correct height before pouring begins.
Ordering the right concrete mix
Specify at minimum 3,000 PSI concrete with a slump of 4–5 inches. In Utah and other freeze-thaw climates, add the air-entrainment requirement (4–7% air content) to your order. Adding water on site increases slump for easier pouring but reduces final PSI and durability significantly. Do not allow the ready-mix driver to add water once the truck arrives.
Pouring and screeding
Pour concrete continuously from one end to the other. Stopping mid-pour creates cold joints, which are weak planes where fresh and partially set concrete meet. Strike off the surface with a screed board to bring it to the correct level, then use a bull float to close the surface and embed aggregate.
Finishing and control joints
The finishing sequence runs: bull float, edging, jointing, and final broom or texture finish. Control joints are the most overlooked detail in residential driveway work. Cut them to one-quarter of the slab depth at spacing no greater than 2–3 times the slab thickness in feet. For a 4-inch slab, that means joints every 8–12 feet. Control joints give the concrete a place to crack in a straight, predictable line rather than randomly across the surface.
Pro Tip: Finish concrete in the shade or during cooler parts of the day when possible. Hot, dry, or windy conditions accelerate surface drying and cause plastic shrinkage cracks before the slab even sets.
How long does curing take and what are the best practices?
Curing is not drying. Concrete gains strength through a chemical reaction called hydration, and that reaction requires moisture. Proper curing maintains moisture for several days and allows concrete to reach full design strength without scaling, dusting, or cracking.
The timeline for a standard residential driveway looks like this:
- 24–48 hours: Safe for foot traffic only.
- 7 days: Light vehicles may use the driveway, but avoid sharp turns and heavy loads.
- 28 days: Full design strength reached. Normal vehicle use is safe.
Methods for retaining moisture during curing include:
- Curing compounds: Sprayed on immediately after finishing. They form a membrane that slows moisture loss. The easiest option for most projects.
- Plastic sheeting: Laid over the slab and weighted at the edges. Effective but requires monitoring to prevent wind displacement.
- Wet burlap: Kept damp for the first 7 days. Labor-intensive but highly effective in hot, dry climates like southern Utah.
Concrete reaches approximately 75% of its design strength in the first 7 days of proper curing. The remaining 25% develops over the following three weeks. Driving on a slab before 7 days risks permanent surface damage that no sealer can fix.
Plan for alternative parking during the curing period. Arrange with neighbors or use a nearby street before the pour date. Weather matters too. Pouring in temperatures below 40°F or above 90°F requires special precautions, including insulating blankets in cold weather and sun shading in extreme heat.
What does concrete driveway installation cost?
Residential concrete driveway installation costs range from $6–$18 per square foot for standard finishes, with premium decorative work reaching $12–$22 per square foot. A typical two-car driveway of 400–600 square feet runs $2,400–$10,800 depending on finish choice, site conditions, and local labor rates.
| Finish type | Average cost per sq ft |
|---|---|
| Broom finish (standard) | $6–$10 |
| Exposed aggregate | $8–$12 |
| Stamped concrete | $12–$18 |
| Stamped + colored (premium) | $15–$22 |
Additional costs that catch homeowners off guard include:
- Demolition of existing driveway: $1–$3 per square foot for concrete removal and haul-off.
- Concrete pumping: Truck access issues can add $150–$300 per hour if the pour site is not reachable by a standard ready-mix truck.
- Decorative borders or inlays: Add $2–$5 per square foot to the base price.
- Sealing: $0.50–$1.50 per square foot applied after curing. Extends surface life and improves appearance.
Budget a 10–15% contingency on top of your contractor quote. Unexpected soft spots, drainage corrections, or weather delays add cost on almost every project. If you are considering a driveway gate as part of the project, a driveway gate cost estimate can help you plan that portion of the budget separately.
DIY installation saves labor costs but requires renting a plate compactor, screed, bull float, and edging tools. It also requires at least two experienced helpers on pour day. For most homeowners, the risk of a failed pour outweighs the savings.
Key Takeaways
Concrete driveway installation succeeds or fails based on subgrade compaction, correct reinforcement placement, and disciplined curing through the full 28-day cycle.
| Point | Details |
|---|---|
| Subgrade compaction is non-negotiable | Compact to 95% Modified Proctor Density to prevent settlement and early failure. |
| Reinforcement placement matters | Elevate wire mesh or rebar to mid-slab depth using chairs; base contact makes it useless. |
| Never add water on site | Extra water increases slump but reduces final PSI and causes premature cracking. |
| Curing takes 28 days | Allow light vehicles after 7 days and full traffic only after the 28-day milestone. |
| Costs range widely by finish | Budget $6–$10/sq ft for broom finish and up to $22/sq ft for premium stamped designs. |
What I've learned from watching driveways fail
After working on hundreds of concrete projects across Cedar City and southern Utah, the pattern is clear. The driveways that crack within three years almost always share one problem: the base was rushed.
Contractors under schedule pressure sometimes compact the gravel once and move on. Homeowners do not know what 95% Modified Proctor Density looks like, so they cannot push back. The concrete goes down, it looks perfect for 18 months, and then the first hard winter or wet spring reveals the problem. Cracks appear at the edges first, then diagonal lines run toward the center.
The second most common failure I see is reinforcement sitting on the base. I have watched crews pull wire mesh up during a pour, only to have it sink back down as concrete flows over it. Chairs cost almost nothing. Using them consistently is the difference between a slab that performs and one that does not.
The finish choice question comes up constantly. Homeowners in Utah often want stamped concrete because it looks great in photos. My honest advice: stamped is worth it if you are sealing it every 2–3 years and treating it carefully. Broom finish requires almost no maintenance and handles freeze-thaw cycles better. If you are not committed to the upkeep, go with broom finish and spend the savings on a thicker slab.
Patience during curing is the last thing I push hard on. Every homeowner wants to park in their new driveway. Waiting 7 days feels long. Waiting 28 days feels impossible. But a slab that cures properly will outlast one that was driven on at day 3 by decades. Plan the parking situation before the pour, not after.
— Jake
A-to-zconstruction handles your driveway from subgrade to finish
A-to-zconstruction is a licensed general contractor based in Cedar City, Utah, with over 500 completed projects across residential and commercial sites. The team handles every phase of driveway work in-house, from earthwork and grading through concrete placement, finishing, and sealing.

Working with a single contractor for the full project means no gaps between the excavation crew and the concrete crew. A-to-zconstruction coordinates site prep, base compaction, forming, pouring, and finishing without the delays that come from managing multiple subcontractors. For homeowners in Iron County, Washington County, and surrounding areas, you can explore concrete services in Iron County or request a free estimate through the hardscape estimate page. The team brings the same attention to base preparation and reinforcement placement that this guide describes, because those details are what separate a 5-year driveway from a 40-year one.
FAQ
How thick should a residential concrete driveway be?
Standard residential driveways require a minimum of 4 inches of concrete for passenger vehicles. Driveways that support heavier vehicles like trucks or RVs need 5–6 inches.
Can I drive on new concrete after 24 hours?
Foot traffic is safe after 24–48 hours, but vehicle use requires at least 7 days of curing. Full design strength is not reached until 28 days.
What causes concrete driveways to crack?
The most common causes are poor subgrade compaction, missing or misplaced reinforcement, and inadequate control joints. Adding water to the mix on site also reduces strength and increases cracking risk.
How much does a concrete driveway cost per square foot?
Basic broom-finish driveways cost $6–$10 per square foot. Stamped or premium decorative finishes range from $12–$22 per square foot, not including demolition or site access fees.
Do I need a permit to install a concrete driveway?
Most municipalities require a permit for new driveway construction, especially where the driveway connects to a public street. Check with your local building department before work begins, as requirements vary by city and county.