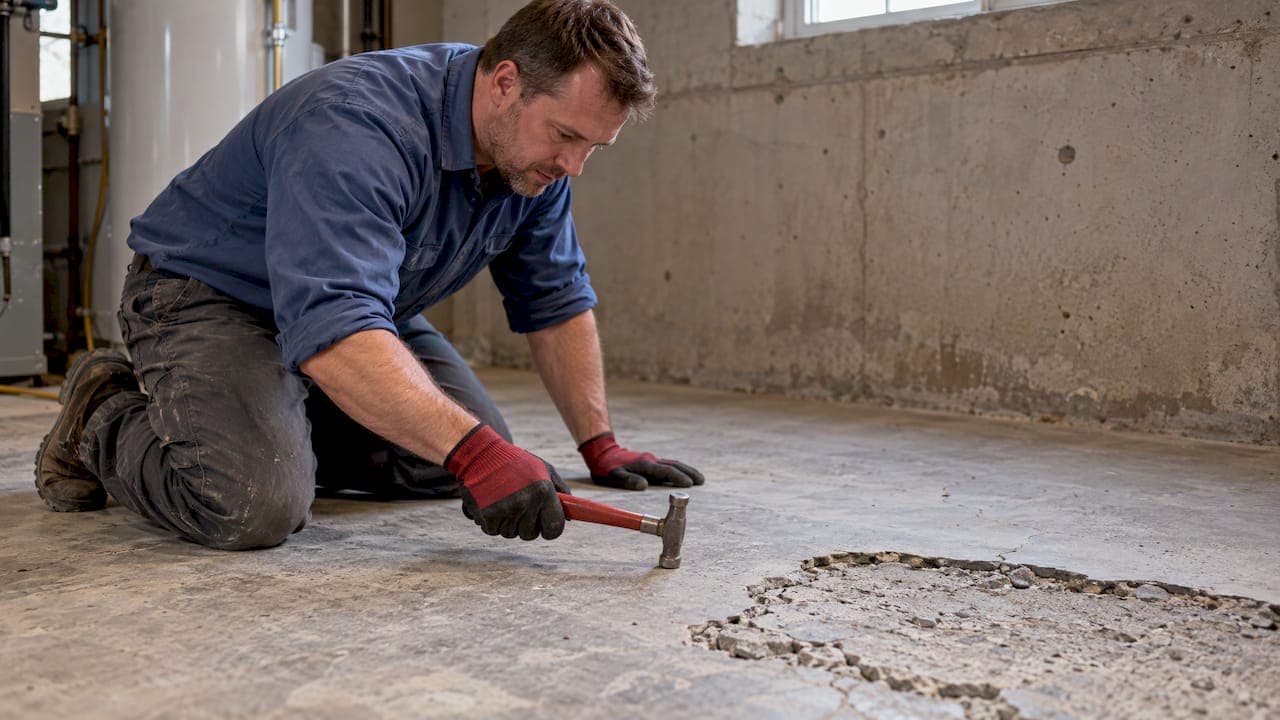
Concrete spalling is the flaking, chipping, or peeling away of the concrete surface, usually exposing the aggregate or the rebar underneath. It comes from water intrusion, rebar corrosion, freeze-thaw cycling, alkali-silica reaction, fire exposure, or poor finishing work. Photograph and measure the damaged area now, keep people away from any spot with loose overhead material or exposed corroded steel, and bring in a licensed engineer or repair contractor if the damage looks structural rather than cosmetic.
TL;DR:
- Exposed rusted rebar, loose overhead fragments, spreading cracks, or spalls larger than a dinner plate warrant restricting access and professional assessment.
- Contractors should sound beyond visible damage, since hidden delamination may extend past the broken edge; cores, chloride profiles, or petrography can identify the cause.
- Shallow patches suit sound concrete without exposed rebar or nearby hollow areas, while corroded steel or wider deterioration may require structural repair or replacement.
- For freezing and thawing, specify a water to cement ratio at or below 0.45 with air entrainment; renew penetrating sealers every three to five years.
- After repairs cure, ask for pull off adhesion testing; guidelines commonly recommend bond strength above 150 psi, and hammer sounding can reveal remaining delamination.
Table of Contents
- What Concrete Spalling Looks Like and What It Isn't
- What Causes Concrete Spalling
- Is It Cosmetic or Structural? Reading the Warning Signs
- How Professionals Assess Spalled Concrete
- Repairing Spalled Concrete: From Patch to Structural Fix
- Preventing Concrete Spalling Before It Starts
- How We Scope and Run Spall Repairs
- Get Your Spalled Concrete Assessed and Repaired
- FAQ
- Sources
What Concrete Spalling Looks Like and What It Isn't
Spalling shows up as chunks of concrete breaking off the surface, leaving pits, exposed aggregate, or bare rebar behind. It often starts as delamination, a thin layer separating from the slab below, which sounds hollow when you tap it and eventually pops loose. That's different from scaling, which is shallow flaking of the top few millimeters of paste, usually from freeze-thaw and deicing salts, and from plain cracking or surface staining, which don't involve material actually breaking away.
Spalling tends to show up in predictable places:
- Along control joints and slab edges, where water collects and drains slowly.
- On older overlays or resurfaced slabs where the bond layer has weakened.
- Near parking areas, ramps, and sidewalks exposed to deicing chlorides.
- Around embedded rebar, anchors, or dowels where cover is thin.
Garage floor spalling and driveway spalling repair searches both point to this same pattern: damage concentrated where water, salt, or moisture exposure is highest.
What Causes Concrete Spalling
Several distinct mechanisms produce spalling, and identifying which one is at work changes the repair approach entirely.
Corrosion of embedded steel is the most common driver in structures with rebar. Chloride ions from deicing salts or seawater penetrate the concrete and break down the passive oxide layer that normally protects steel, a process FHWA research describes as a two-stage model: an initiation period (Ti) while chlorides migrate to the rebar, followed by propagation (Tc, Ts) once corrosion starts and rust expansion cracks the surrounding concrete. Low chloride concentrations in concrete can trigger steel depassivation, which is why routine inspection is important before cracks appear.
Freeze-thaw cycling and deicer scaling attack saturated concrete when trapped water expands as it freezes. FHWA technical guidance recommends a maximum water-cement ratio of 0.45 for exposure classes F1 through F3, along with proper air entrainment to give that expanding water somewhere to go. Deicing salts can worsen scaling damage even on well-entrained concrete in freeze-prone climates.
Alkali-silica reaction (ASR) is a slower, internal process: reactive aggregate particles react with alkalis in the cement paste, forming a gel that swells and cracks the concrete from within. ASR tends to produce a map-like pattern of cracking that worsens over years rather than months.
Fire-induced spalling happens when rapid heating builds pore pressure and steep thermal gradients inside the concrete faster than moisture can escape. High-strength concrete can be more susceptible to explosive spalling during fire exposure because its lower permeability traps vapor, and polypropylene fibers have been used to mitigate this risk in many experiments by melting and creating escape channels for steam.
Poor construction practices round out the list: high water-cement ratios, overworked or over-troweled finishes, and inadequate curing all leave a weak, porous surface layer that spalls prematurely. Chemical attack from sulfates or acids can also degrade the paste and trigger surface loss, particularly in industrial or agricultural settings.

Is It Cosmetic or Structural? Reading the Warning Signs
Not every spall is an emergency, but some combinations of symptoms mean you should stop using the area and call a professional immediately.
- Exposed, visibly corroded (rusted, flaking) rebar within the spalled area.
- Loose or hanging fragments on an overhead surface like a ceiling, soffit, or balcony underside.
- Cracking that keeps extending or spreading from the original spall over weeks.
- Spalled area larger than a dinner plate or appearing in multiple spots on the same structural element.
These signs often track back to the corrosion propagation timeline: a long, invisible initiation period followed by a faster propagation phase once cracking starts, which is why FHWA emphasizes building inspection cadence and life-cycle maintenance into any plan rather than reacting only after damage appears. If you see any of the red flags above, rope off the area, avoid parking or walking underneath overhead spalls, and contact a licensed structural engineer for load-bearing elements or a qualified repair contractor for slabs, driveways, and flatwork.
How Professionals Assess Spalled Concrete
A proper assessment moves from simple observation to targeted testing. Understanding the sequence helps you interpret a contractor's report.
- Document the damage by measuring each spall, photographing it with a scale reference, and mapping locations across the structure or slab.
- Sound the surface using a hammer or chain drag to detect delamination that hasn't broken through yet; hollow-sounding areas indicate concrete that will eventually spall.
- Pull cores from representative areas to check depth of deterioration, chloride content at different depths, and overall concrete quality.
- Run chloride profiling to see how far salts have penetrated relative to the rebar depth, which helps predict how much more damage is coming.
- Order petrography when ASR is suspected, since a lab can confirm reactive aggregate and gel formation under microscopy.
- Test bond strength with pull-off tests on any existing patches or overlays, following methods referenced in ICRI and ACI repair guidance.
Air content testing on fresh concrete, often referencing ASTM C231, is also part of quality control on new pours and repairs, since correct air content is what gives freeze-thaw resistance in the first place.
Pro Tip: Ask any contractor proposing a repair whether they sounded the surrounding area beyond the visible spall; delamination often extends further than what's already broken loose.
Repairing Spalled Concrete: From Patch to Structural Fix
The right repair depends entirely on what the assessment finds. A shallow surface spall with no exposed rebar and no hollow sounding nearby is usually a straightforward patch. A spall with exposed, corroded steel or a hollow area extending well past the visible damage calls for a deeper structural repair, and anything involving load-bearing members or widespread deterioration may call for partial or full replacement.
For most spall repairs, contractors follow a sequence that mirrors industry guidance like RAP-7:
- Sawcut a clean perimeter around the damage, extending into sound concrete rather than stopping at the visible edge.
- Remove unsound material down to solid substrate, undercutting around any exposed rebar so a hand can pass beneath it.
- Clean corroded rebar to bare metal and apply a corrosion-inhibiting coating before patching.
- Prepare the substrate to the target concrete surface profile (CSP) and bring it to a saturated surface-dry condition before placing material.
The actual repair then follows these steps:
- Select a repair material matched to the damage: polymer-modified mortar for small patches, low-pressure spray or shotcrete for larger or vertical areas, and full-depth concrete for structural sections.
- Mix to a low water-cement ratio, generally targeting durability similar to the original design strength or better.
- Place and consolidate the material to avoid voids, especially around undercut rebar.
- Finish to match the surrounding surface texture and slope.
- Cure according to manufacturer instructions, since inadequate curing is one of the most common causes of early repair failure.
Quality checks matter as much as the repair itself. Pull-off adhesion tests after curing verify bond strength, with many guidelines recommending target values generally above 150 psi to confirm good bond; hammer-sounding checks help ensure there is no delamination. Reasonable curing windows and a clear warranty on labor and materials are worth asking for before work begins; our concrete curing guide walks through typical timelines in more detail.
Preventing Concrete Spalling Before It Starts
Most spalling traces back to a handful of preventable conditions, and addressing them is far cheaper than repairing structural damage later.
- Specify a water-cement ratio at or below 0.45 for any concrete exposed to freeze-thaw cycling, along with proper air entrainment.
- Use supplementary cementitious materials like fly ash or slag where chloride or sulfate exposure is a concern.
- Confirm air content testing happens during the pour rather than relying on mix design alone.
- Avoid overworking or over-troweling finishes, which pulls excess paste to the surface and weakens it.
- Improve drainage around slabs and foundations so water doesn't pond against the concrete.
- Choose deicers more carefully in winter, since some chemistries accelerate scaling even on well-built concrete.
- Apply penetrating silane or siloxane sealers, reapplying every three to five years to maintain protection against water and chloride ingress.
Pro Tip: Walk your driveway or slab each spring and tap any suspicious areas with a hammer; catching a hollow sound early turns a future spall into a small, inexpensive patch. Our spring maintenance checklist covers the rest of the seasonal routine, and if heaving or subgrade drainage is part of the picture, our piece on why driveways heave explains what to check underneath.
How We Scope and Run Spall Repairs
We start every spall repair with an on-site inspection: sounding the surrounding area, checking rebar condition where it's exposed, and scoping the repair before any demolition begins. Because our crew handles concrete, masonry, and structural remodeling directly, we don't hand the job between subcontractors between assessment and finish work. When you review a repair estimate, look for the same things we build into ours: documented surface prep, a clear rebar treatment plan, and a defined curing window before the area goes back into service.
— Jake
Get Your Spalled Concrete Assessed and Repaired
A spall that's spreading or exposing rebar won't fix itself, and waiting usually turns a patch job into a bigger one. We handle concrete repair with a unified crew and a single point of contact, from initial inspection through final cure.

What we cover on a spalling job:
- Structural patching and full-depth repairs for driveways, slabs, and foundations.
- Masonry restoration where spalling has damaged brick or stone surfaces.
- Surface prep, rebar treatment, and curing managed by the same crew start to finish.
During an on-site estimate, we'll sound the surrounding concrete, flag anything that needs engineer review, and give you a written scope before work starts. Request a visit through our concrete services page and we'll schedule an assessment.
FAQ
How do you fix spalling concrete?
Small, cosmetic spalls are typically repaired by sawcutting a clean perimeter, removing unsound concrete, treating any exposed rebar, and placing a bonded patch material before curing. Larger or structural spalls may need shotcrete, full-depth replacement, or engineer-specified repairs depending on how far the damage extends.
How serious is concrete spalling?
Spalling ranges from a shallow cosmetic flake to a sign of active rebar corrosion that's structurally significant. Exposed corroded rebar, loose overhead fragments, or spreading cracks are signs you should restrict access and get a professional assessment rather than treat it as cosmetic.
Will sealing concrete stop spalling?
Penetrating sealers like silane or siloxane reduce water and chloride ingress and can slow the processes that lead to spalling, but they don't reverse existing damage or stop corrosion that's already started. Penetrating sealers typically require reapplication every three to five years to maintain effectiveness, and they are best used preventatively on sound concrete rather than to fix existing spalling damage.
What should I check before choosing a spalling repair contractor?
Look for a contractor who sounds the surrounding area for hidden delamination, treats exposed rebar before patching, and follows a defined curing schedule rather than rushing the surface back into use. Ask what substrate preparation and bond testing they plan to use, since most repair failures come from weak surface prep rather than the patch material itself.
Sources
- Fire-induced spalling of concrete: mechanisms and mitigation
- Corrosion-induced deterioration and its role in spalling (FHWA-HRT-09-020)