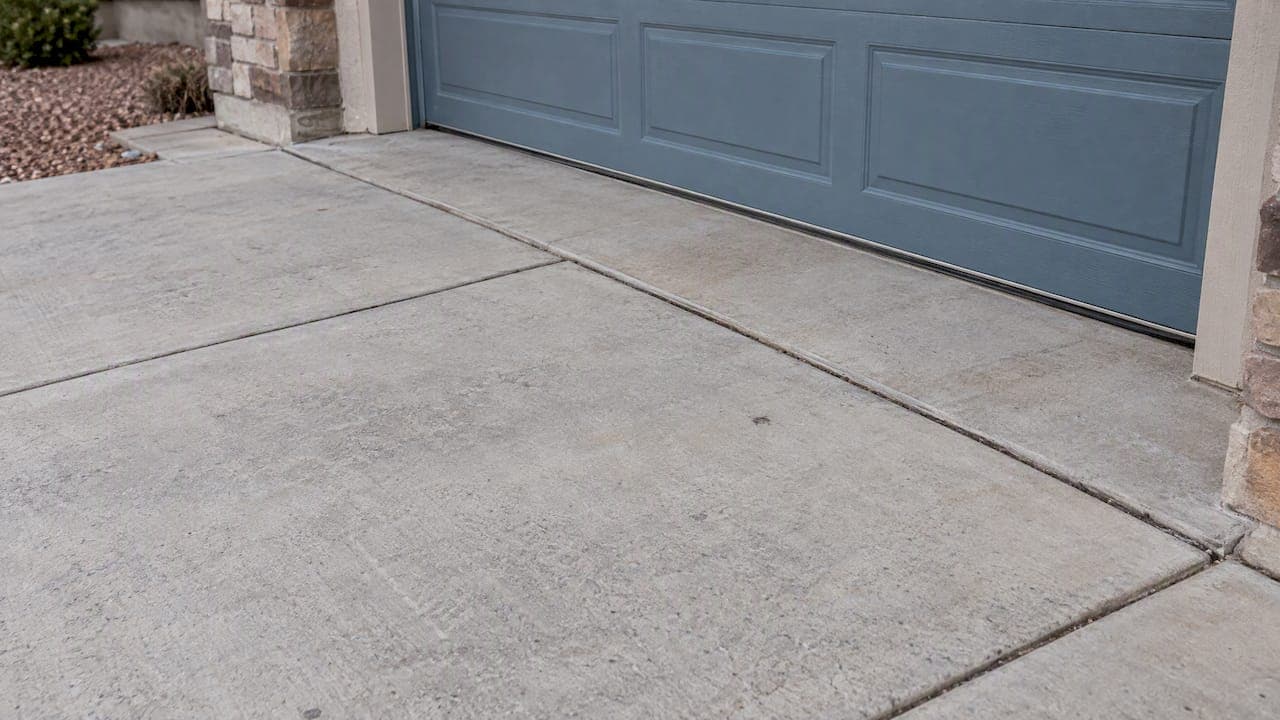
An expansion joint (also called an isolation joint) is a full-depth gap that lets a concrete driveway slab move independently from garages, sidewalks, and curbs without cracking. If yours is cracked, missing sealant, or pulling away at one of those connections, reseal it before winter. Call a licensed contractor if you see spalling, crumbling edges, or a hollow sound when you tap the slab near the joint, since that often points to base failure underneath.
TL;DR:
- Put isolation joints where the driveway meets a garage apron, sidewalk, or curb; space control joints 10 to 15 feet apart on 6 inch slabs.
- For vehicle areas, choose traffic rated polyurethane rather than silicone, and place closed cell backer rod beneath it to control sealant depth and allow flex.
- Reseal only when the surrounding slab is sound; remove debris, install backer rod, and apply sealant to a dry joint before allowing it to cure.
- A reseal will not solve slab movement, lost load transfer, or base erosion; replacement costs rise when repairs require excavation and recompaction beneath the slab.
Table of Contents
- What expansion, isolation, and control joints are and how they differ
- Do you need expansion joints in a driveway?
- Placement and spacing guidance
- Materials and fillers: what to use for driveway joints
- How to reseal or repair an expansion joint
- When to repair versus replace, plus costs and lifespan
- How professionals approach joint inspection and repair
- What I've learned from driveway joint repairs gone wrong
- Let us handle your driveway joint repair or replacement
- FAQ
- Sources
What expansion, isolation, and control joints are and how they differ
Three joint types show up in a typical driveway, and mixing them up leads to the wrong repair.
- Expansion and isolation joints run the full depth of the slab and separate the driveway from fixed structures like a garage slab, sidewalk, or curb, so each piece can move on its own.
- Control (contraction) joints are cut or tooled to about one-quarter of the slab's depth, creating a weak plane where cracking happens on purpose in a straight, predictable line instead of randomly.
- Isolation joints exist specifically where a driveway meets something rigid that won't expand and contract at the same rate as the slab.
Adding too many expansion joints backfires. According to FHWA technical guidance, expansion joints are a special-use feature meant for locations where slab expansion could create damaging compressive stress, not a default choice, and overusing them cuts load transfer and creates extra maintenance points down the road.
Do you need expansion joints in a driveway?
Most residential driveways need isolation joints at a handful of specific spots, not throughout the whole slab. You'll want one wherever the driveway meets the garage apron, a public sidewalk, or a curb, since those structures move at different rates and a rigid connection will crack.
The rest of the slab relies on control joints instead. For a typical 6-inch residential driveway, spacing control joints roughly every 10 to 15 feet manages shrinkage cracking without the maintenance burden of extra expansion joints. If your driveway runs long, carries heavy vehicle loads, or already shows diagonal cracking or a slab that's heaving at one edge, that's a sign to bring in a contractor rather than guess at a fix yourself.

Placement and spacing guidance
Joint placement follows a few consistent rules regardless of driveway size, and the numbers below reflect standard residential practice for a 6-inch slab.
| Joint type | Typical spacing or location | Notes |
|---|---|---|
| Control (contraction) joint | Every 10 to 15 feet | Cut to about 1/4 slab depth per ACI 302.1R guidance |
| Isolation/expansion joint | Garage apron, sidewalk, curb interfaces | Full slab depth, allows independent movement |
| Saw-cut timing | Within hours of finishing, before random cracking starts | Formed-in-place joints are set during pours |
Saw-cut control joints need to go in early, generally within a few hours after finishing, before the slab's natural shrinkage cracking beats the saw to it. Formed-in-place isolation joints, by contrast, go in during the pour itself, with a filler strip set against the adjoining structure before concrete is placed.
Materials and fillers: what to use for driveway joints
Not every sealant belongs on a driveway. Silicone handles pedestrian areas reasonably well but isn't built for the compression and abrasion a vehicle tire puts on a joint, so traffic-rated polyurethane sealants are the standard choice for driveways and garage aprons.
- Self-leveling polyurethane is formulated for horizontal, traffic-bearing joints and resists the repeated compression from tires.
- Preformed neoprene or compressible foam strips work well at isolation joints and are sized to stay compressed even at the coldest temperatures the joint will see.
- Backer rod (closed-cell, non-absorptive) sits beneath the sealant to control depth and keep it from bonding to the joint's base, which lets the sealant flex instead of tearing.
When installing preformed neoprene seals, installers typically size them to stay 20 to 50% compressed even at the coldest expected temperature, which keeps the seal functional through seasonal movement. Getting the backer rod's width-to-depth ratio right matters just as much as picking the right sealant, since an undersized or oversized rod changes how the sealant cures and flexes.
How to reseal or repair an expansion joint
Resealing a failed joint is one of the more approachable driveway repairs for a motivated homeowner, as long as the surrounding slab is sound.
- Inspect the joint and the slab on either side for spalling, crumbling edges, or incompressible debris packed into the gap.
- Rout out old, failed sealant and any debris, widening the joint slightly if the sides are damaged or uneven.
- Clean the joint thoroughly with air or water blasting, and sandblast if oil or old sealant residue remains.
- Press in a closed-cell backer rod sized to the joint's width-to-depth shape factor.
- Apply a traffic-rated polyurethane sealant, tool it smooth, and let it cure fully before driving on it.
Pro Tip: Dry weather matters more than warm weather: sealant applied to a damp joint often fails at the bond line within a season.
Stop and call a licensed contractor if you find spalling that exposes rebar or aggregate, or if the slab sounds hollow when tapped near the joint. Both point to undermined base material rather than a simple sealant failure, and resealing over that problem just hides it temporarily.
When to repair versus replace, plus costs and lifespan
A straightforward reseal handles most joint failures: cracked or missing sealant, minor edge wear, or a joint that's simply reached the end of its sealant's service life. Full replacement becomes necessary when the slab itself has shifted, lost load transfer at the joint, or when the base beneath it has eroded from years of water infiltration.
FHWA's resealing study monitored 1,600 joints across five test sites and found service life varies significantly by material, climate, and installation method, which is why a sealant that lasts a decade in one region can fail much sooner in another. Cost for a repair generally scales with linear footage, how deep and wide the joint needs to be routed, and whether the base beneath it also needs excavation and recompaction, a step that changes both scope and price. For a driveway crack that keeps returning despite patching, the underlying joint is often the real culprit.

How professionals approach joint inspection and repair
A contractor walking a driveway for a joint evaluation checks three things first: whether the base underneath is solid, whether there's visible evidence of slab movement, and whether the existing joints are configured correctly for the driveway's layout. From there, the workflow mirrors the DIY steps on a larger scale: routing and cleaning the joint, sizing backer rod to the shape factor the sealant manufacturer specifies, applying a traffic-rated sealant, and checking the cured joint for proper tooling and adhesion.
We built our process around managing every phase of a project with our own licensed crew rather than handing pieces off to subcontractors, which keeps inspection, repair, and any follow-up work on one timeline.
What I've learned from driveway joint repairs gone wrong
The most common mistake I see is reaching for silicone sealant because it's available at any hardware store, then wondering why it tears within a year under tire traffic. A close second is skipping the cleaning step: debris trapped in a joint keeps the new sealant from bonding at all.
Keep water and incompressible debris out of the joint, and fix a failed seal while it's still a small job.
— Jake
Let us handle your driveway joint repair or replacement
If your driveway's joints need resealing, widening, or a full section replaced, we manage the entire job in-house, from diagnosing whether the base needs work to finishing the surface, without juggling separate subcontractors for each step.

That single-point coordination is also why our concrete driveway and approach work moves faster than projects split across multiple crews. Request a free estimate on your concrete driveway or patio and we'll tell you honestly whether you're looking at a simple reseal or something more involved.
FAQ
Should you fill expansion joints in a driveway?
Yes, expansion and isolation joints need a backer rod and sealant to keep out water and debris. An open or failed joint lets incompressible material pack in and water erode the base underneath, which leads to bigger repairs later.
How much does it cost to replace expansion joints in a driveway?
Cost depends mainly on linear footage, joint depth and width, and whether the base underneath also needs excavation and recompaction. A simple reseal costs far less than a repair that requires removing and replacing a damaged section of slab, so getting an on-site estimate is the only reliable way to know your number.
Do I need expansion joints in a concrete driveway?
You need isolation joints wherever the driveway meets a garage apron, sidewalk, or curb, since those fixed structures move at different rates than the slab. The rest of the driveway relies on control joints, typically spaced every 10 to 15 feet on a standard 6-inch slab.
What do you put in driveway expansion joints?
A closed-cell backer rod goes in first to control depth and prevent three-sided bonding, followed by a traffic-rated polyurethane sealant sized to the joint's shape factor. Preformed neoprene or compressible foam strips are an alternative for isolation joints at garage or sidewalk connections.
Sources
- Resealing concrete pavement joints (FHWA-RD-99-137)
- Technical Advisory: Concrete Pavement Joints (FHWA)