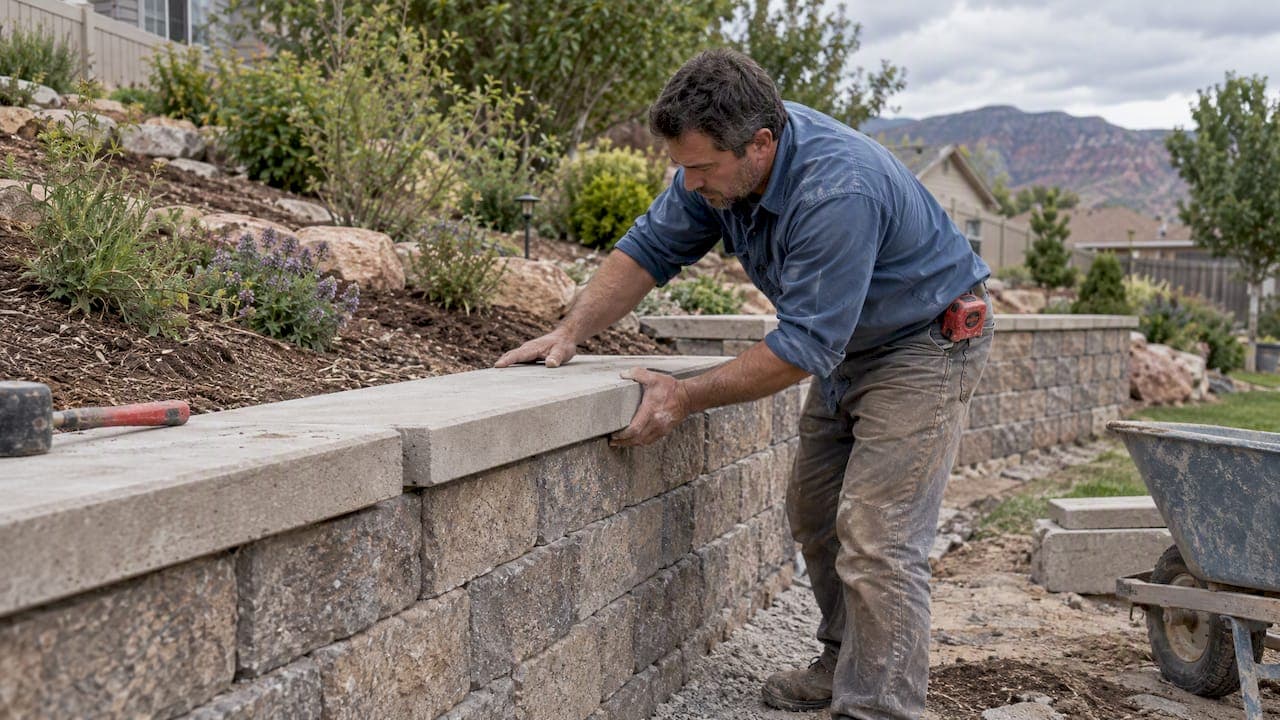
For most homeowners, precast concrete or natural-stone caps give the best balance of durability and appearance, and capping your wall is worth doing because it seals the top course against moisture and freeze-thaw damage. Lightweight polyurethane caps are a solid DIY-friendly alternative when you want the look of stone without the weight or the price.
TL;DR:
- Choose natural stone when appearance justifies its higher cost and handling demands; polyurethane suits do it yourself installation because it is lightweight and resembles stone.
- Use peaked caps to shed water, bullnose edges for seating, and flat profiles for a modern look, while recognizing that flat caps retain water longer.
- Dry fit each cap, clean and dry the wall, use flexible adhesive, and leave about 3/4 inch of overhang; taller or windy walls may need pins.
- Maintainable drains, gravel backfill, and perforated pipe control water pressure better than ordinary weep holes; spacing can reach 30 feet, depending on groundwater.
- Check local permit rules before building taller than standard retaining heights, and treat walls over a few feet as candidates for engineered design.
Table of Contents
- Choosing a cap material: pros, cons, and typical uses
- Picking a cap profile: bullnose, chamfered, peaked, flat, and more
- Attaching caps the right way: adhesives, pins, and fitting
- Why capping and drainage decide whether your wall lasts
- Planning your order: quantities, curves, and step-downs
- What professional installers check that homeowners often miss
- Our straight answer on which cap to choose
- Let us handle your retaining wall cap project from start to finish
- FAQ
- Sources
Choosing a cap material: pros, cons, and typical uses
Concrete caps are the default choice for good reason. They come in a wide range of colors and textures, cost less than natural stone, and bond well with flexible adhesive systems that hold up outdoors. Homeowner-facing comparisons consistently list concrete alongside stone, brick, wood, and polyurethane as the main material categories you will run into while shopping.
Natural stone delivers a premium look that concrete can only approximate, but it costs more and weighs significantly more per unit, which raises both material and labor demands. Pick stone when appearance is the priority and your budget has room for it.
Brick and wood show up in specific situations, usually matching an existing structure or fitting a rustic design, but both carry durability tradeoffs: brick can spall in freeze-thaw cycles without the right finish, and wood needs more upkeep over time.
Here's how the main options stack up by use case:
- Concrete: affordable, widely available in many colors and finishes, easiest to source locally.
- Natural stone: best appearance, heaviest and most expensive, often needs professional handling.
- Brick: works for matching existing masonry, but durability varies with finish quality.
- Wood: fits rustic designs, requires more maintenance over the wall's life.
- Polyurethane: mimics stone texture, lightweight, straightforward for DIY installation.
Picking a cap profile: bullnose, chamfered, peaked, flat, and more
Profile shapes aren't just decorative choices. A peaked profile sheds water off both sides, which helps in rainy climates. A bullnose profile rounds the front edge, making it comfortable enough to sit on, a common pick for seat walls. A flat profile gives a clean, modern line but holds water longer than a peaked design. Chamfered caps split the difference, angling the edge without a full curve.
Manufacturer product lines typically offer these profiles alongside shape variants built for specific geometry:
- Universal or triface caps: finished on multiple sides, useful where the wall is visible from more than one angle.
- Radius caps: pre-shaped for curved wall sections, avoiding heavy field cutting.
- Pillar caps: sized and finished for columns or wall-end posts.
- Flat straight units: the standard choice for long, uninterrupted runs.
Finished-side details matter for placement. A single-finished cap needs the raw edge turned toward the retained soil, while unused or miscut pieces usually get set aside, so plan for some waste when ordering.
Attaching caps the right way: adhesives, pins, and fitting
The attachment method determines how long a cap stays put and whether water finds its way behind it. Flexible, high-strength adhesives are the preferred choice over rigid mortar, because mortar can crack under the small movements that happen naturally as a wall settles and freezes, letting water in through the gaps. Pins or mechanical fixing come into play on taller walls or in high-wind areas where adhesive alone isn't enough.
A practical installation sequence looks like this:
- Dry-fit every cap across the run before gluing anything, catching sizing or alignment issues early.
- Clean and dry the top course surface so the adhesive bonds fully.
- Apply a sufficient amount of flexible adhesive carefully to avoid hollow spots that can trap water underneath.
- Set the cap with a slight overhang of about 3/4 inch for appearance and to shed water away from the wall face.
- Saw-cut or split caps as needed at corners, using a wet saw for clean edges rather than forcing a break.
Pro Tip: Lay out a full dry run of caps along the entire wall before any adhesive touches the blocks. It's far easier to swap a piece now than to pry off a cured cap later.
Why capping and drainage decide whether your wall lasts
Capping isn't cosmetic. A cap seals the seams of the top course, and construction manuals point to that sealing function as the main defense against moisture working its way into the wall and causing freeze-thaw cracking over time.
Below the surface, drainage does the heavier lifting. Maintainable drains, properly sized gravel backfill, and perforated pipe reduce hydrostatic pressure more reliably than conventional weep holes, according to research on earth-retaining structures, which also found that maximum practical drain spacing tops out around 30 feet depending on groundwater conditions.
A few details tie the system together:
- Slope the soil behind the wall away from the top edge so runoff doesn't pool against the caps.
- Match drain size and spacing to the site rather than defaulting to minimum weep holes.
- Review our retaining wall drainage guide for the backfill and pipe details that pair with any cap choice.
Planning your order: quantities, curves, and step-downs
Getting the fit right starts with the math. Estimate cap counts using lineal feet of wall multiplied by a standard factor, a method outlined in Keystone's installation guide, then add extra units to cover saw-cutting losses and mistakes.
From there, work through these steps:
- Decide whether you need finished-sided caps, which matters if both faces of the wall will be visible, versus standard units you can cut to fit.
- For curved sections, choose between A and B cap units that mirror convex and concave curves, or plan on miter-cutting straight units to follow the radius.
- Pick tapered caps when the curve is tight enough that standard units leave visible gaps.
- For unusual profiles, such as a stepped wall transitioning to a seat wall, consider cast-in-place coping poured to match the exact geometry.
Our guide on interlocking retaining wall blocks walks through block system choices that affect which cap style fits best.
What professional installers check that homeowners often miss
We've worked through the cap and coping details on retaining walls across many completed projects. That experience shapes a few habits that separate a wall that lasts from one that needs rework within a few years.
- Confirm whether local permitting applies before the wall goes taller than standard retaining heights.
- Treat any wall over a few feet as a candidate for engineered design rather than a standard gravity wall.
- Build drainage into the plan from the start instead of adding it after backfill is in place.
- Coordinate grading and cap installation as one sequence so the finished slope actually directs water away from the wall.
For structural questions, our retaining wall footing guide and our breakdown of when a wall needs geogrid cover the engineering side in more depth, and ModernYardz's design basics guide offers useful layout thinking for homeowners planning the project themselves.
Our straight answer on which cap to choose

If you want the best balance of cost and appearance, go with precast concrete. It is the material most homeowners end up with for good reason: wide color options, dependable supply, and straightforward installation with the right adhesive.
Choose natural stone when the look is the priority and your budget supports the added weight and cost. Reach for polyurethane when you're handling the installation yourself and want something light enough to set without extra help. For stone caps or any wall tall enough to need engineering, bring in a professional rather than guessing at the structural math.
— Jake
Let us handle your retaining wall cap project from start to finish
We manage retaining walls, masonry, and hardscape work as one coordinated project. That means we source the cap material, handle the cutting and fitting for curves or corners, and build the drainage and grading in as part of the job.

- We source and fit concrete, stone, or specialty cap materials to match your wall and budget.
- We handle saw-cutting, mitering, and corner work so the finished line looks clean.
- We coordinate drainage, grading, and any required permitting as part of the build.
If you'd rather skip the dry-fitting and adhesive math, request a free estimate through our retaining wall services page and we'll walk the site with you.
FAQ
What are the different types of stone retaining walls?
Stone retaining walls generally fall into dry-stacked (no mortar), mortared stone, and veneer-over-block construction, each with different structural and drainage needs. The choice affects what cap style fits, since dry-stacked walls often use flat capstones while mortared and veneer walls can accommodate bullnose or chamfered profiles.
Should you cap a retaining wall?
Yes, capping is recommended because it seals the top course and helps prevent moisture ingress and freeze-thaw damage that shortens a wall's life. An uncapped wall also tends to look unfinished and can be less comfortable to touch or sit on.
Does a 2-foot retaining wall need a footing?
Footing requirements depend on soil conditions, local codes, and the block or stone system you're using, so there's no single universal answer. Our retaining wall footing guide covers how to assess your specific situation before pouring anything.
What is an RCC retaining wall?
RCC stands for reinforced cement concrete, referring to a wall built with steel reinforcement embedded in poured concrete rather than stacked block or stone units. These walls are typically engineered for taller or higher-load applications and are capped or finished differently than modular block systems.
Sources
- Keystone construction manual — finishing and capping
- VERSA-LOK technical bulletin: Cap units and adhesive guidance
- Maintainable drains for earth-retaining structures — research report
- Unilock technical guide — capping and coping installation
- HomeEdit guide to retaining wall caps