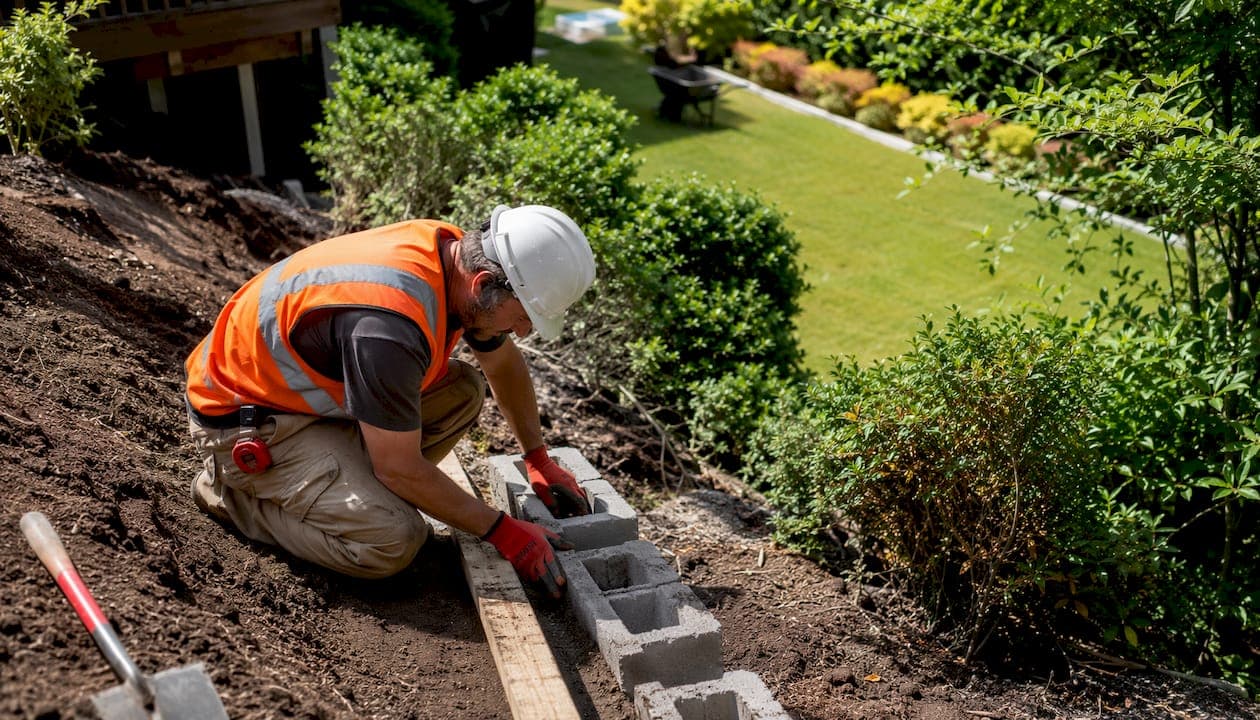
You can build a retaining wall on a slope, and for most homeowners the safe DIY scenario is a gravity or segmental concrete block wall under 48 inches total height, with no surcharge load above it, set on a compacted stone base in undisturbed soil. Get those three conditions right and you have a wall that can last decades. Miss any one of them and you have an expensive repair waiting to happen.
Before you pick up a shovel, know the hard stops. Under U.S. residential code, walls exceeding roughly 48 inches in total height or any wall supporting a surcharge (a driveway, patio, fence, or sloped grade above) typically requires a permit and an engineered design. Seismically sensitive sites add another layer of review. If your project hits any of these triggers, stop and call a licensed contractor or structural engineer before you dig.
- Walls under about four feet, with no surcharge and stable soil: DIY-appropriate with proper technique
- Walls exceeding four feet, any surcharge, or tiered walls with short offsets: permit and P.E. design required
- Groundwater presence or seismic exposure: engineering review required regardless of height
- Unstable or unknown fill soil: geotechnical consult before any work begins
Pro Tip: Drainage and base preparation determine whether your wall stands for 30 years or fails in 3. Poor drainage is the leading cause of retaining wall failure — hydrostatic pressure behind the wall will eventually win. Spend your time and budget here before you think about block color.
Table of Contents
- How to assess your slope, soil, and project goals before you dig
- What permits and engineering does your wall actually require?
- Which wall systems actually work on a slope?
- Your complete tools and materials checklist
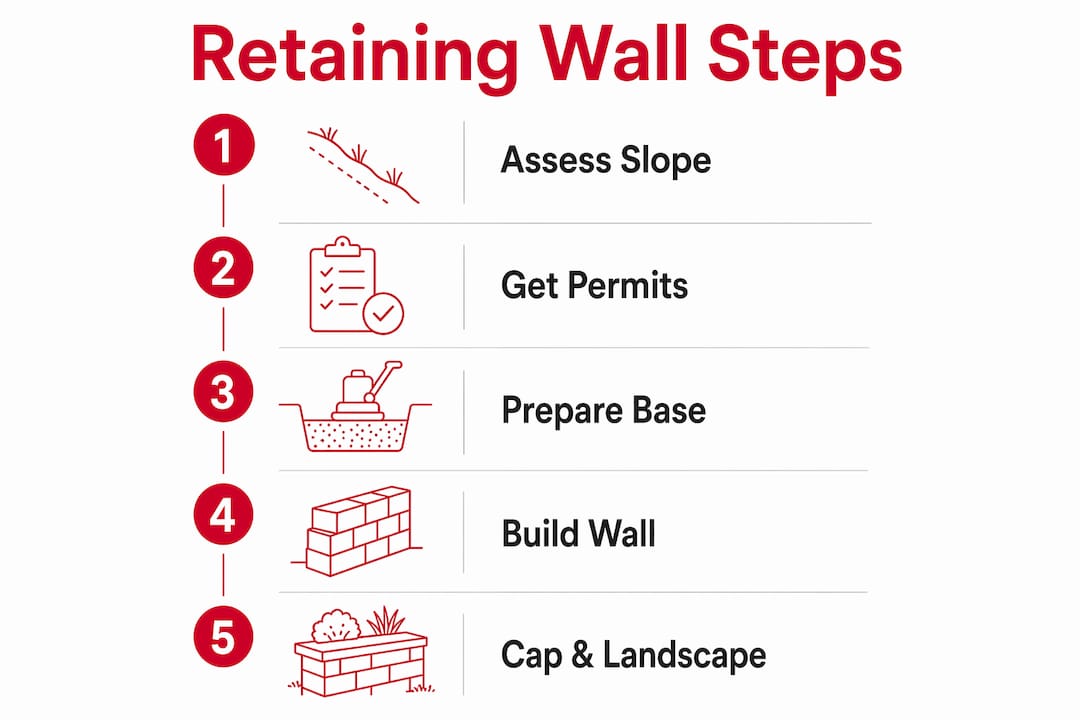
- Step-by-step: how to build a retaining wall on a slope
- Capping, grading, and protecting your slope after the wall is built
- Common DIY mistakes that cause retaining walls to fail early
- How long will your wall last, and what maintenance does it need?
- When should you hire a licensed contractor instead of doing it yourself?
- How A-to-zconstruction handles slope retaining-wall projects from start to finish
- Key Takeaways
- What contractors wish homeowners knew before starting a slope wall
- A-to-zconstruction builds slope retaining walls across Utah
- Useful sources
- FAQ
How to assess your slope, soil, and project goals before you dig
Measure your slope before you design anything. The rise-over-run ratio tells you whether a single wall makes sense or whether you need to terrace the slope into multiple shorter walls. A 2:1 slope (2 feet of run for every 1 foot of rise) is steep enough that a single tall wall concentrates enormous lateral pressure. Breaking that into two or three shorter walls, each under 48 inches, reduces the load on any single structure and creates usable flat terraces in the process.

Soil type matters just as much as slope angle. Clay soil expands when wet and contracts when dry, which cycles stress into the wall face year after year. Granular or sandy soils drain freely but can shift under load. A quick field test: grab a handful of moist soil and squeeze it. Clay holds a firm ribbon when you push it between your thumb and finger; granular soil crumbles. If the site has been previously graded or filled, probe with a steel rod every few feet. Easy penetration past 18 inches suggests loose fill that won't support a wall footing without remediation.
Define your project goals early because they change the structural requirements. A decorative planter terrace under 18 inches is a different animal than a 42-inch gravity wall holding back a hillside above your patio. The taller and more loaded the wall, the more critical every step below becomes.
What permits and engineering does your wall actually require?
In the U.S., the IRC Section R404.4 is the standard reference point for residential retaining wall engineering triggers. Local jurisdictions often adopt stricter thresholds, so always verify with your building department before assuming the 48-inch rule applies in your city.
| Trigger | Consequence |
|---|---|
| Wall height exceeds ~48 in. (varies by jurisdiction) | Permit required; engineered design typically required |
| Any surcharge (driveway, patio, fence, slope above) | Permit and P.E. design required regardless of height |
| Tiered walls with horizontal offset less than wall height | Treated as a single tall wall; engineering required |
| Groundwater at or near footing level | Geotechnical review and drainage engineering required |
| Seismic Design Category C or higher | Engineering review required regardless of height |
| Unstable or expansive foundation soils | Geotechnical consult required before design |
When you go to the building department, bring a simple site sketch showing the wall location, existing grade, proposed finish grade, any structures within 10 feet, and the approximate wall height at each end. Departments move faster when you show up with a drawing rather than a description.
Pro Tip: Sketch your proposed finish grades before the permitting meeting, not after. A reviewer who can see where water will flow and where the wall ties into existing grade will approve your plan faster and flag fewer questions.
Which wall systems actually work on a slope?
For most DIY slope projects, segmental concrete block walls are the best balance of DIY-friendliness and long-term durability. They're dry-stacked, forgiving of minor adjustments during installation, and the interlocking geometry creates a natural batter (backward lean) that resists soil pressure without mortar.
| Wall type | DIY-friendly | Typical max DIY height | Drainage needs | Longevity |
|---|---|---|---|---|
| Segmental concrete block | High | about four feet | Gravel column + pipe | lasts decades |
| Timber (landscape ties) | Moderate | about three feet | Gravel + weep holes | modest lifespan in freeze-thaw climates |
| Boulder/dry-stacked stone | Low–moderate | about three feet | Natural gaps + pipe | long-lasting |
| Anchored/deadman systems | Low | 48 in. with engineering | Full drainage system | 30 years |
Timber walls are cheaper upfront but rot, especially in Utah's freeze-thaw cycles. Boulder walls look great and drain naturally through gaps, but moving 200-pound stones safely on a slope requires equipment most homeowners don't have. For a short decorative terrace under 18 inches, almost any system works. For a functional gravity wall approaching 48 inches, segmental block with a proper gravel base and drain pipe is the right call. Above that height, or with any surcharge, geogrid reinforcement becomes necessary to tie the backfill mass to the wall.
Pro Tip: Never use native soil as backfill and never use treated timber as a primary structural wall material on a loaded slope. Both are among the most common failure drivers in DIY retaining wall construction.
Your complete tools and materials checklist
The job splits into items you buy and items you rent. Plan both before you start, because running out of #57 stone mid-pour or discovering you need a plate compactor on day two costs you time and introduces compaction inconsistencies.
Earthwork and excavation:
- Spades, mattocks, and a digging bar for hand work
- Mini excavator (rent for slopes; worth every dollar)
- Plate compactor (rent; essential for base and backfill lifts)
- String line, line level, and 4-foot level
- Rubber mallet and dead-blow hammer
Base and drainage materials:
- #57 crushed stone: 6 inches minimum for the base, 12-inch column behind the wall
- Non-woven geotextile fabric (filter fabric) to wrap the drainage column
- 4-inch perforated drain pipe with sock (fabric sleeve to prevent clogging)
- Compactable road base or crusher run for base lifts
Wall units and adhesive:
- Segmental retaining wall blocks (calculate by linear foot and wall height)
- Cap blocks for the top course
- Construction adhesive rated for masonry (for the top two courses and all caps)
Reinforcement:
- Geogrid (required for walls over 4 feet or any surcharged wall; machine direction perpendicular to the wall face)
Safety gear:
- Work gloves, steel-toed boots, safety glasses
- Back support belt for block handling
- High-visibility vest if working near traffic or equipment
For a rough quantity estimate: plan on several inches of compacted #57 stone for the base and a drainage column behind the blocks, sized appropriately for the wall height. Order 10–15% extra on stone to account for compaction loss.
Step-by-step: how to build a retaining wall on a slope
Follow this sequence without skipping steps. Each phase depends on the one before it.
-
Mark the wall layout. Use stakes and string to mark the wall face. On a slope, decide whether the wall steps up (each section starts higher) or follows a single base elevation. Stepping up is cleaner for most residential projects.
-
Excavate to undisturbed soil. Dig the trench wide enough and deep enough to bury the first course plus a compacted gravel base. On a slope, step the base trench so each level section is independently flat. Each step must bury at least one full block unit to prevent sliding. Never cut into loose fill and call it done; probe until you hit firm, undisturbed native soil.
-
Install the compacted stone base. Pour a compacted layer of #57 crushed stone in lifts, targeting proper compaction density. Check level in both directions constantly. This is the most critical step in the entire build. Sand or native dirt as a setting bed is not acceptable.
-
Set and level the first course. Place blocks on the compacted base with the rear lip facing down. Check level front-to-back and side-to-side on every block. The first course is completely below grade. If it's off, every course above amplifies the error.
-
Install the drainage system. Line the back of the excavation with non-woven geotextile fabric, letting it drape up the cut face. Lay a perforated pipe on clean gravel behind the first course, with perforations facing down. Slope the pipe at least 1 inch per 8 feet toward a daylight outlet at the wall end. Fill behind the first course with clean stone to create a continuous drainage column. For guidance on routing outlets and surface drainage, the outdoor drainage design principles used in hardscape work apply directly here.
-
Stack successive courses. Offset each course by half a block (running bond). The rear lip of each block automatically creates the setback batter. Backfill with clean gravel behind each course as you go, maintaining a continuous drainage column. Compact infill soil (not the gravel column) in manageable lifts, using hand-operated equipment within close proximity to the wall face only.
-
Install geogrid where required. For walls over 4 feet or any surcharged wall, install geogrid layers at the heights specified in your design. Geogrid length is generally proportional to the wall height for residential segmental walls according to standards. Lay it with the machine direction perpendicular to the wall face, secure it under the next course of blocks, and backfill before tensioning.
-
Backfill and compact in lifts. Place infill soil in lifts behind the gravel column, compacting each to meet specified density requirements. Keep heavy equipment at least 3 feet from the wall face. For the top 6 inches, switch to topsoil to create a planting zone.
-
Cap and finish. Apply construction adhesive to the top two courses and glue every cap block. Grade the soil behind the wall to slope away at 1–2% for the first few feet.
Safety on slopes: Keep machine exclusion zones clear of the wall face during excavation. Shore any cut deeper than 4 feet per OSHA requirements. Handle blocks with a partner when they exceed 80 pounds. Never stand downhill of a block being moved on a grade.
Capping, grading, and protecting your slope after the wall is built
Proper capping and surface drainage are the last line of defense against failure, and most DIYers underinvest here. Glue every cap block with construction adhesive. Caps that shift from freeze-thaw cycles or lawn equipment can expose the top course to water infiltration.
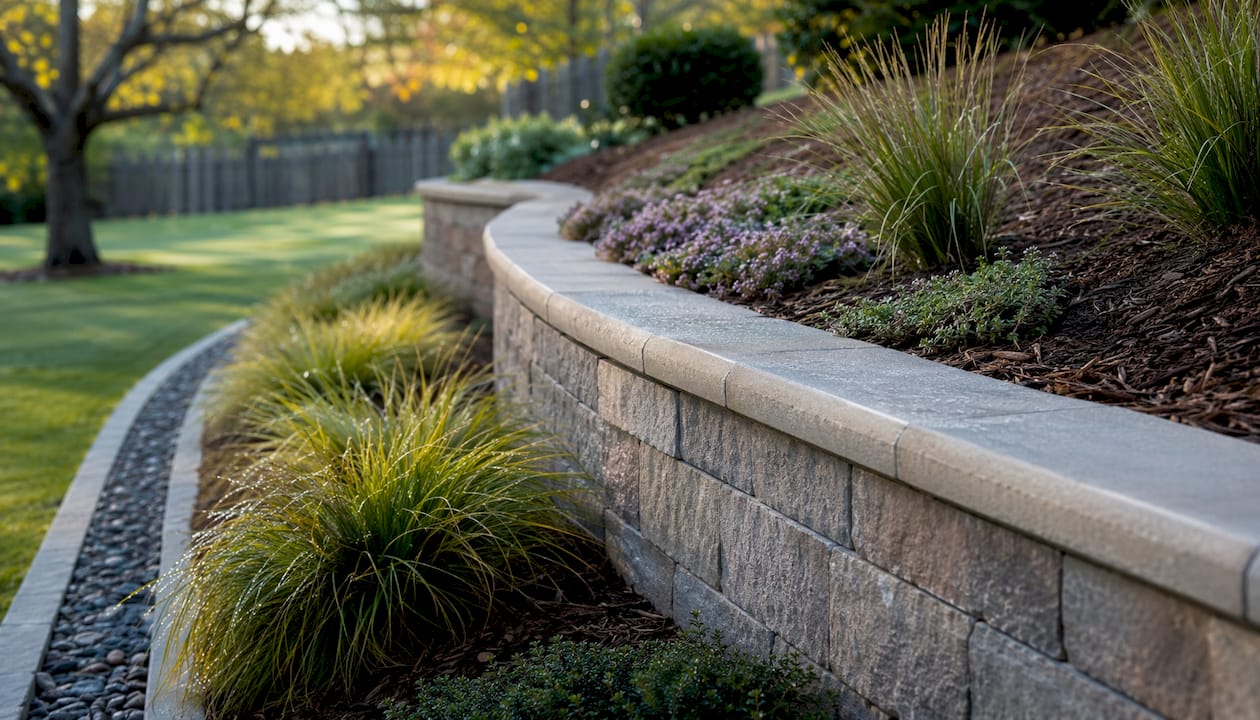
Grade the soil behind the wall so it slopes gently away from the wall for the initial few feet. That small slope keeps surface water from pooling against the back of the wall and saturating the backfill. Route downspouts and any uphill drainage away from the wall using swales or extensions, not toward it.
For planting, stick to shallow-root groundcovers like creeping thyme, sedum, or ornamental grasses. Deep-rooted shrubs and trees planted close to the wall face can work roots into the block joints over time. Keep irrigation heads pointed away from the wall face, and protect the daylighted drain outlet with a splash pad or outlet cover to prevent erosion at the discharge point.
Common DIY mistakes that cause retaining walls to fail early
The leading causes of premature failure are poor drainage, native fill as backfill, insufficient embedment of the first course, and inadequate compaction. Most of these are invisible once the wall is built, which is why getting them right the first time matters.
- No drain pipe or gravel column: Water builds up behind the wall, hydrostatic pressure increases, and the wall face bulges or tips. Fix retroactively by cutting weep holes at the base or excavating to install pipe, but prevention is far cheaper.
- Native soil as backfill: Clay and silty soils hold water, expand, and transfer enormous pressure to the wall. Use clean crushed stone for the drainage column and free-draining granular fill for the infill zone.
- Shallow first-course embedment: The 1/3 rule means roughly one-third of the total wall height should be buried below grade for embedment. For example, a 48-inch wall would require about 16 inches buried. Skimping here is the most common cause of forward sliding.
- Compacting too close to the wall face: Running a plate compactor within 3 feet of the wall face pushes blocks outward. Use hand tamping in that zone.
- Skipping geogrid on taller walls: A wall over 4 feet without geogrid is relying entirely on mass for stability. That's not enough when soil is wet or surcharged.
Red flags that mean call a professional now: horizontal bowing of the wall face, deep vertical cracks, settlement at the base, saturated backfill that won't drain after rain, or any section that has visibly moved since installation.
How long will your wall last, and what maintenance does it need?
A properly built segmental block wall with good drainage can last 30–50 years with minimal intervention. Timber walls typically need replacement within 10–20 years in climates with freeze-thaw cycles. The maintenance that matters most is keeping the drainage system clear.
Seasonal inspection checklist:
- After the first major storm: check that the daylight outlet is flowing freely and no backfill has settled
- Each spring: look for new cracks, bulges, or cap blocks that have shifted; clear sediment from drain outlets
- Annually: verify positive grade at the top of the wall; check that no irrigation is directed at the wall face
- Every 5–10 years: inspect for settlement at the base, check cap adhesive condition, and probe behind the wall if you suspect drainage issues
Catching a clogged outlet or a shifted cap block early costs almost nothing. Ignoring it until the wall face bows costs thousands.
When should you hire a licensed contractor instead of doing it yourself?
Call a pro when the wall exceeds approximately 48 inches, supports any surcharge load, is tiered with short horizontal offsets, or when you find soft soil, groundwater, or unknown fill during excavation. These aren't judgment calls; they're engineering problems that require a licensed professional.
When you contact a contractor or structural engineer for a slope wall project, ask:
- Are you licensed in Utah and do you carry general liability and workers' comp insurance?
- How many slope retaining walls have you built, and can you share photos or references?
- Who pulls the permits, and do you coordinate the engineered design?
- What compaction testing do you perform, and do you document it?
Before requesting an estimate, prepare a site sketch showing the wall location, existing and proposed grades, any structures within 10 feet, known drainage issues, and photos from multiple angles. Comparing bids on scope (what's included) rather than price alone protects you from low bids that cut corners on drainage or base prep. Those are the exact corners that cause failure. For projects involving structural masonry or CMU walls, the engineering and permitting requirements go up another level.
How A-to-zconstruction handles slope retaining-wall projects from start to finish
A professional process starts with site verification, not a quote. Here's the workflow A-to-zconstruction uses on slope retaining-wall projects:
-
Site evaluation. The crew walks the slope, probes soil at the proposed footing line, identifies drainage paths, and notes any surcharge sources (driveways, structures, uphill grade). This is where undisturbed soil depth gets confirmed, not assumed.
-
Permit and engineering check. A-to-zconstruction reviews local code triggers and coordinates engineered design when the wall height, surcharge, or soil conditions require it. The client receives a permit list and material schedule before work begins.
-
Machine-assisted excavation and benching. On sloped sites, A-to-zconstruction uses equipment to step the base trench accurately, cutting to undisturbed soil at each bench. This is where most DIY projects go wrong: hand-digging on a slope rarely achieves the consistent depth and level that a machine can.
-
Compaction and base installation. Base stone is placed and compacted in documented lifts. The drainage column, geotextile wrap, and perforated pipe are installed before the first block goes down.
-
Wall construction, geogrid, and backfill. Courses are stacked with continuous level checks. Geogrid is placed at the correct heights with machine direction perpendicular to the wall face. Backfill is compacted in lifts with hand equipment near the wall face.
-
Finish grading and drainage daylighting. Caps are glued, grade is pitched away from the wall, and drain outlets are protected and confirmed flowing.
Pro Tip: Experienced contractors watch for three things DIYers routinely miss: whether the footing is actually in undisturbed soil (not just firm-feeling fill), whether the drain outlet has a clear path to daylight with no low spots that will pond, and whether geogrid is laid in the correct machine direction. Reversing the geogrid orientation eliminates most of its load-transfer benefit.
Key Takeaways
Drainage, a base set in undisturbed soil, and knowing the permit threshold are the three non-negotiable requirements for a retaining wall on a slope that actually lasts.
| Point | Details |
|---|---|
| 48-inch permit trigger | Walls over ~48 in. or with any surcharge require a permit and engineered design under U.S. code. |
| Drainage is the top priority | Poor drainage is the leading cause of retaining wall failure; install a 12-inch gravel column and perforated pipe at the base. |
| Step the base on a slope | The base trench must be stepped and each step must bury at least one full block unit to prevent sliding. |
| Geogrid for taller or loaded walls | Walls over 4 feet or any surcharged wall need geogrid at 0.6 × wall height length, machine direction perpendicular to the wall face. |
| A-to-zconstruction for pro work | When the project exceeds DIY scope, A-to-zconstruction provides licensed, end-to-end retaining wall services across Utah. |
What contractors wish homeowners knew before starting a slope wall
The gap between a wall that lasts and one that fails within five years almost always comes down to decisions made in the first hour of planning, not the last hour of construction. Homeowners tend to focus on block color and wall height. Contractors focus on where the water goes.
The most expensive repair calls come from walls where the homeowner skipped the drain pipe to save $200 in materials and a half-day of work. Hydrostatic pressure is patient. It will find every weakness in a wall that lacks drainage, and it will do it faster on a slope where water concentrates naturally. The fix, once the wall has moved, often costs more than the original project.
Permits feel like bureaucratic friction, but they exist because a failed retaining wall on a slope can move a lot of soil quickly. That soil goes somewhere, and sometimes it goes toward a neighbor's property or a structure. The permit process forces a second set of eyes on the design before anything is built. For walls that qualify for DIY, the process is usually straightforward. For walls that need engineering, it's the difference between a wall that performs and a liability.
Realistic time expectations matter too. A 20-foot wall on a slope is a multi-day project even for an experienced crew with equipment. A homeowner doing it by hand on weekends should plan for two to three weekends minimum, not counting material delivery delays. Rushing the base and compaction phases to finish faster is how walls fail.
A-to-zconstruction builds slope retaining walls across Utah
When the wall height, soil conditions, or surcharge loads push your project past the DIY threshold, A-to-zconstruction delivers licensed, end-to-end retaining wall and hardscape services across Utah. The crew handles everything from initial site evaluation and permit coordination to machine excavation, drainage installation, block work, and finish grading, all under one roof with no subcontractor handoffs.

Before requesting an estimate, gather photos of the slope from multiple angles, note any known drainage issues or nearby structures, and sketch your desired finish grade. A-to-zconstruction uses that information to produce a scoped proposal that covers materials, drainage details, and permit requirements, so you're comparing real scope, not just a number. Utah homeowners can request a free hardscape estimate directly to get the process started.
Useful sources
The following sources support the code references, NCMA best practices, and construction guidance in this article. Consult them for additional technical detail on permit triggers, geogrid design, and segmental wall installation.
- IRC Section R404.4 — International Code Council (ICC): U.S. residential code reference for retaining wall engineering and permit triggers
- NCMA Segmental Retaining Wall Installation Guide — Remodel Calculators: Base prep, compaction specs, drainage column, and geogrid placement guidance based on NCMA standards
- Allan Block Slope Installation Guide: Stepped base course requirements for sloped sites
- Valley Block and Concrete — AB Installation Guide (Allan Block): Geogrid machine-direction orientation and reinforced wall design
- BuildVisionAI — Retaining Wall Failure Causes: Drainage as the primary cause of retaining wall failure
- MURS Projects — 1/3 Rule in Retaining Wall Design: Embedment depth standards and the 1/3 rule explained
- Main Street Retaining Walls — Terracing on Slopes: Terracing as a load-reduction strategy for steep grades
FAQ
Can you build a retaining wall on a slope?
Yes. A gravity or segmental block wall under 48 inches with no surcharge, set on a compacted stone base in undisturbed soil, is a manageable DIY project. Steeper slopes or taller walls typically require terracing and an engineered design.
What is the 1/3 rule for retaining walls?
The 1/3 rule means roughly one-third of the total wall height should be buried below grade for embedment. For a 48-inch wall, this means approximately 16 inches buried.
What are the most common mistakes when installing retaining wall blocks?
The most frequent failures are skipping the drain pipe and gravel column, using native soil as backfill, insufficient first-course embedment, compacting too close to the wall face, and omitting geogrid on walls over 4 feet. Each one accelerates failure.
What is the cheapest way to build a retaining wall?
Timber landscape ties have the lowest upfront material cost, but they rot within 10–20 years in freeze-thaw climates. Segmental concrete block costs more initially but lasts 30–50 years with proper drainage, making it the lower long-term cost for most slope projects.