Most rigid and tall retaining walls need a concrete footing. Small segmental gravity walls — the kind built with interlocking blocks — can often rely on a well-prepared leveling pad instead. The dividing line comes down to wall height, soil conditions, surcharge loads, and what your local building authority requires.
Here are the rules you can apply right now:
- Footing required: Any cast-in-place or cantilever wall, walls taller than roughly 4 ft (many jurisdictions use 4–6 ft as the permit trigger), walls carrying surcharge from a driveway or structure, and any wall adjacent to a slope or road.
- Leveling pad may suffice: Low segmental gravity walls (typically under 4 ft) on competent, well-drained soil with no surcharge — provided local code allows it.
- Minimum footing depth: Below your local frost line, with an absolute floor of 12 inches below undisturbed grade per IRC Chapter 4. Most contractors add a 6-inch buffer below that frost depth.
- Embedment rule for segmental walls: 1 inch of buried block per 1 foot of wall height, with a 6-inch minimum.
- Footing width for cantilever walls: 50–70% of wall height as a starting proportion, then verified with stability checks.
Your immediate next steps: Look up your county's frost depth (the Concrete Toolkit footing depth calculator maps IRC minimums by state), confirm your soil is competent bearing material, pull a permit if your wall exceeds local height thresholds, and call a licensed structural or geotechnical engineer if height, surcharge, or soil conditions push past prescriptive limits.
Pro Tip: Check your local frost depth before you do anything else. In Utah's Iron County, frost depths can reach 24–30 inches — far deeper than the IRC's 12-inch absolute minimum. Building to the minimum without checking local conditions is one of the most common footing mistakes.
Table of Contents
- What type of footing does a retaining wall actually need?
- How deep and wide does a retaining wall footing need to be?
- How soil, drainage, and backfill affect your footing size
- Step-by-step: how to build a retaining wall footing
- Rebar, footing thickness, and tie details for engineered walls
- When do you need an engineer or a building permit?
- A-to-zconstruction worked example: sizing a footing for a 5-foot residential wall
- What does a retaining wall footing project actually cost?
- Common footing mistakes and how to maintain your wall
- Key Takeaways
- What contractors actually see in the field
- A-to-zconstruction builds retaining walls right, from the footing up
- Useful sources and further reading
- FAQ
What type of footing does a retaining wall actually need?
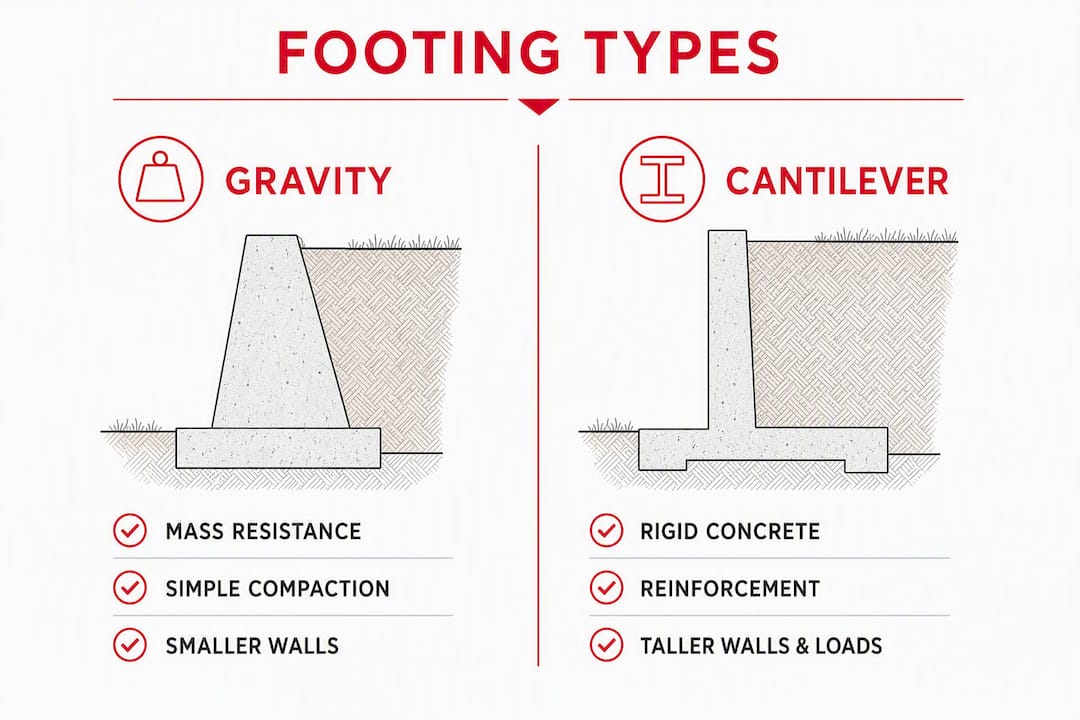
The answer depends on how the wall works structurally. Gravity walls resist earth pressure through their own mass; cantilever walls use a concrete stem and footing to lever against the soil. Each demands a different base.
| Footing Type | How It Works | Best For | Limitations |
|---|---|---|---|
| Compacted leveling pad | 4–6" of angular granular fill, compacted in place | Segmental/modular block walls under ~4 ft, no surcharge | Not a structural footing; relies on block mass and embedment |
| Poured strip footing | Continuous concrete pad, typically 12"+ wide and 8–12" thick | Walls over 4 ft, CMU, or stone walls needing a rigid base | Requires formwork, rebar, and curing time |
| Cantilever/T-footing | Wide concrete base with heel, toe, and stem; sized at 50–70% of wall height | Engineered walls over 6 ft, heavy surcharge, poor soils | Requires engineering drawings and permit |
| Shear key (keyway) | Notch or projection cast into the footing bottom | Any wall where sliding resistance is marginal | Added to a strip or cantilever footing, not standalone |
| Geogrid-reinforced gravity wall | Layers of geogrid extend into backfill to widen the effective base | Tall segmental walls where a concrete footing isn't practical | Requires geogrid design per manufacturer or engineer |
A leveling pad is not a structural footing. It levels the first course of block and distributes load across a wider area, but the wall's stability still comes from block mass, embedment, and drainage. Keystone's construction manual specifies a minimum of 4 inches of compacted angular granular fill for walls under 4 ft and 6 inches for walls over 4 ft, plus the buried block embedment on top of that.
A poured strip footing changes the equation entirely. Now you have a rigid concrete element that must resist horizontal earth pressure, prevent overturning, and distribute vertical loads within the soil's bearing capacity. Undersized or improperly proportioned footings are a leading cause of retaining wall failure — not a dramatic collapse, usually, but a slow lean that accelerates after the first hard freeze.
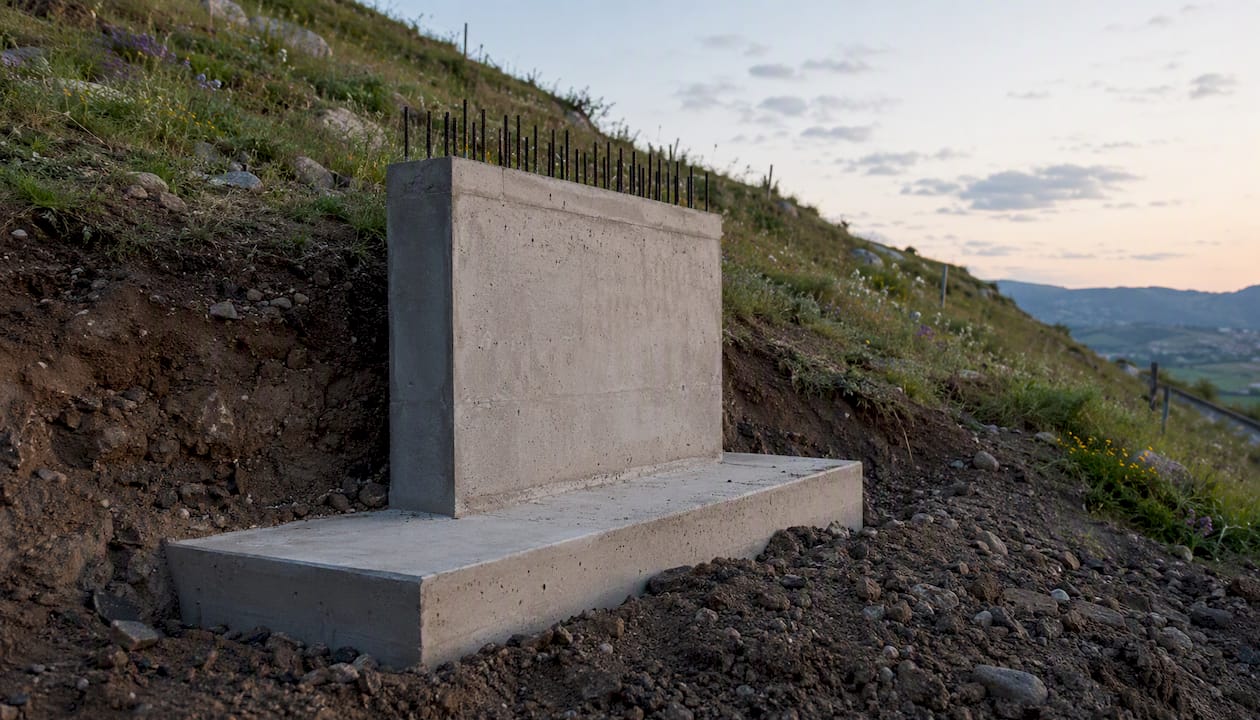
The cantilever T-footing is what most people picture when they think "engineered retaining wall." The heel extends back into the retained soil, the toe projects forward, and the stem rises from the middle. This geometry lets the weight of soil on the heel help resist overturning. For a cutaway diagram, picture the footing as a capital T lying on its side, with the stem pointing up.
For modular block walls that grow taller than prescriptive limits, geogrid reinforcement effectively widens the gravity mass without pouring concrete. Layers of geogrid extend horizontally into the backfill at specified intervals, tying the wall into the retained soil. This is a valid engineered alternative, but it still requires a properly prepared and compacted base.
How deep and wide does a retaining wall footing need to be?
This is where code meets field reality. The IRC sets the baseline: footings must extend below the local frost depth, with an absolute minimum of 12 inches below undisturbed grade. In practice, contractors routinely add a 6-inch safety buffer below the frost line to account for seasonal variation and to reach competent bearing material.
Frost depths across the U.S. range from about 12 inches in warm southern regions to over 72 inches in northern climates. Always verify your local frost depth with your AHJ before finalizing footing depth.
Embedment rules for segmental walls
Embedment and footing depth are related but different. Embedment is the buried block course that anchors the wall's base against sliding and rotation. The Allan Block standard puts it simply: about one unit of embedment per unit of wall height, with a minimum embedment. For taller walls, some guidance recommends increasing embedment accordingly. This is a starting point, not a substitute for engineering when site conditions are complex.
The 1/3 rule applies to flexible gravity walls: bury at least one-third of the total wall height below grade. A 3-foot exposed wall needs roughly 1 foot of buried depth. Simple, but it assumes competent soil and no surcharge.
Footing width for cantilever walls
| Wall Height | Preliminary Footing Width (50–70% rule) | Notes |
|---|---|---|
| 4 ft | 2.0 ft | Verify with overturning and sliding checks |
| 6 ft | — | Likely requires permit and engineered drawings |
| 8 ft | — | Engineer required; surcharge adds width |
| 10 ft | — | Full geotechnical and structural analysis needed |
USACE guidance on retaining wall proportions puts the base width at 50–70% of wall height for cantilever designs. That range accounts for soil type and surcharge — sandy, well-drained soil lets you stay toward the narrow end; clay or a driveway surcharge pushes you wider.
Stability checks you need to pass
Three independent checks must all pass before a footing design is acceptable:
- Overturning: The stabilizing moment (wall weight + soil on heel) must be at least 1.5–2.0 times the overturning moment from lateral earth pressure.
- Sliding: Base friction plus passive pressure at the toe must be at least 1.5 times the horizontal force. Shear keys improve this ratio when friction alone falls short.
- Bearing: The maximum soil pressure under the footing must stay within the allowable bearing capacity. The middle-third rule keeps the resultant force within the middle third of the footing width, preventing tension at the heel.
These three checks must be satisfied independently — passing two out of three is not enough.
Quick worked check for a 4-foot wall
Assume: 4 ft exposed wall height, no surcharge, sandy loam soil (allowable bearing ~1,500 psf), frost depth 24 inches.
- Footing depth: — 24" frost + 6" buffer = 30" below grade minimum.
This is a preliminary sizing exercise, not a substitute for engineered drawings when a permit is required.
How soil, drainage, and backfill affect your footing size
Soil is the variable most homeowners underestimate. Two walls of identical height can need completely different footings depending on what is in the ground.
Clay soils are frost-susceptible, retain water, and have lower bearing capacity than granular soils. A footing in clay often needs to go deeper to reach competent bearing strata and wider to spread load within the allowable pressure. Practitioners commonly exceed the IRC minimum by 6–12 inches in high-clay or frost-susceptible soils to avoid seasonal heave.
Drainage is not optional. A saturated retained zone can roughly double the lateral loads on a wall compared with drained conditions — a 3-meter wall retaining saturated soil can experience lateral pressures up to twice those for drained conditions, according to footing design analysis. That means a footing sized for drained conditions may be half the size it needs to be if drainage fails. Hydrostatic pressure is the silent killer of retaining walls that looked fine for the first few years.
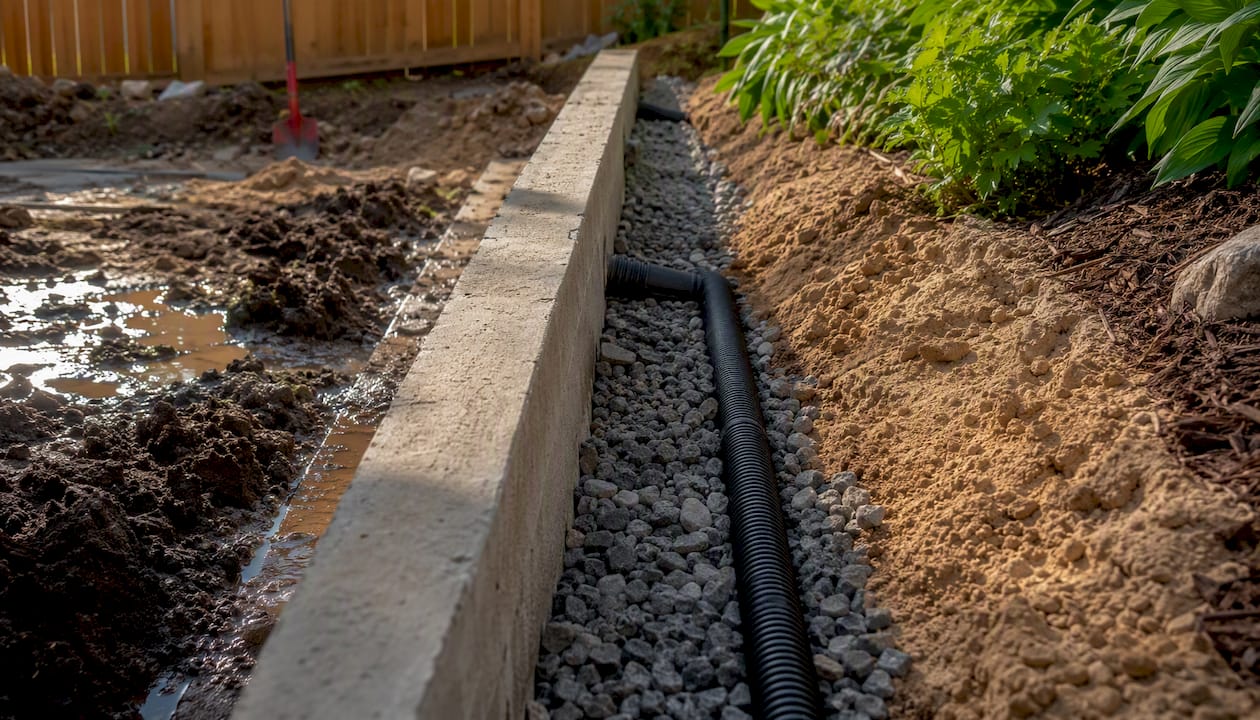
Pro Tip: Install a perforated drain pipe (4-inch diameter minimum) at the base of the wall, wrapped in filter fabric, sloped to daylight. Add weep holes through the wall face every 6–8 feet as a secondary relief. Skipping this step is the single most common reason retaining walls fail prematurely.
What to do before you pour
- Visual check: Dig a test hole to footing depth. If the soil is soft, organic, or disturbed fill, you need to excavate further or bring in a geotechnical engineer.
- Percolation check: Fill the test hole with water. If it drains in under an hour, drainage is manageable. If it sits for hours, you have a drainage problem that affects footing sizing.
- Remove soft material: Never pour a footing on organic soil, loose fill, or disturbed material. Excavate to undisturbed, competent bearing strata.
- Granular drainage zone: Place 12–18 inches of clean crushed stone or gravel directly behind the wall, from footing level to within 12 inches of the surface. Cap with filter fabric to prevent soil migration.
- Backfill in lifts: Compact backfill in 6–8 inch lifts using a plate compactor. Never dump and compact all at once — uneven compaction creates differential settlement.
- Order a soil-bearing test when the wall is over 6 ft, soil looks questionable, or a surcharge is present. A geotechnical report costs a few hundred to a few thousand dollars and can prevent a failed wall that costs far more to repair.
Step-by-step: how to build a retaining wall footing
This sequence applies to a poured strip or cantilever footing for a residential wall. For segmental walls using only a leveling pad, skip the formwork and pour steps.
- Mark and permit check. Confirm wall height, pull required permits, and schedule a pre-pour inspection with your AHJ if required. Mark the footing outline with spray paint or stakes.
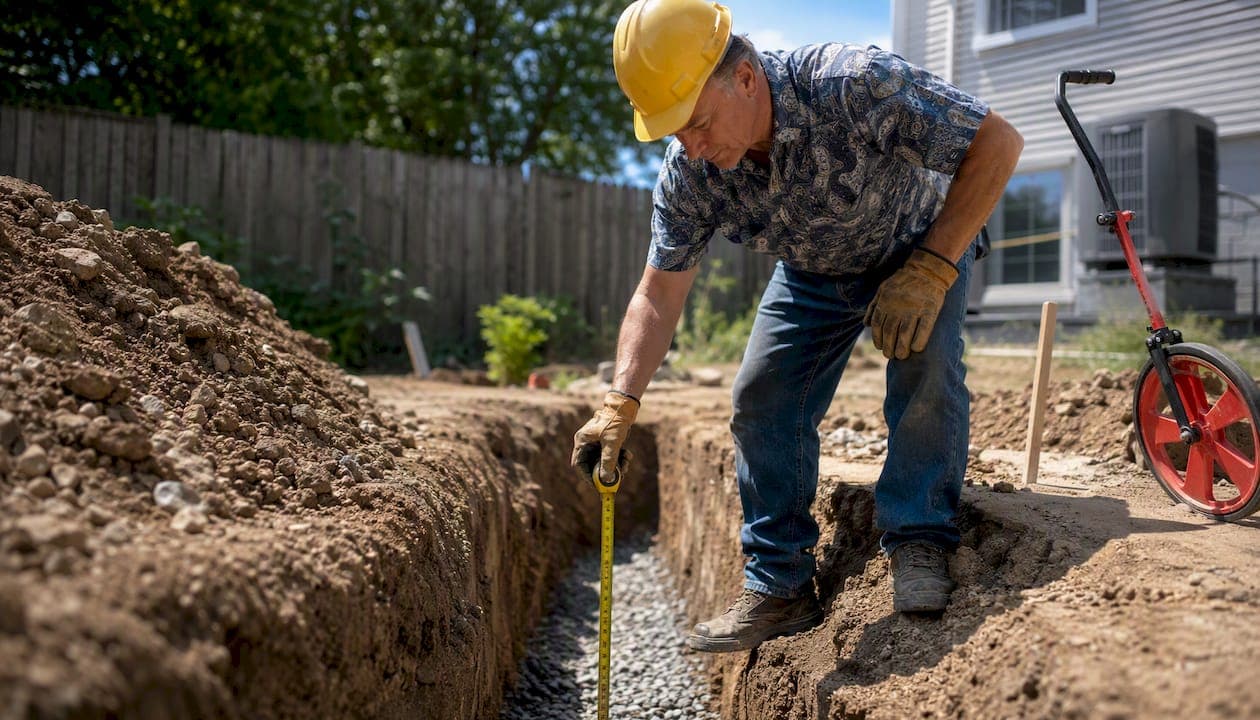
- Excavate to competent bearing. Dig to below frost depth plus your safety buffer. Trench width should match footing width plus 12 inches on each side for formwork. Remove all soft, organic, or disturbed material.
- Prepare the sub-base. Compact the trench bottom with a plate compactor. Add 4–6 inches of compacted angular gravel if the native soil is soft or poorly graded.
- Install drainage. Lay perforated drain pipe at the base of the excavation, sloped to daylight, wrapped in filter fabric. This goes in before the footing, not after.
- Set formwork. Build forms from 2×8 or 2×10 lumber, braced and staked so they hold concrete pressure without deflecting. Check for level and square.
- Place rebar. Lay continuous #4 bars at the bottom of the footing (3-inch clear cover from the bottom), and at the top for footings over 12 inches thick. Add vertical dowels at the spacing shown on your drawings — these tie the stem or block cores to the footing. Wire-tie all intersections.
- Pre-pour inspection. Before ordering concrete, have the AHJ inspector verify rebar placement, footing depth, and form layout if your permit requires it. Do not skip this step — a failed inspection means breaking out concrete.
- Pour and consolidate. Use a minimum 3,000 psi concrete mix (3,500 psi in freeze-thaw climates). Consolidate with a vibrator or rod to eliminate voids around rebar. Strike off level with the top of the forms.
- Cure. Keep the footing moist for at least 7 days, or use a curing compound. Do not load the footing or place block until it reaches adequate strength — typically 3–5 days minimum in warm weather, longer in cold.
- Place the first course. Set the first block or CMU course on the cured footing, checking for level and alignment. For segmental walls on a leveling pad, this is where embedment depth is confirmed.
Tools and materials for the footing pour
- Concrete (3,000–3,500 psi mix), rebar (#4 minimum for residential), wire ties, rebar chairs
- 2× lumber for forms, stakes, duplex nails, bracing
- Plate compactor, tamper, or jumping jack for sub-base
- Concrete vibrator or rod, screed board, float
- Perforated drain pipe, filter fabric, angular gravel
Safety callouts: Trench walls deeper than 5 ft require shoring or sloping per OSHA standards. Never work in an unshored trench. Keep concrete off skin — it causes chemical burns. Protect adjacent structures from excavation-induced settlement by limiting trench width and backfilling promptly.
Rebar, footing thickness, and tie details for engineered walls
For a residential cantilever or strip footing, rebar placement follows a straightforward pattern. The goal is to put steel where the concrete is in tension — at the bottom of the footing (where bending from soil pressure causes tension) and at the top when the footing cantilevers over the toe.
Typical residential footing reinforcement:
- Continuous #4 bars (1/2-inch diameter) at top and bottom, running the length of the footing
- Minimum 3-inch clear cover from all faces
- Transverse bars or stirrups at 12–18 inch spacing for wider footings (over 18 inches)
- Vertical dowels at 24–48 inch spacing, extending up into the stem or block cores, with development length per ACI 318 (typically 12–24 inches of embedment)
For a 16–24 inch wide footing, two continuous #4 bars top and bottom with #4 dowels at 24 inches on center is a common starting point for residential walls under 6 ft with no surcharge. Always confirm with your engineer or inspector.
Pro Tip: Lap splices matter. When you need to join two rebar pieces, overlap them by at least 24 bar diameters — for #4 bar, that is 24 × 0.5" = 12 inches minimum. Short laps are a common DIY error that shows up in inspections.
Shear keys and dowels
A shear key is a rectangular notch or projection cast into the bottom of the footing. It engages passive soil pressure below the footing, improving sliding resistance when base friction alone is not enough. Shear keys are typically 6–8 inches deep and 6–8 inches wide, centered under the stem.
Dowels connect the footing to the stem or to block cores. Without them, the stem can separate from the footing under lateral load. For CMU walls, dowels extend into grouted cores; for poured stems, they are bent into the footing and tied to vertical wall bars.
The limits of DIY reinforcement are real. Bar placement tolerances, development lengths, and hook geometry all affect structural performance. If your wall requires a permit, the inspector will check these details. If it requires engineering, the drawings will specify them. Either way, get it right before the pour.
When do you need an engineer or a building permit?
Most jurisdictions use a height threshold as the trigger for both a building permit and engineered drawings. But height is not the only trigger.
Call a structural or geotechnical engineer when:
- Wall height exceeds 4 ft (many AHJs require engineering above this threshold regardless of wall type)
- Any surcharge is present: driveways, parking, buildings, or heavy equipment within the zone of influence (roughly a 45-degree failure wedge from the wall base)
- Soil is clay-heavy, expansive, or shows signs of instability
- The wall is on or near a slope
- The wall is within 5 ft of a property line, structure, or public right-of-way
- Groundwater is present or the site has poor drainage
- Future excavation near the wall is planned
Permit triggers (check with your local AHJ — these are common thresholds, not universal):
- Wall height over 4 ft (measured from bottom of footing to top of wall)
- Wall within a hillside or landslide zone
- Wall supporting a structure or adjacent to a public road
- Any wall in a regulated flood zone
What an engineer delivers:
- Stability calculations (overturning, sliding, bearing) with documented factors of safety
- Footing dimensions, rebar schedule, and shear key details
- Drainage design recommendations
- Soil-bearing capacity verification (may require a geotechnical report)
- Stamped drawings your AHJ will accept for permit
To speed up an engineer quote, collect: wall length and height, rough soil description, photos of the site, any surcharge details, and your local frost depth. A 15-minute site visit or a set of good photos can cut the back-and-forth significantly.
A-to-zconstruction worked example: sizing a footing for a 5-foot residential wall
Here is how A-to-zconstruction approaches a typical residential retaining wall project in southern Utah.
Assumptions:
- Exposed wall height: 5 ft
- Frost depth: 24 inches (Iron County, Utah)
- Soil: sandy loam, estimated allowable bearing capacity 1,500 psf
- Surcharge: none (lawn behind wall)
- Groundwater: not present
- Wall type: CMU block, poured concrete footing
| Design Parameter | Preliminary Value | Basis |
|---|---|---|
| Footing depth | 30 inches below grade | 24" frost + 6" buffer |
| Footing width | 30 inches | 50% of 5 ft wall height |
| Footing thickness | 12 inches | IRC minimum; rebar clearance |
| Embedment (block) | 6 inches minimum | 1" per foot rule, 6" min |
| Rebar (longitudinal) | 2 × #4 continuous, top and bottom | Standard residential |
| Rebar (dowels) | #4 at 24" o.c. into CMU cores | Stem-to-footing connection |
| Drainage | 4" perforated pipe + crushed stone zone | Hydrostatic pressure control |
| Concrete mix | 3,500 psi | Freeze-thaw exposure |
Stability check summary (simplified):
- Overturning: At 5 ft with no surcharge on sandy loam, a 30-inch footing provides a factor of safety above 1.5 against overturning. Adding a driveway surcharge would require widening to at least 36 inches.
- Sliding: Base friction on sandy loam (friction coefficient ~0.4) provides adequate sliding resistance at this height. A shear key would be added if the soil were clay.
- Bearing: With a 30-inch footing, the bearing pressure stays well within 1,500 psf for this wall height and soil type.
Contractor decisions: A-to-zconstruction chose a poured concrete footing over a leveling pad because the wall is CMU block (rigid, not segmental), the height is at the upper end of the prescriptive range, and the client wanted a permit-ready installation. The 6-inch safety buffer below frost depth accounts for the variability in southern Utah's freeze-thaw cycles. Drainage was treated as non-negotiable: a perforated pipe at the footing base, crushed stone backfill zone, and weep holes at 6-foot intervals through the CMU face.
For segmental block walls on the same site under 4 ft, A-to-zconstruction uses a 6-inch compacted angular gravel leveling pad with 6 inches of buried block, consistent with Allan Block embedment guidelines and the interlocking retaining wall block approach detailed in our DIY guide.
What does a retaining wall footing project actually cost?
Cost varies more than most homeowners expect, and the footing itself is often not the biggest line item.
Cost drivers:
- Excavation depth and rock: rocky soil or deep frost lines mean more machine time and disposal costs
- Concrete volume: a longer or wider footing adds material and pour costs quickly
- Rebar and drainage: materials are relatively inexpensive, but labor to place them correctly adds up
- Permits and inspections: typically $100–$500 for residential walls, but varies by jurisdiction
- Hauling and disposal: excavated material has to go somewhere
Representative ranges (DIY vs. contractor-installed, small residential walls):
For a straightforward 20-linear-foot wall at 4–5 ft height, DIY material costs for the footing alone (concrete, rebar, gravel, drain pipe) typically run $400–$900 depending on footing size and local material prices. Add equipment rental (plate compactor, concrete forms) and the number climbs.
A contractor-installed footing and wall in the same scenario generally runs $150–$300 per linear foot for the complete installed wall, depending on wall type, site access, and local labor rates. Complex sites with poor access, deep excavation, or rock can push that higher.
Timeline expectations:
- Excavation and sub-base prep: 1–2 days for a 20-ft wall
- Formwork and rebar: half a day to a full day
- Pour and cure: 1 day to pour, 3–7 days cure before loading
- Block placement and backfill: 1–3 days depending on wall height and material
- Inspection scheduling: add 2–5 business days if a pre-pour inspection is required
The most common delay is waiting for inspection. Schedule it the day you set forms, not the day before you want to pour.
When comparing contractor bids, watch for these line items: excavation and disposal, concrete mix specification (3,000 vs. 3,500 psi matters in freeze-thaw climates), drainage installation, and whether the permit fee is included. A bid that skips drainage is not a bargain.
Common footing mistakes and how to maintain your wall
Most retaining wall failures trace back to a handful of avoidable errors made during design or construction.
Mistakes that cause failures:
- Underestimating frost depth. Building to the IRC's 12-inch absolute minimum in a region with 30-inch frost depth guarantees heave and cracking within a few winters.
- Skipping drainage. Hydrostatic pressure from a saturated backfill zone is the most common cause of wall rotation and footing failure.
- Using organic or uncompacted backfill. Topsoil and organic material compress over time, creating voids and uneven settlement behind the wall.
- Undersized footings. A footing sized by eye rather than calculation often fails the overturning check, especially once surcharge is added.
- Ignoring surcharge. A driveway added after the wall was built, or a neighbor's fence post within the zone of influence, can push a marginally adequate footing past its limits.
- Pouring on disturbed soil. Footings poured on loose fill or disturbed material settle unevenly, cracking the wall above.
Seasonal maintenance checklist:
- After every freeze-thaw cycle, inspect the wall face for horizontal cracks, rotation, or bulging. These are structural distress signals, not cosmetic issues.
- Clear weep holes and drain outlets every spring. A clogged weep hole turns a drained wall into a saturated one.
- Check the toe of the wall for erosion. Soil loss at the toe reduces passive resistance and can trigger sliding.
- Look for settlement cracks at the top of the wall or at corners. Differential settlement often shows up at transitions between wall sections.
- Keep heavy equipment and vehicles away from the top of the wall unless it was designed for that surcharge.
Quick fixes vs. call a pro: Clearing a clogged weep hole or adding a splash pad at a drain outlet is a DIY job. A wall that is visibly rotating, has horizontal cracks through the middle of the face, or has moved more than an inch from plumb needs a structural assessment before any repair. Patching the face of a failing wall without addressing the footing is money wasted. For spring hardscape maintenance beyond the basics, a professional inspection can catch problems before they become expensive.
Key Takeaways
A properly sized retaining wall footing — deep enough to clear the frost line, wide enough to pass overturning and sliding checks, and paired with adequate drainage — is the single factor that separates walls that last decades from walls that lean within a few years.
| Point | Details |
|---|---|
| Frost depth drives footing depth | Go below your local frost line plus a 6-inch buffer; the IRC's 12-inch absolute minimum is a floor, not a target. |
| Footing width scales with wall height | Size cantilever footings at 50–70% of wall height as a starting point, then verify with overturning, sliding, and bearing checks. |
| Drainage is non-negotiable | A saturated backfill zone can roughly double lateral loads; install perforated drain pipe and a granular drainage zone at the footing level. |
| Engineer triggers are clear | Walls over 4–6 ft, any surcharge, poor soils, or slope adjacency require a licensed structural or geotechnical engineer. |
| A-to-zconstruction handles it all | For Utah homeowners, A-to-zconstruction sizes, pours, and inspects retaining wall footings with an in-house licensed crew from excavation to final block placement. |
What contractors actually see in the field
The gap between what the code says and what gets built is wider than most homeowners realize. The three problems A-to-zconstruction encounters most often on retaining wall repair calls are soft soils that were never excavated to competent bearing, drainage that was either skipped entirely or installed incorrectly, and footings that were sized by guessing rather than calculation.
The soft-soil problem is particularly common on sloped lots where previous grading left disturbed fill near the surface. A footing poured on fill that looks solid in summer can settle 2–3 inches after the first wet winter. By then, the wall has already cracked.
DIY is reasonable for low segmental walls under 3–4 ft on flat, well-drained sites with no surcharge. The leveling pad and embedment rules are straightforward, the materials are manageable, and the consequences of a minor error are limited. Push past those conditions and the risk profile changes fast. A wall that leans into a driveway or toward a neighbor's property is not just an aesthetic problem.
The worked example in this guide reflects how A-to-zconstruction actually sizes a footing for a mid-range residential wall. The numbers are conservative by design. In the field, we add the 6-inch frost buffer every time, we always install drainage, and we never pour on anything that does not feel like competent bearing material under a compactor. Those habits are why walls built correctly stay plumb for 20 years.
A-to-zconstruction builds retaining walls right, from the footing up
Sizing and pouring a retaining wall footing correctly the first time saves you from the much more expensive job of rebuilding a leaning wall five years later. A-to-zconstruction handles every phase of that work in-house: foundation excavation and earthwork, concrete footing pours, masonry and CMU block wall installation, drainage, and backfill. No subcontractors, no handoffs, no gaps in accountability.

Utah homeowners from Cedar City to Iron County get a single point of contact, a licensed crew, and a fixed bid before any work starts. To get a free hardscape estimate, have your wall dimensions, a few site photos, and a rough description of the soil and slope ready. That information lets the team give you an accurate number on the first call, not a ballpark that doubles by the time permits are pulled. Reach out to A-to-zconstruction to schedule your estimate.
Useful sources and further reading
- IRC Chapter 4: Foundations (ICC) — frost-depth requirements and minimum footing dimensions
- USACE technical publications on retaining wall proportions — stability checks and footing sizing guidance
- Concretemetric footing design guide — overturning, sliding, and bearing checks with worked examples
- Concrete Toolkit footing depth calculator — IRC-referenced frost depth lookup by state
- ADU foundation types explained for homeowners — accessible overview of foundation types and their applications
- A-to-zconstruction retaining wall services — local contractor services for Utah homeowners
This article provides general construction information for educational purposes. Consult a licensed structural or geotechnical engineer and your local building authority to confirm requirements for your specific project.
FAQ
Do I need a footing for a retaining wall?
Most walls taller than a certain height or carrying any surcharge load require a concrete footing. Low segmental gravity walls below that height on competent, well-drained soil can often use a compacted granular leveling pad instead, provided local code allows it.
How deep should a retaining wall footing be?
The IRC requires footings to extend below the local frost depth, with an absolute minimum of 12 inches below undisturbed grade. Most contractors add a 6-inch buffer below the frost line to account for seasonal variation and to reach competent bearing material.
What is the 1/3 rule for retaining walls?
For segmental retaining walls, the typical embedment rule is 1 inch of buried block per 1 foot of wall height, with a minimum of 6 inches regardless of total height.
What is the best footing type for a retaining wall?
It depends on the wall type. Segmental block walls under 4 ft typically use a compacted granular leveling pad. Taller or rigid walls (CMU, poured concrete) need a poured strip or cantilever footing sized to pass overturning, sliding, and bearing checks. Walls over 6 ft almost always require an engineered cantilever footing with a shear key.
When does a retaining wall require a building permit?
Most jurisdictions require a permit when wall height exceeds 4 ft measured from the bottom of the footing to the top of the wall, when the wall is near a property line or structure, or when any surcharge is present. Check with your local AHJ — thresholds vary by county and municipality across Utah and the broader U.S.