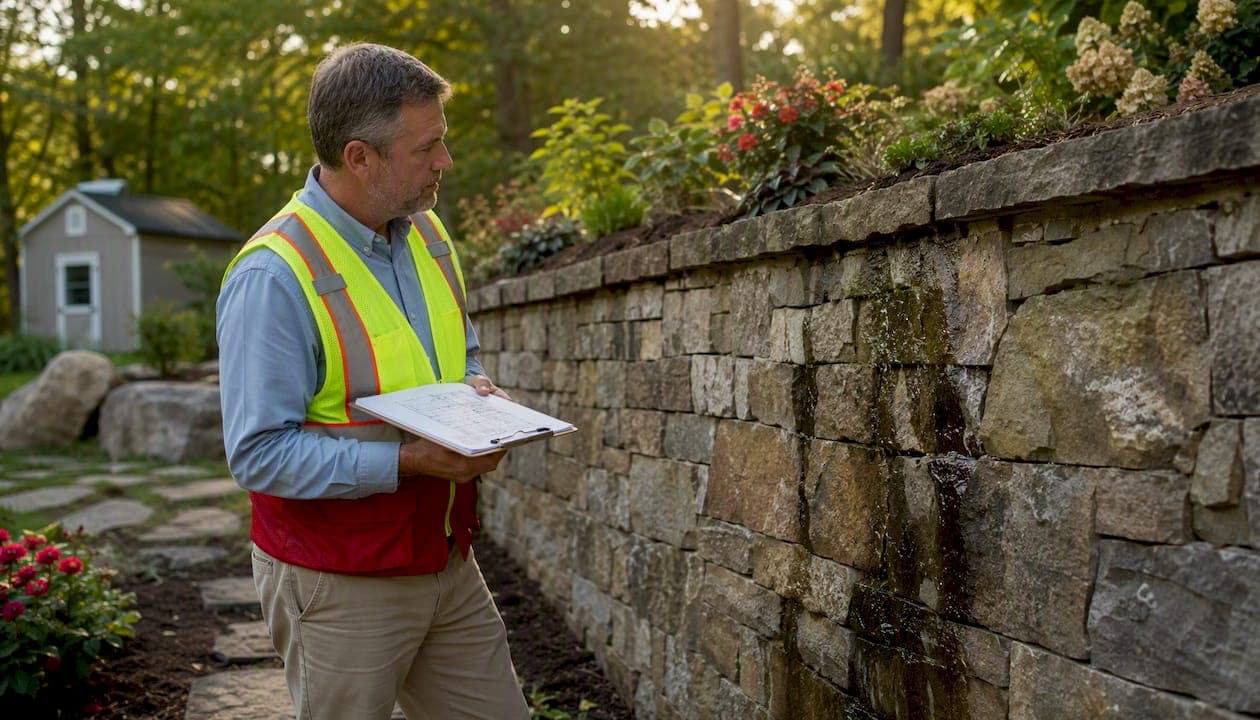
Any retaining wall over 4 feet tall, or any wall holding back clay soil, needs a formal drainage system. Full stop. The professional spec is straightforward: a 12-inch column of #57 washed stone behind the wall, a 4-inch perforated PVC or HDPE drain pipe sloped at least 1% to a daylighting outlet, non-woven geotextile fabric wrapping the stone zone, and surface water diverted away from the top of the wall. Get all four right and the wall stands for decades. Miss one and you're looking at a repair bill that dwarfs what drainage would have cost.
Quick next steps:
- Walk the wall after the next rain and check whether weep holes or the outlet are discharging
- Confirm the outlet is clear and not buried or blocked by vegetation
- If the wall is leaning, cracking, or showing bulges, call a licensed contractor before the next wet season
Saturated soil can push against a wall with significantly greater lateral force than dry soil. That pressure difference is what separates a wall that lasts from one that fails.
Table of Contents
- Why does water destroy retaining walls?
- When does a retaining wall actually need drainage?
- What components does a proper drainage system require?
- How do you install retaining wall drainage correctly?
- How do you inspect and maintain a drainage system?
- What does retaining wall drainage cost?
- When should you call a licensed contractor?
- Key Takeaways
- The part most contractors skip
- A-to-zconstruction builds drainage in from the start
- Useful sources and installation references
- FAQ
Why does water destroy retaining walls?
Hydrostatic pressure is the primary mechanical cause of most retaining wall failures. When rain or irrigation saturates the soil behind a wall and that water has nowhere to go, it builds force against the wall face. Saturated soil produces 2–3× the lateral pressure of dry soil, and that increase is what turns a structurally sound wall into a bowing, cracking liability.
The failure pattern is almost always the same. Water enters the backfill, the soil becomes saturated, pressure climbs, and the wall either slides at the base, tilts outward at the top, or blows out at a mid-point where the blocks or mortar are weakest. According to the Iowa State University Center for Transportation Research and Education, poor drainage is by far the most common cause of poor performance in earth retention systems, and those serviceability problems can progress to outright failure if not addressed.
Secondary failure modes compound the pressure problem:
- Erosion and piping: Water moving through fine-grained backfill carries soil particles with it, creating voids that accelerate collapse
- Frost heave: Saturated soil expands when it freezes, ratcheting the wall outward with each freeze-thaw cycle
- Surcharge amplification: A saturated backfill behind a wall that also carries a driveway or structure load is carrying two forces at once
Surface water sources above the wall, including roof downspouts, irrigation runoff, and hardscape drainage, are frequent contributors that homeowners overlook. Fixing where surface water goes is often the fastest, cheapest intervention before any subsurface work begins.
When does a retaining wall actually need drainage?
Walls under roughly 2 feet tall in naturally well-draining sandy or gravelly soil may function without a formal drainage system. Once you cross 4 feet, a toe drain is essentially mandatory. The 2–4 foot range is where judgment calls live, and the answer almost always tips toward "yes, install drainage" when any of the following site conditions apply.
Height and soil triggers:
- Under 2 ft, sandy/gravel soil: Drainage optional; monitor after heavy rain
- 2–4 ft, any soil: Drainage strongly recommended; required in clay or high-rainfall areas
- Over 4 ft, any soil: Engineered drainage required; professional design plans typically needed
Clay soil is the biggest wildcard. Clay drains poorly, swells when wet, and shrinks when dry, which means it cycles through pressure states with every rain event. A 3-foot wall in clay can fail faster than a 5-foot wall in sandy loam. High water tables, slopes above the wall that funnel runoff toward the backfill, and nearby impervious surfaces like driveways or patios all push the decision toward a full system.
Pro Tip: Even a short decorative wall (18–24 inches) should get drainage if it sits at the base of a slope, receives irrigation runoff, or holds back clay. The cost of adding a stone column and a short pipe run during construction is trivial compared to rebuilding the wall in five years.
For walls taller than 4 feet in poorly draining soils, toe drains vented to daylight approximately every 50 feet are the standard. When subsurface seepage is present, chimney or blanket drains that extend through the reinforced zone are the appropriate upgrade.
On-site decision checklist:
- Does the soil clump and stay wet after rain? (Clay indicator)
- Is there a slope above the wall directing runoff toward it?
- Are downspouts, irrigation heads, or hardscape draining toward the backfill?
- Is the wall over 4 feet, or carrying a structural load like a driveway?
- Has the wall shown any movement, staining, or persistent wetness?
One "yes" answer means drainage is worth adding. Two or more means it's not optional.
What components does a proper drainage system require?
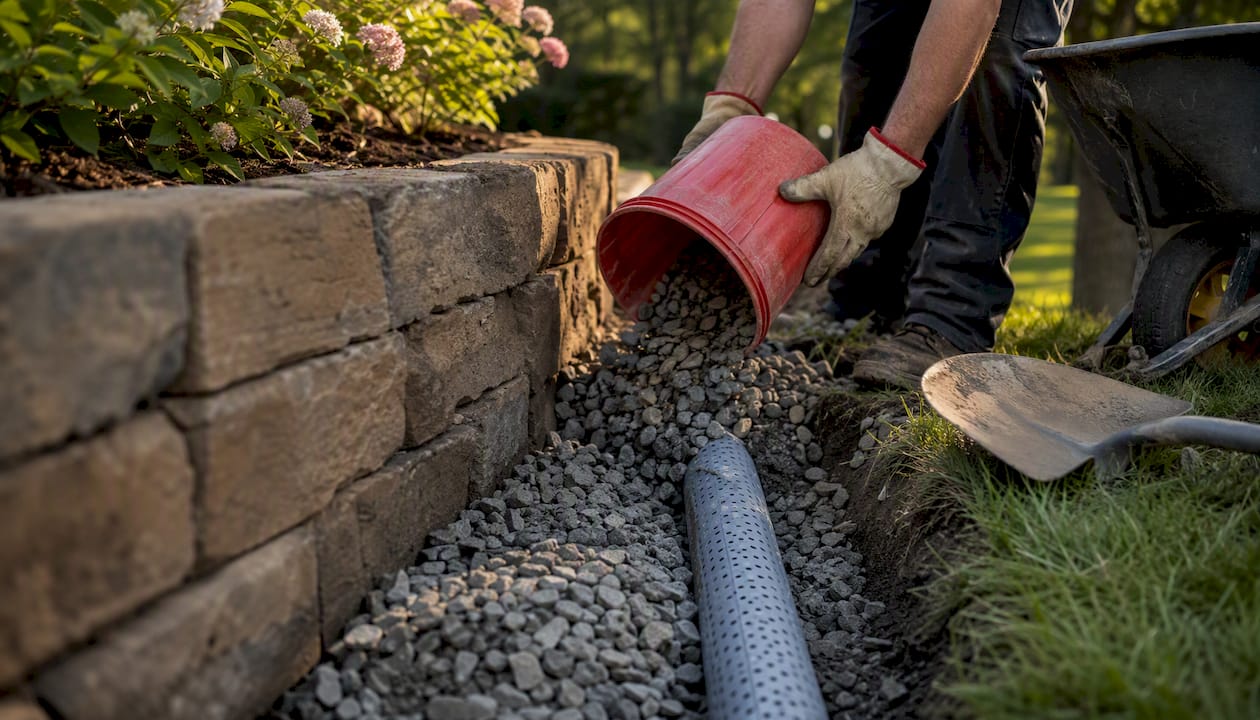
A standard professional-grade drainage system has four core components: a 12-inch-wide column of clean #57 washed stone, a 4-inch perforated pipe sloped at a minimum 1% grade, non-woven geotextile filter fabric, and a daylighting outlet with surface water diversion above the wall. Every component depends on the others. Skip the fabric and the stone clogs with fines within a few years. Use the wrong stone and the voids fill with sediment. Dead-end the pipe, and the whole system backs up.
| Component | Minimum Spec | Why It Matters |
|---|---|---|
| Drain aggregate | #57 washed stone, 12" wide column | Clean, angular voids allow water to move freely; no fines to clog |
| Perforated drain pipe | 4" PVC or corrugated HDPE, perforations down | Collects water at the lowest point in the stone zone |
| Pipe slope | 1% minimum slope | Gravity moves water to the outlet; flat pipe holds water and fails |
| Geotextile fabric | Non-woven, wrapped around stone zone | Keeps native soil from migrating into the stone and clogging voids |
| Outlet | Daylights to grade or connects to storm drain | Without a real exit, the pipe fills and pressure builds anyway |
| Weep holes | Every 4–6 ft, supplemental only | Backup pressure relief; not a substitute for the pipe-and-stone system |
A few material notes worth knowing before you buy:
- #57 washed stone vs. crusher run: Crusher run contains fines that compact and block water movement. It will clog the drainage zone. Use only clean, washed stone with no fines.
- PVC vs. corrugated HDPE: Rigid 4-inch PVC holds its slope better over long runs and is less prone to crushing under compaction loads. Corrugated HDPE is easier to handle on curved walls but requires careful bedding to maintain grade.
- Perforations down: Placing pipe perforations facing downward captures water at the lowest point in the stone zone and reduces sediment entry into the pipe. This is the opposite of what many DIYers assume.
- Geotextile sock: Wrapping the pipe in a geotextile sock, or surrounding it with a small pocket of stone, further reduces sediment entry and extends service life.
Pro Tip: The fabric and the correct stone size are the two components most often skimped on in low-bid installations. A drainage system without non-woven geotextile is on a timer. The pipe will still be there in 10 years; the stone zone around it will be a mud plug.
Weep holes spaced regularly are a useful belt-and-suspenders measure but carry their own risks: they can clog with mineral deposits or debris, and unmanaged discharge can erode the wall face. Treat them as backup, not primary drainage.
How do you install retaining wall drainage correctly?
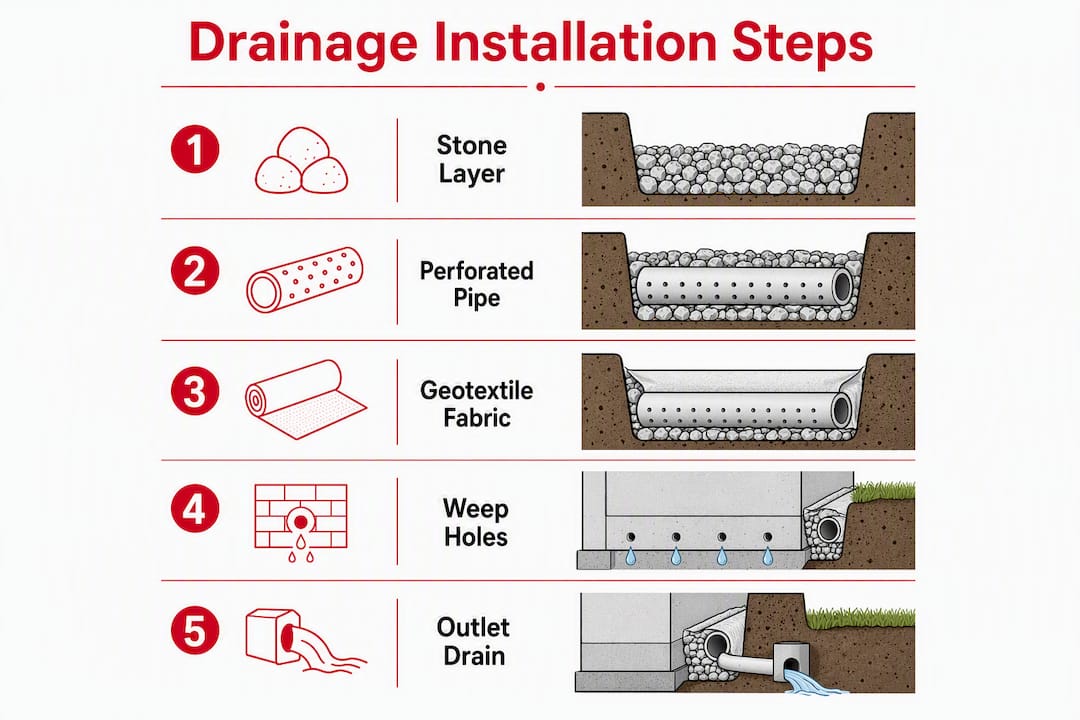
The installation sequence runs from the bottom of the excavation up: fabric first, pipe next, stone around and over the pipe, fabric wrapped closed, then native backfill on top. Every step has a measurable checkpoint.
- Excavate the drainage trench at the base of the wall, wide enough for a 12-inch stone column plus the pipe diameter. Confirm the trench bottom slopes at least 1% toward the outlet end before placing anything.
- Line the trench with non-woven geotextile fabric, draping it up both sides with enough overlap to wrap back over the top of the stone zone after filling. Minimum 12-inch overlap at the seam.
- Set the 4-inch perforated pipe on the trench bottom with perforations facing down. Verify slope with a level or laser before backfilling. The pipe must run continuously to the outlet with no low spots that trap water.
- Fill the stone zone with #57 washed stone to a minimum 12-inch width around and above the pipe. Do not use native soil, crusher run, or mixed aggregate.
- Wrap the fabric closed over the top of the stone column, overlapping the edges. This cap prevents native backfill from filtering down into the stone zone over time.
- Install weep holes through the wall face every 4–6 feet at the base course, aligned with the stone zone. Keep them clear of mortar.
- Daylight the outlet at a lower grade point where water can discharge freely. Protect the outlet with a rodent guard or flap valve. Never bury or cap the outlet end.
- Compact native backfill in lifts above the fabric-wrapped stone zone. Do not use heavy compaction equipment directly against the wall face.
- Divert surface water above the wall using swales, grading, or downspout extensions so roof and hardscape runoff cannot enter the backfill zone.
- Run a hose test before finishing grade: place a hose at the top of the stone zone and confirm water appears at the outlet within approximately 60 seconds.
The hose test is the simplest quality check on the job. Water placed in the drainage zone should emerge at the outlet within about 60 seconds for a properly sloped, unobstructed system. If it takes longer, or nothing comes out, the pipe slope or outlet connection has a problem that needs to be fixed before the wall is finished.
Pro Tip: Take photos of the pipe, stone zone, and outlet before backfilling. If a drainage problem develops years later, those photos tell a contractor exactly what was installed and where the pipe runs. Without them, diagnosing a buried system means excavating.
When excavation depth exceeds 4 feet, OSHA shoring requirements apply. Any wall that requires a structural engineer's stamp also requires that engineer to review the drainage design, not just the wall geometry. Check with your local building department before breaking ground on walls over 4 feet tall.
How do you inspect and maintain a drainage system?
Inspect twice a year: once in early spring after the freeze-thaw season, and once in late fall before the ground freezes. Add an inspection after any storm that drops more than an inch of rain in 24 hours. The single most important sign of failure is water that stays wet in the backfill zone for more than 72 hours after rain stops.
Seasonal inspection checklist:
- Outlet is clear and discharging freely (not buried, crushed, or blocked by vegetation)
- Weep holes are open and show signs of discharge after rain
- No persistent wetness or soft spots in the backfill 48–72 hours after rain
- No mineral staining or white efflorescence on the wall face (indicates water moving through the wall, not around it)
- No visible settlement, bulging, or tilting of the wall face
Troubleshooting by symptom:
- Outlet not discharging after heavy rain: Check for blockage at the outlet end first. Clear debris and retest with a hose. If still blocked, the pipe may be crushed or the slope may have settled.
- Weep holes dry but backfill stays wet: The pipe or stone zone is likely clogged. A plumber's snake or low-pressure jetting can sometimes clear a pipe, but if the stone zone is silted in, excavation is the only real fix.
- White staining on wall face: Efflorescence means water is migrating through the wall material. The drainage system is not capturing all the water, or surface water is entering from above.
- Upstream runoff entering backfill: Check that swales and grading above the wall still direct water away. Settled grade can reverse drainage direction over time.
Routine maintenance steps:
- Clear outlet screens or flap valves of debris each spring
- Trim vegetation away from the outlet so roots do not block or crush the pipe
- Check that downspouts and irrigation heads still discharge away from the wall
- After any significant excavation or grading near the wall, re-verify outlet elevation and slope
Pro Tip: Run the hose test annually. Place a garden hose at the top of the stone zone (or at a weep hole) and time how long it takes for water to appear at the outlet. A healthy system responds in roughly 60 seconds. A slow or absent response tells you the system needs attention before the next wet season, not after.
Red flags that require immediate professional evaluation: any visible leaning or tilting of the wall face, horizontal cracks near the base, bulging at mid-height, voids or sinkholes forming behind the wall, or water emerging from the base of the wall in a concentrated flow rather than through the outlet. These are structural warning signs, not maintenance issues. Treat them as safety concerns.
Just as drainage matters for decking and other outdoor structures, the principle holds for retaining walls: water that has no designed exit path will always find its own, usually through the structure itself.
What does retaining wall drainage cost?
Drainage adds roughly 12–22% to the total cost of a retaining wall project, but it prevents repair costs that routinely run several times the original wall price. A wall that fails from hydrostatic pressure doesn't just need drainage added; it typically needs to be torn out and rebuilt.
Cost drivers:
- Wall length and height (more linear feet means more pipe, stone, and fabric)
- Soil conditions (clay or high water table requires more stone volume and sometimes engineered drainage)
- Outlet distance and elevation drop available (longer runs to daylight cost more)
- Access for equipment (tight residential lots increase labor time)
- Whether the drainage is new construction or a retrofit (retrofit requires excavating existing backfill)
- Permit and stormwater connection fees if the outlet ties into a municipal system
Sample cost scenarios (DIY vs. professional, U.S. estimates):
| Scenario | DIY Material Cost | Professional Installed |
|---|---|---|
| Per linear foot (general range) | $8 | $35 |
Retrofit work costs significantly more than new construction drainage because the existing backfill must be excavated, the old material removed, and the wall inspected for damage before the new system goes in. Timeline for a drainage-only installation on an accessible site runs 1–3 days for a professional crew. Retrofits with significant excavation or rework can run a full week.
Pro Tip: Ask any contractor for a line-item estimate that separates drainage materials (stone tonnage, pipe, fabric) from labor. A bid that lumps everything into one number makes it impossible to verify whether the drainage spec matches what the job actually needs.
When should you call a licensed contractor?
Some drainage work is genuinely DIY-friendly: a short, accessible wall in sandy soil where the outlet is easy to reach. But several conditions push the job into professional territory, and misjudging that line is expensive.
Call a licensed contractor when:
- The wall is over 4 feet tall or is a stepped multi-tier system
- The wall shows any structural movement (leaning, cracking, bulging)
- The soil is clay, the water table is high, or subsurface seepage is present
- Utilities may be in the excavation zone
- The wall ties into geogrid reinforcement or is an engineered design
- The outlet needs to connect to a municipal storm drain or drywell
- You cannot confirm the existing drainage spec or pipe location
What a qualified contractor's scope should include:
- Site assessment and review of existing drainage conditions
- Geotechnical input when soil conditions are uncertain
- Engineered drainage design for walls over 4 feet
- Excavation, hauling, and proper disposal of existing backfill
- Installation to spec with documented pipe slope and outlet location
- Photo documentation before backfill
- Hose test verification and written inspection checklist
- Permit coordination where required
Questions to ask during bidding:
- Are you licensed and insured in Utah?
- Can you show examples of similar retaining wall drainage projects?
- Who handles permits, and is that included in the bid?
- What is the minimum stone column width in your spec?
- How do you verify pipe slope before backfilling?
- What warranty do you offer on the drainage installation?
Pro Tip: The fastest way to spot a low-quality bid is to ask specifically about stone column width and fabric type. A contractor who cannot answer those questions, or who says "we use whatever gravel is on-site," is telling you the drainage will fail. Walk away.
A-to-zconstruction integrates drainage into every retaining wall project from the design phase, not as an afterthought. The crew handles excavation, drainage installation, masonry, and outlet routing under one contract, which eliminates the coordination gaps where drainage details typically get dropped. For walls with significant earthwork requirements, the foundation and drainage earthwork team handles excavation and outlet grading as part of the same scope.
Key Takeaways
Proper retaining wall drainage requires all four components working together: clean #57 stone, a sloped perforated pipe, non-woven geotextile fabric, and a clear daylighting outlet.
| Point | Details |
|---|---|
| Drainage is mandatory over 4 ft | Walls over 4 feet or in clay soil require a formal drainage system, not just weep holes. |
| Four components, no shortcuts | #57 stone, 4" perforated pipe at 1% slope, non-woven geotextile, and a daylighted outlet must all be present. |
| Hose test confirms performance | Water placed in the drainage zone should reach the outlet within about 60 seconds on a working system. |
| Retrofit costs more than new | Adding drainage to an existing wall costs significantly more than installing it during original construction. |
| A-to-zconstruction handles full scope | A-to-zconstruction integrates drainage, masonry, and earthwork under one contract for retaining wall projects in Utah. |
The part most contractors skip
The drainage conversation in retaining wall work almost always focuses on the pipe. That's the wrong focus. The pipe is the least likely component to fail on its own. What fails is the stone zone around it, and what kills the stone zone is missing or wrong fabric.
Here's what actually happens on low-bid jobs: the contractor installs a 4-inch pipe, throws some gravel behind the wall, and calls it done. No non-woven geotextile, or worse, woven fabric that lets fines through. Within a few wet seasons, the native soil migrates into the stone zone, the voids fill, and the pipe is now surrounded by compacted mud. The pipe is still there. It just doesn't drain anything.
The other mistake that gets less attention is surface water. Homeowners spend money on subsurface drainage and then leave a downspout dumping directly onto the backfill. The Allan Block water management guide is explicit: surface drainage must move away from both the top and bottom of the wall. A swale above the wall, or even just regrading so water sheds away from the backfill, can reduce the load on the subsurface system dramatically. Sometimes it's the only fix needed.
The walls that fail aren't usually the ones with no drainage at all. Those get caught during inspection or permit review. The ones that fail are the ones with drainage that looks right from the outside but was installed without the fabric, with the wrong stone, or with an outlet that was never properly daylighted. They pass visual inspection and fail five years later when nobody's looking.
A-to-zconstruction builds drainage in from the start
Drainage failures are almost always preventable, and the fix is almost always cheaper before the wall goes up than after it comes down. A-to-zconstruction's masonry and hardscape services cover the full scope: site assessment, earthwork and excavation, drainage system installation to spec, masonry wall construction, and outlet routing, all under one contract with one crew.

For Utah homeowners dealing with clay soils, hillside lots, or walls that are already showing signs of movement, A-to-zconstruction offers free estimates that include a drainage review. The team brings the same spec to every project: 12-inch #57 stone column, 4-inch pipe verified for slope, non-woven geotextile, and a documented outlet. No guesswork, no subcontracted drainage afterthought.
Request a free hardscape estimate and have your wall dimensions, site photos, and any known drainage issues ready. The estimate covers both new construction and retrofit drainage work across Cedar City and the broader Utah service area.
Useful sources and installation references
The technical specs in this article draw from manufacturer installation guides and engineering research. The sources below are the most useful for verifying drainage specs, pipe slope requirements, and geotextile selection.
| Source | Best Used For |
|---|---|
| Allan Block Drain Pipes Installation Guide | Height thresholds, pipe specs, toe drain requirements |
| Allan Block TS617 Water Management PDF | Surface diversion, chimney/blanket drains, perforations-down detail |
| Iowa State CTRE Maintainable Drains Report | Engineering basis for drainage as primary failure cause |
| BuildCalcHub Retaining Wall Drainage Guide | Hydrostatic pressure multiplier, hose test, common mistakes |
- The Allan Block installation guides are the primary reference for pipe diameter, stone spec, slope minimums, and vent spacing. Use them to verify any contractor's material list.
- The Iowa State CTRE report is the strongest engineering citation for the claim that poor drainage is the leading cause of earth retention failures.
- The BuildCalcHub guide covers the 2–3x pressure multiplier for saturated soil and the 60-second hose test expectation.
- For surface water management (swales, downspout routing, slopes above walls), the Allan Block TS617 PDF is the most detailed reference available without hiring a civil engineer.
FAQ
What is the best drainage system behind a retaining wall?
A 12-inch column of #57 washed stone surrounding a 4-inch perforated pipe sloped at 1% to a daylighting outlet, all wrapped in non-woven geotextile fabric, is the standard professional spec. All four components must be present for the system to work long-term.
Does a 2-foot retaining wall need drainage?
Walls under roughly 2 feet in well-draining sandy or gravelly soil may not require formal drainage. However, any 2-foot wall holding back clay soil, receiving irrigation runoff, or sitting at the base of a slope should have at least a stone column and outlet pipe installed.
What is the 1-3 rule for retaining walls?
The 1-3 rule is a general rule of thumb stating that a retaining wall's base width should be at least one-third of its height for stability. It is a structural sizing guideline, not a drainage rule, and does not replace engineered drainage requirements for walls over 4 feet.
What are the most common retaining wall drainage mistakes?
The most common mistakes are using crusher run or native soil instead of clean #57 washed stone, skipping non-woven geotextile fabric, installing insufficient stone width (under 12 inches), failing to slope the pipe at least 1%, and dead-ending the pipe without a daylighting outlet. Missing fabric is the mistake most likely to cause silent, gradual failure.