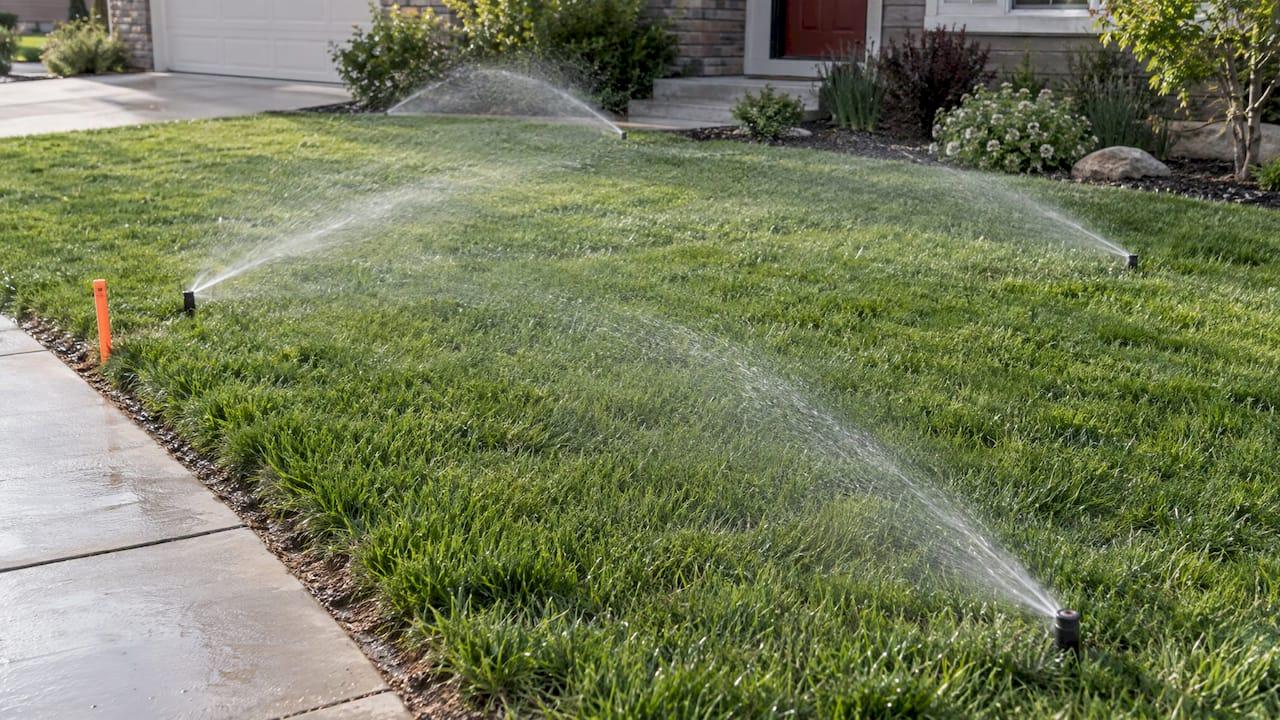
Space each sprinkler head no farther apart than its throw radius, so the spray from one head reaches the next head. This is called head-to-head coverage. A head that throws 15 feet should sit about 15 feet from its neighbors. Past that distance you get dry spots, and a layout that looks fine on paper fails the first hot July. Spacing is also the one part of a sprinkler system that is hard to fix after the trenches are filled, so it pays to get it right before anything goes in the ground.
We install irrigation systems as part of full landscape projects in Utah, and spacing is where a good layout starts. Below is how the rule works, how to adjust it for your yard, and the mistakes that cost homeowners the most.
TL;DR
- Space heads at the throw radius, which is 50% of the throw diameter. Colorado State University Extension says never go beyond 60% of the diameter.
- Head-to-head coverage means each head's spray reaches the neighboring heads. This is what evens out the weak outer edge of every spray pattern.
- Start at the corners and edges, then fill the interior. Part-circle heads go on borders, full-circle heads in the middle.
- Wind, low pressure and small or odd-shaped lawns call for tighter spacing, not wider.
- Plan spacing on paper before digging. Changing it after installation means trenching again.
Table of Contents
- What head-to-head coverage means
- How far apart sprinkler heads should be
- Square or triangular spacing
- How to lay out heads, step by step
- When to space heads closer
- Mistakes that cause dry spots and wasted water
- Why even coverage saves water
- Our perspective
- Have us plan and install your system
- FAQ
- Sources
What head-to-head coverage means
Every sprinkler waters unevenly. The area close to the head gets the most water, and the water tapers off toward the edge of the throw. If you set heads so the sprays only touch at their outer limits, the spots between them are watered thinly while the ground right next to each head is soaked.
Head-to-head coverage fixes this by letting the spray from one head reach the next head. Each spot in the lawn is then watered by two or more heads, and the thin outer edge of one pattern is topped up by its neighbors. UC Integrated Pest Management describes it as placing heads so each one's output overlaps a neighbor's by 50%, with square or triangle-shaped patterns being the common choices.
The practical rule is one line: spacing equals the throw radius. A head with a 10-foot radius goes about 10 feet from the next one. A head with a 15-foot radius goes about 15 feet away.
How far apart sprinkler heads should be
There are three ways to state the same rule, and they agree:
| Way of stating it | What it means | Example with a 15-ft radius head |
|---|---|---|
| Throw radius | Heads no farther apart than the radius | 15 ft apart |
| 50% of throw diameter | Same thing, expressed from the diameter | 50% of 30 ft = 15 ft |
| Hard ceiling | CSU Extension says never exceed 60% of the diameter | 18 ft at the absolute most |
Treat 50% as the target and 60% as a line you should not cross. The 60% figure is a limit for tight situations, not a layout goal. Staying at 50% leaves margin for the things a drawing never captures: a clogged nozzle, a pressure dip or a breezy afternoon.
Professional standards agree. The Florida Water Star technical manual requires head spacing no greater than 50% of the nozzle's throw diameter for its higher certification levels. It also allows no more than 1 foot of variation in spacing, and it asks for a head in every corner of the irrigated area. That is a good standard to hold your own layout to, even if you are nowhere near Florida.
Typical spacing by head type
The radius is printed on the nozzle or in the manufacturer's data table, so use the actual number for the head you are buying. As a rough guide, spray nozzle specifications list spacing of 5 to 15 feet at 15 to 30 psi (pounds per square inch, the unit for water pressure). Rotary nozzles cover a wider range and perform effectively at 20 to 55 psi, with the radius set by the pressure at the head.
In practice:
- Spray heads suit small lawns, narrow strips and planting beds. Spacing is short, in the 5 to 15 foot range.
- Rotors and rotary nozzles suit larger open lawns. They throw farther, so you need fewer heads, but the head-to-head rule still applies at their longer radius.
The maker's spacing chart is your ceiling. If the chart says 12 feet at your pressure, 12 feet is the most, not a suggestion.
Square or triangular spacing
The two common layouts both achieve head-to-head coverage.
Square spacing puts heads at the corners of a grid, like the squares on graph paper. It is easy to draw, easy to lay out with a tape measure, and it fits rectangular yards, which are most of them.
Triangular spacing staggers each row, like laying bricks. It can give more even coverage in open areas and wind resistance is better. But Florida Water Star warns that triangular spacing can create significant overspray in small areas and next to hard surfaces. Next to a driveway, a patio or a sidewalk, it throws water where you do not want it.

For most residential yards, square spacing along the edges and a clean grid is the safer choice. Use triangular spacing in big open lawns where the layout runs well away from pavement.
One rule beats regular patterns: CSU Extension notes that keeping spacing at or below half the throw diameter takes precedence over keeping a tidy pattern. If a perfect grid would stretch one gap too far, add a head and break the pattern.
How to lay out heads, step by step
Here is the sequence that works, whether you are drawing a plan or reviewing one from a contractor.
- Measure and map the lawn to scale. UC IPM's irrigation design guide says to mark slopes and obstructions that may block coverage, such as trees, walls and planters. Graph paper works. Note where your house, walkways and beds sit.
- Pick the head type and read its radius. Choose by area size. Use that head's printed radius and its allowed spacing range, not a generic number.
- Place a head in every corner. Corners and edges are where coverage is hardest to get and where dry spots usually appear, so lock them in first. Corner heads are part-circle (quarter-circle).
- Space the perimeter at the radius. Along straight edges, use half-circle heads at intervals equal to the radius. Aim the spray onto the lawn, not onto the sidewalk or street. CSU Extension advises lining the zone edges so water lands on turf.
- Fill the interior. Add full-circle heads where grid lines cross, keeping every gap at or under the radius. In a lawn wider than a head's throw, you will need heads down the middle as well.
- Check both directions. Measure spacing along the rows and along the columns. A layout can pass one way and fail the other.
- Add a head wherever a gap stretches. Curves, odd angles and small pockets often need an extra head. More heads is cheaper than replacing dead grass.
A worked example
Take a 30 by 60 foot rectangular lawn and heads with a 15-foot radius. Spacing at the radius means heads every 15 feet.
- Corners: four quarter-circle heads.
- Along each 60-foot edge, heads at 15, 30 and 45 feet from the corner: three half-circle heads per side, six in total.
- Along each 30-foot edge, one half-circle head at the 15-foot mark: two in total.
- Interior: full-circle heads on the grid. With 15-foot spacing across a 30-foot width, a row down the center line at 15 feet in from each long edge, spaced every 15 feet along the 60 feet.
That is a lot of heads, and it is meant to be. Fewer heads with wider gaps looks cheaper on the quote and costs more in water and dead turf. Head-to-head coverage uses water more evenly, so you do not have to run the zone long to rescue the weakest spots. If a rotor with a longer radius fits the lawn, the same logic applies at that larger radius with far fewer heads.
When to space heads closer
The 50% rule is a maximum for calm conditions with proper pressure. Three things push spacing tighter.
Wind
Wind pushes spray off course and shortens the effective throw on the downwind side. The Toro planning guide directs that where winds regularly exceed 8 mph, heads should be placed at 90% of the spray radius or less, depending on prevailing wind direction and speed. Florida Water Star adds that consistently windy locations may need even closer spacing. Open lots and hillsides in southern Utah are often breezy, so plan for it from the start.
Pressure
Published radius figures assume the pressure the manufacturer lists. If the pressure at the head is low, the spray falls short, the radius shrinks, and your spacing is suddenly too wide. If it is too high, the spray turns to mist and drifts. Before you finalize a layout, check what the system will actually deliver. Our guide to sprinkler water pressure covers how to read it and what to do when it is off.
Slopes, obstacles and odd shapes
Trees, walls and slopes block or distort spray. Curved lawn edges are handled by treating the curve as a series of straight segments, placing part-circle heads where they meet, and filling inward, with extra heads where the pattern leaves a gap. Slopes also let water run downhill, so the lower side usually needs more attention, shorter run times or tighter spacing so the upper side is not starved.
Mistakes that cause dry spots and wasted water
Spacing heads too far apart to save money. Heads too far apart dry out the center of each gap. Homeowners then run the system longer to compensate, which soaks the ground near each head. Water used evenly is water saved.
Mixing head types in one zone. The Toro guide says not to mix fixed-spray heads and rotors on the same zone, because the two apply water at different rates. One part of the lawn gets flooded while the other stays dry.
Ignoring the corners. The corners are the first place a lawn goes brown. Put a head in each one.
Spraying pavement. Water on a driveway or sidewalk is water wasted. Use part-circle heads on borders and point the arc at the turf.
Trusting a layout you cannot change. Once pipe is buried, adjusting spacing takes trenching and fittings. Getting the plan right at the start is far cheaper than a retrofit.
Skipping seasonal checks. Even a perfect layout drifts as heads tilt, nozzles clog and grass grows over them. Property owners who manage several homes can build a head check into a lawn care schedule for rentals. Utah homeowners should also plan for sprinkler winterization before the first hard freeze.
Why even coverage saves water
Uniform coverage is the point of all of this. When every part of the lawn gets close to the same amount, you can run each zone for a shorter time and still keep the weakest area green. That is why a system that looks like it has too many heads often ends up using less water. If you are interested in cutting outdoor water use further, there are practical ways to reuse rainwater at home, and for areas where turf is hard to justify, see our look at drought tolerant lawn alternatives.
Budget matters too. Our irrigation system cost guide explains what drives the price, and our overview of irrigation system types helps you choose between spray, rotor and drip for each part of the yard.
Our perspective
Spacing is where we see an irrigation job succeed or fail, and it is decided before the first trench is dug. A sprinkler layout is not a set of heads dropped on a lawn. It is a drawing in which every head is tied to its neighbors, its zone and the pressure that feeds it.
We build irrigation as part of a complete outdoor project. Our in-house, licensed crew handles the work from the first estimate to final completion, without subcontractors. That matters for sprinklers more than most trades, because the layout has to fit everything around it: the concrete, the pavers, the retaining walls, the sod and the turf. When one crew does all of it, the heads are planned around the patio and the driveway edge instead of being squeezed in afterward.
Our approach is built on a single point of contact, so the person you talk to at the estimate is the person who answers when you have a question about zones, head types or coverage. And we know Utah's climate and codes, which is why we plan for wind, pressure and winter from day one.
Jake
Have us plan and install your system
If you would rather not draw a head layout and trench it yourself, our team designs and installs irrigation and sprinkler systems for Utah homes. Published pricing for irrigation and sprinkler systems is $3,000 to $8,000 as a one-off project, and we work from a fixed bid.

Because we also handle concrete, pavers, retaining walls, sod and artificial turf, the sprinkler plan is drawn alongside the rest of your project. Browse our landscaping services or request a free sprinkler and irrigation estimate.
FAQ
How far apart should sprinkler heads be?
No farther than the head's throw radius, which equals 50% of its throw diameter. A head with a 15-foot radius should be about 15 feet from its neighbors. CSU Extension sets 60% of the diameter as the absolute limit.
Can I space sprinkler heads farther apart to use fewer heads?
Wider gaps leave the middle of each gap under-watered, which makes dry, brown patches. Fewer heads also tend to lead to longer run times to compensate. If you want fewer heads, choose a head with a longer radius and keep the spacing at that radius.
Where do I put the first sprinkler head?
Start in the corners, then space heads along the edges at the throw radius, then fill the interior. Corners and edges are the hardest places to cover, so settling them first prevents the most common dry spots. Part-circle heads go on borders and corners, full-circle heads in the middle.
Do wind and low pressure change the spacing?
Yes, both. In regular winds above 8 mph, the Toro planning guide calls for spacing of 90% of the spray radius or less. Low pressure shortens the throw, so the radius you plan with must be the radius you actually get at the head.
Can spray heads and rotors share a zone?
No. They apply water at different rates, so one type will over-water or under-water compared to the other. Keep each head type on its own zone.
Sources
- Watering Efficiently, CSU Extension
- Healthy Lawns: Irrigation System Design, UC IPM
- Sprinkler spacing, Florida Water Star
- Sprinkler Planning & Installation Guide
- Spray nozzle specifications
- Rotary nozzle installation guide