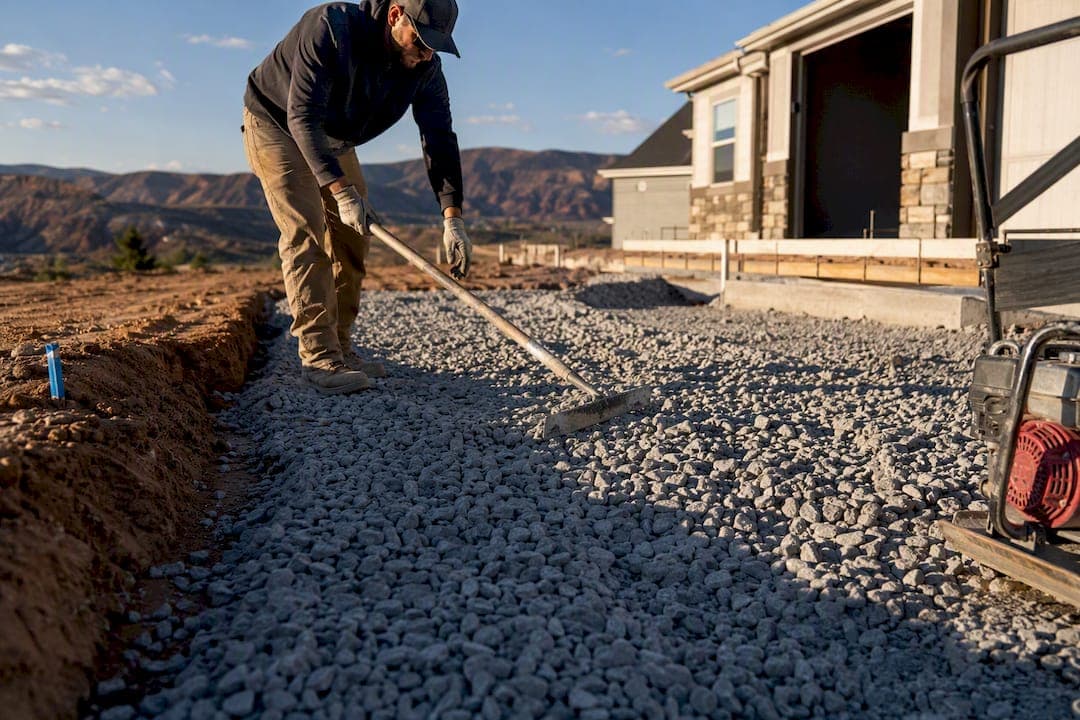
A durable driveway base is a compacted, layered assembly of angular crushed aggregate built over a stripped, well-drained subgrade. Get three things right and the rest falls into place: excavate deep enough for your surface type, set a slope so water runs off instead of pooling, and compact the aggregate in lifts rather than dumping it all at once. Skip any of the three and cracking or rutting shows up within a season or two.
TL;DR:
- Proper driveway base requires at least 4 inches of angular crushed aggregate that is carefully compacted in lifts to prevent cracking and rutting.
- Excavation should include removing all organic matter and grading to ensure a 1 to 2% slope away from structures, with verification at multiple points to avoid water pooling.
- Subgrade testing through proof-rolling and inspecting for sponginess or footprints is crucial, especially on clay or moist soils, which may need additional stabilization.
- Use geotextile fabric on clay or silty soils to prevent contamination of the base, and avoid driving over frozen ground to prevent voids and settlement issues.
- Most driveway failures stem from inadequate compaction, so renting the right equipment and following lift-by-lift compaction to 90-95% of standard Proctor density is essential for long-term durability.
Table of Contents
- What Materials Make the Best Driveway Base?
- How Deep Should You Excavate for a Driveway?
- Do You Need to Test or Stabilize the Subgrade First?
- How Do You Compact Base Material Correctly?
- How Do You Stop Drainage Problems From Ruining a New Driveway?
- What Tools Do You Need and When Should You Call a Contractor?
- What A to Z Construction's Crews See on Driveway Base Jobs
- The Base Matters More Than the Surface, and Most Guides Bury That
- How A to Z Construction Handles Driveway Base Work in Utah
- Where to Check Layer Charts and Material Calculators
- Sources
- FAQ
What Materials Make the Best Driveway Base?
Not every gravel product qualifies as base material, and that distinction trips up more DIYers than any other step. What you want is something with sharp, angular edges that lock together when compacted, not smooth stones that shift under load.
Dense-graded aggregate (DGA) and crusher run are the standard choices. Both mix crushed stone with stone dust in graduated sizes, so smaller particles fill the gaps between larger ones and create a tight, load-bearing mat. #57 stone works well as an open-graded drainage layer under a base course, while #3 stone handles larger voids in poorly draining soil. Recycled crushed concrete has become a popular budget option and performs almost as well as virgin limestone once compacted, since the crushing process leaves it just as angular.
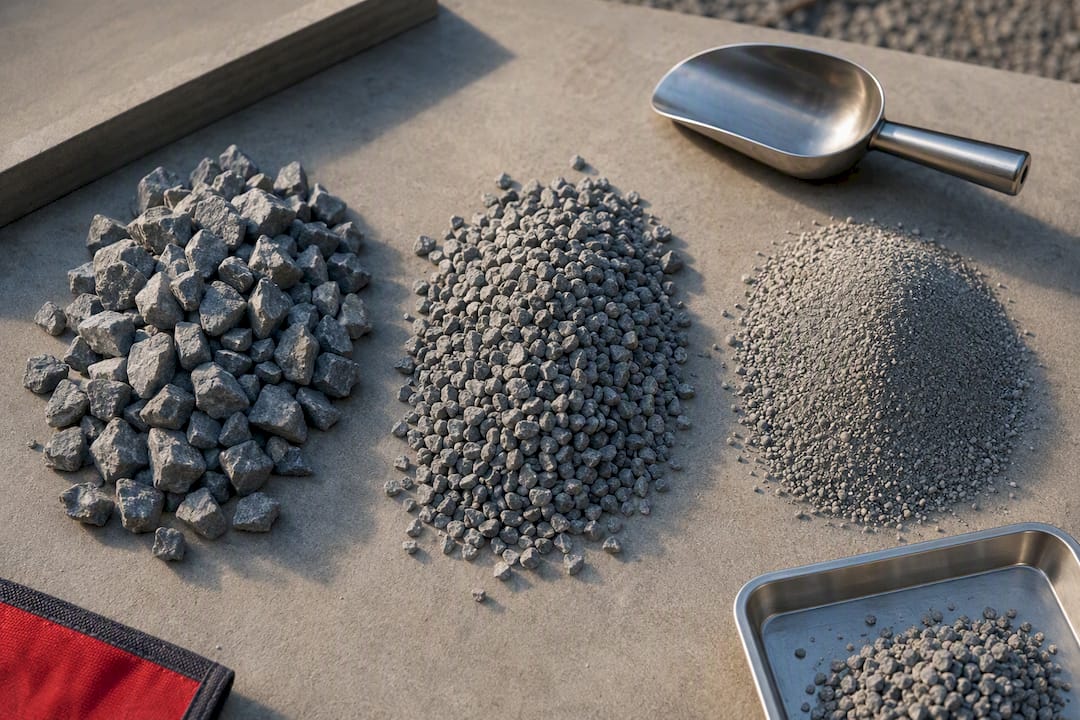
What you want to avoid: rounded river rock, pea gravel, and loose sand as structural base. They look fine on delivery day, but rounded aggregate never locks into an interlocking matrix, and vehicle weight just pushes it apart. That's why angular crushed stone consistently outperforms rounded gravel in every load test contractors run.
Compacted thickness depends on what's going on top and how heavy your traffic is:
- Gravel driveway: 6 to 9 inches total, split between a coarser sub-base and a finer top-dress layer.
- Asphalt driveway: 4 to 6 inches of compacted base beneath 2 to 3 inches of asphalt.
- Concrete driveway: 4 inches of compacted base beneath the slab, more if you expect an RV or heavy trailer.
- Paver driveway: 4 to 6 inches of base plus a 1-inch bedding layer of coarse sand or stone dust.
Heavier vehicles, trucks, and RVs require thicker bases to support the increased load. If you're deciding between budget and performance, spend the savings on aggregate quality before you spend it on total depth. Four inches of well-graded, angular stone beats six inches of poorly graded gravel.
How Deep Should You Excavate for a Driveway?
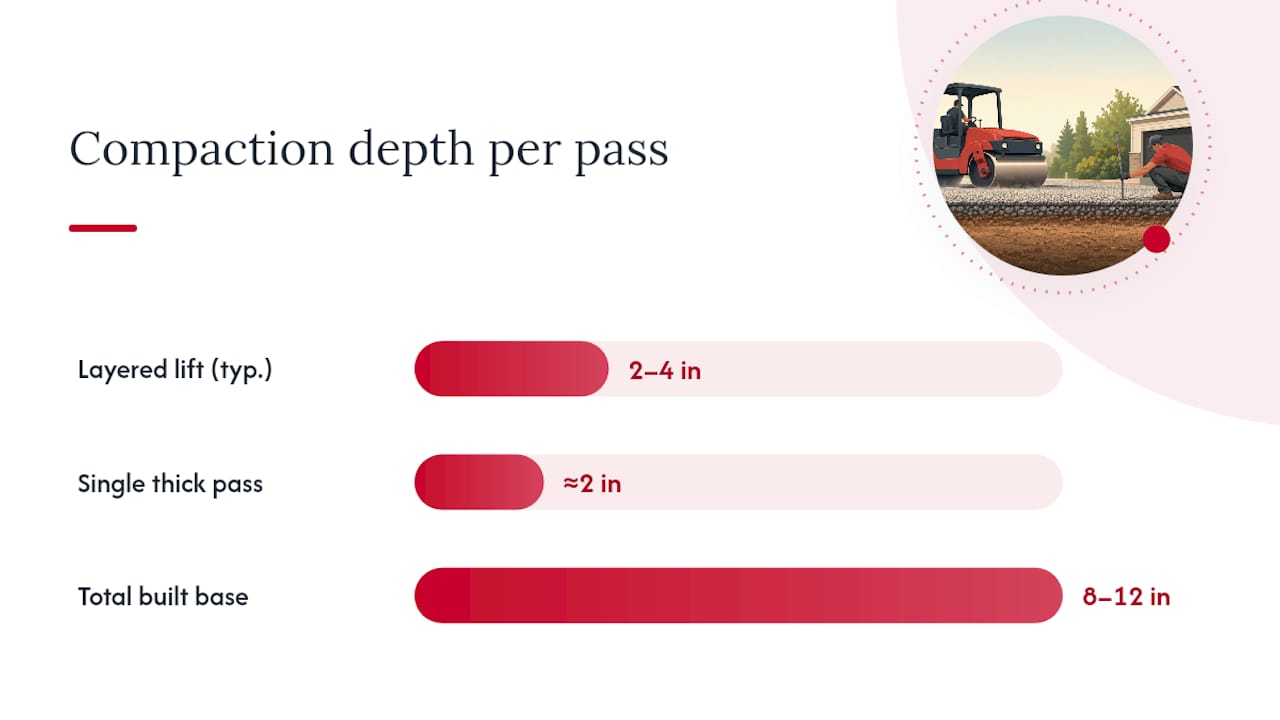
Excavation depth is simple math once you know your layers: add up every compacted layer you plan to place, then add an over-excavation allowance for soft spots or fabric. For most residential driveways, that lands you between 8 and 12 inches total, covering base plus whatever surface you're installing.
Grading is where a lot of driveways quietly fail, because water damage rarely announces itself until the second or third winter. Here's the sequence that keeps you out of trouble:
- Strip all topsoil and organic matter down to stable native soil. Roots and dark, spongy dirt have to go, no exceptions, because they compress unevenly over time.
- Set stakes and string lines (or a laser level for longer runs) along both edges of the driveway to mark your target grade.
- Build in slope from the start. Aim for 1 to 2% longitudinal slope running away from structures, and a 2% cross-slope or crown on wider drives so water sheds to both sides.
- Check every corner and low point with a level before ordering aggregate. A driveway that looks flat to the eye can still hide a low spot that ponds water for days.
- Verify the final excavated grade matches your calculated depth everywhere, not just at the ends. Contractors run a story pole or laser at multiple points because middle sag is the most common excavation error.
Never grade a driveway to drain toward your foundation, a neighbor's yard, or a low point without an outlet. Utah's clay soils in particular hold water once it collects, and a driveway that dumps runoff against a foundation wall creates a much bigger repair bill than the driveway itself.
Do You Need to Test or Stabilize the Subgrade First?
Your subgrade, the native soil under everything, decides whether your base holds up or slowly sinks. Two simple checks tell you most of what you need to know before you spend a dollar on aggregate.
First, walk the stripped subgrade a day or two after a rain. If your boot leaves a visible footprint or the ground feels spongy underfoot, that soil needs help before it can support a base layer. Second, once you've got some fill down, run a proof-roll: drive a loaded pickup or a rented roller slowly across the compacted surface and watch for rutting, pumping, or visible deflection. Soft spots that show up under proof-rolling need attention now, not after the surface goes down.
Geotextile fabric earns its place on clay or silty subgrades. It doesn't add strength on its own, but it separates fine soil from your base aggregate so clay particles can't migrate upward and contaminate the stone over time. Skip it on stable sandy or gravelly subgrade, but treat it as close to mandatory anywhere the soil holds moisture.
- Firm, well-draining native soil: proceed with normal base depth.
- Soft or spongy soil that leaves footprints: over-excavate an extra 4 to 6 inches and bring in structural fill.
- Heavy clay or any organic material: geotextile fabric plus extra base thickness, or call a geotechnical professional if the area is large.
- Standing water after rain: address drainage before you place any base material.
Pro Tip: Never compact base material over frozen ground. Frost traps moisture beneath the surface, and once it thaws, that trapped water leaves voids under your compacted layer that no amount of surface repair will fix.
How Do You Compact Base Material Correctly?
This is the step most DIY driveways get wrong, and it's not because homeowners skip compaction entirely. It's that they compact one thick layer instead of several thin ones.
Contractors build base in lifts, meaning you place 2 to 4 inches of loose aggregate, compact it to refusal, then place the next layer on top. Try to compact 8 inches of loose stone in one pass and the compactor only affects the top couple of inches. The bottom stays loose, and that's exactly where rutting starts six months later.
Moisture matters almost as much as lift thickness. Aggregate that's bone dry won't lock together properly, and aggregate that's saturated turns into a slurry under the roller. Light misting with a hose works fine for small residential jobs.
Equipment scales with the job:
- Plate compactor: fine for gravel driveways and smaller paver projects, rentable by the day from most equipment yards.
- Vibratory roller: better for larger concrete or asphalt bases where you need deeper, more uniform density.
- Walk-behind or ride-on roller: worth renting once your driveway runs past a couple hundred square feet, since plate compactors move slowly over larger areas.
Contractors typically target 90 to 95% of Standard Proctor density for driveway base, verified with a nuclear density gauge on commercial jobs or a proof-roll and visual check on residential ones.
A properly compacted 6-inch aggregate base can reduce subgrade stress from roughly 33 psi to about 2.2 psi under a typical passenger tire. That drop in pressure is the entire reason base preparation exists: it spreads a concentrated point load across a much wider footprint before it ever reaches the soil underneath.
How Do You Stop Drainage Problems From Ruining a New Driveway?
Water is the single biggest threat to a driveway base, more than traffic load and more than the wrong aggregate. Get the perimeter details right and most drainage failures never happen.
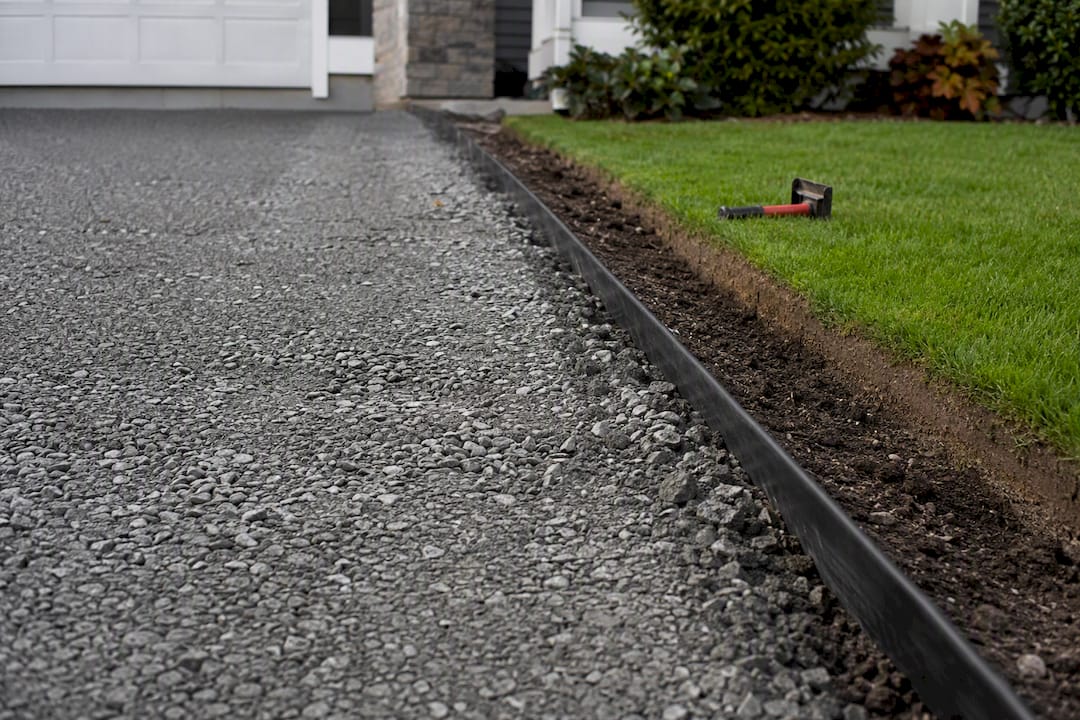
Edge restraint keeps your compacted base from spreading sideways under load. Timber or stone curbs work well for gravel drives, paver edging locks paver bases in place, and a simply compacted shoulder handles lighter asphalt or concrete edges where the grade allows.
For perimeter water control, match the fix to the site:
- Swale: a shallow graded channel, good for gently sloped lots with room to spare.
- French drain: a gravel-filled trench with perforated pipe, useful where space is tight or water collects against a retaining wall.
- Catch basin: a grated inlet tied to piped drainage, best where a low point can't be graded away.
In freeze-thaw climates, water trapped under a driveway base expands and heaves the surface. Maintaining consistent slope and avoiding any low spot that traps water matters more here than almost anywhere else, and a slightly deeper base gives you a buffer against frost penetration.
Before you order surface material, walk the site one more time: confirm slope runs away from structures, confirm no low points hold water, and confirm edge restraint is in place wherever the base meets soft ground.
What Tools Do You Need and When Should You Call a Contractor?
A handful of rented tools cover most residential jobs. A plate compactor or small roller handles the aggregate, a laser level keeps your grade honest across the whole driveway, and a skid steer earns its rental cost fast once you're moving more than a few tons of material by hand.
Three checks tell you whether the base is ready for surfacing:
- Proof-roll test: drive a loaded vehicle slowly across the compacted base and watch for rutting or deflection.
- No-footprint test: walk the surface in work boots. Visible footprints mean more compaction passes are needed.
- Laser grade check: confirm slope and elevation match your original layout at multiple points, not just the corners.
Call a licensed contractor when you're dealing with reactive or consistently soft soil, heavy vehicle loads like RVs or commercial trucks, complex drainage that needs engineered solutions, or any job where a permit or geotechnical report is required. Those situations carry real cost if they go wrong, and they're exactly where A-to-zconstruction's earthwork crews earn their keep.
What A to Z Construction's Crews See on Driveway Base Jobs
Most homeowners can handle the basics: stripping topsoil, setting rough grade with stakes, and compacting a straightforward gravel base with a rented plate compactor. Where it gets harder is anything involving unstable soil, tight drainage margins, or a surface that needs engineered support, concrete and asphalt in particular don't forgive a soft subgrade the way gravel sometimes can.
A-to-zconstruction's crews get called most often to fix, not build, and the pattern repeats across jobs:
- Under-excavated bases where the original installer skipped the topsoil strip and built straight over organic soil, requiring full removal and re-layering.
- Single thick lifts that were never properly compacted at depth, leaving a hollow zone that shows up as a soft spot year later.
- Edge failures where gravel or paver bases spread sideways because nobody installed restraint, requiring new curbing and re-compaction of the shoulder.
- Drainage retrofits where water pooling against a foundation forced a French drain installation after the fact, far more disruptive than getting the grade right the first time.
A-to-zconstruction's earthwork and excavation crews handle these corrections regularly across projects, and the fix is almost always cheaper the earlier it's caught. For readers considering concrete specifically, the gravel base depth guidance for concrete slabs covers the specific compaction targets that matter most under a poured surface, and the site prep mistakes piece walks through real cost consequences of getting this stage wrong.
The Base Matters More Than the Surface, and Most Guides Bury That
Here's the uncomfortable truth about driveway projects: the surface material gets all the attention, concrete versus asphalt versus pavers, while the base underneath decides whether any of those surfaces survive five years. I'd argue the industry has this backwards. A mediocre concrete pour over an excellent base will outlast a premium concrete pour over a base someone rushed.
The conventional DIY advice online tends to treat compaction as an afterthought, one pass with a rented plate compactor and move on. That's where most driveway failures actually start. Lift-by-lift compaction with real density targets isn't optional extra credit; it's the difference between a driveway that holds up and one that ruts by year three.
If you take one thing from this guide, prioritize subgrade evaluation before anything else. A perfect layer recipe on top of unstable clay soil still fails. Test the ground first, choose your aggregate second, and treat compaction as the step that actually protects your investment, not the step you rush to get to the fun part.
— Jake
How A to Z Construction Handles Driveway Base Work in Utah
A-to-zconstruction is the option for homeowners who want their driveway base done once, correctly, instead of diagnosed and repaired twice. Where a DIY build depends on rented equipment and guesswork about soil conditions, an in-house crew handles excavation, grading, drainage, and compaction as one coordinated job rather than a string of separate rentals and weekend attempts.

A-to-zconstruction's earthwork services cover excavation, subgrade evaluation, and drainage design, and that same crew carries the project through to structural and hardscape work if you're pouring a new concrete driveway or building a paver surface on top. Hiring a licensed crew makes the most sense when soil conditions are uncertain, when heavy vehicles will use the drive regularly, or when you want a warranty behind the work instead of a weekend project you're troubleshooting alone. If your site has any of the soft-soil or drainage complications covered above, request a quote through A-to-zconstruction's contact page and get a crew out to look at the ground before you order a single ton of gravel.
Where to Check Layer Charts and Material Calculators
For running your own numbers before calling a contractor, the driveway base preparation calculator estimates material volume and compaction loss. The layer chart from subgrade to surface breaks down recommended depths by driveway type, and A-to-zconstruction's concrete driveway installation guide covers base prep specific to poured concrete.
Sources
- Driveway Base Preparation Calculator & Guide
- Driveway base layers: From subgrade to surface
- Complete guide to road base material for driveways and construction
FAQ
What Is the Best Base to Put Down for a Driveway?
Dense-graded aggregate or crusher run, angular crushed stone that locks together when compacted, is the standard choice across gravel, asphalt, concrete, and paver driveways.
What Should I Put Down Before a Gravel Driveway?
Strip topsoil down to stable soil, add geotextile fabric on clay or silty ground, then build 6 to 9 inches of compacted crushed stone in lifts before the finish layer of gravel goes on top.
Can I Pour Concrete Directly on Dirt?
No. Concrete needs 4 inches or more of compacted crushed stone base underneath; pouring directly on native soil leads to cracking as the ground settles or shifts with moisture.
How Should I Prepare My Base for Driveway Pavers?
Excavate for 4 to 6 inches of compacted aggregate base plus a 1 inch bedding layer of coarse sand or stone dust, and make sure edge restraint is installed before pavers go down to stop lateral spread.