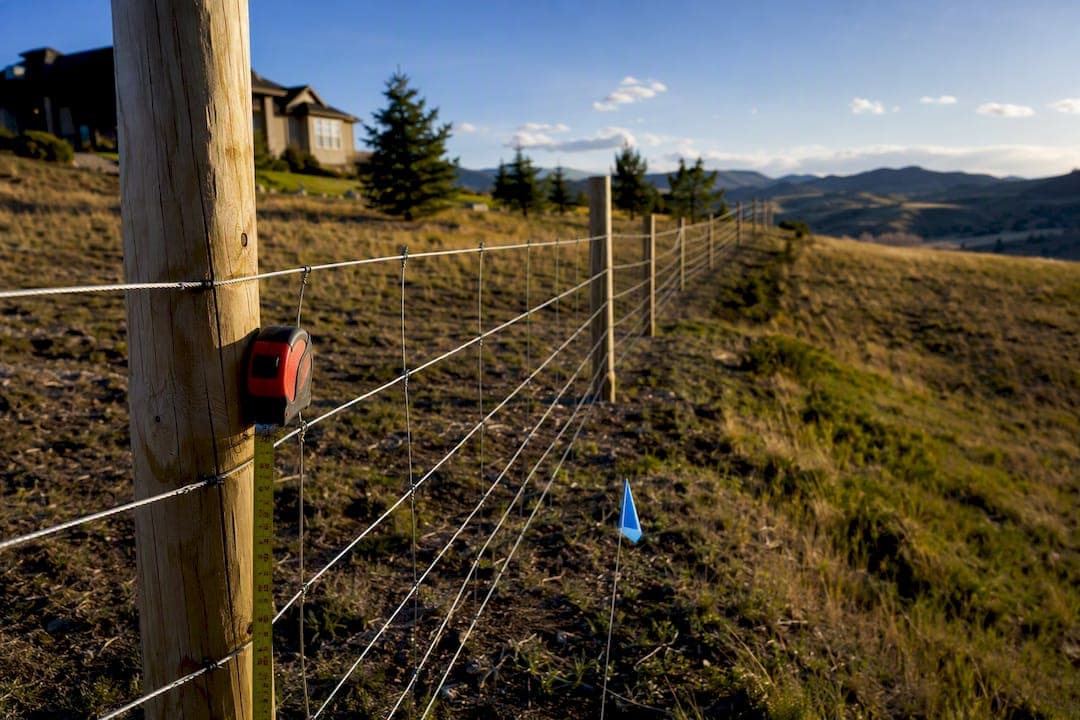
For most residential fences, plan on 6 to 8 feet of post spacing for wood, panel-width spacing for vinyl or ornamental fencing, and 8 to 10 feet for chain link. Set every post at least one-third of its length into the ground, or 6 inches below your local frost line, whichever runs deeper. Tighten those numbers whenever your fence gets tall, heavy, or exposed to wind.
TL;DR:
- Fence spacing should be tighter on windy or exposed lots, with 6 feet for wood fences and 8 feet for chain link on less exposed sites.
- Post depth of at least one-third of post length or 6 inches below the frost line is critical to prevent leaning, especially in cold climates.
- Adjust spacing and footing depth based on soil type, slope, and wind exposure, opting for tighter spacing in loose, clay, or fill soils.
- Corner and gate posts should be larger, set deeper by 6 to 12 inches, and secured with increased concrete volume to withstand additional leverage.
- Using closer spacing of 6 to 7 feet for wood fences offers long-term benefits like fewer repairs, straighter lines, and gates that operate smoothly.
Table of Contents
- Fence post spacing by type: wood, vinyl, chain link, and wire
- How deep should fence posts be set?
- When should you adjust spacing for soil and slope?
- How should gate and corner posts differ from line posts?
- How many fence posts do you need, and what does it cost?
- Why do fences sag, lean, or develop binding gates?
- How A-to-zconstruction applies these spacing rules on real jobs
- The honest trade-off between 6 ft and 8 ft spacing
- Get a Free Estimate for Your Fence Installation
- Sources
- FAQ
Fence post spacing by type: wood, vinyl, chain link, and wire
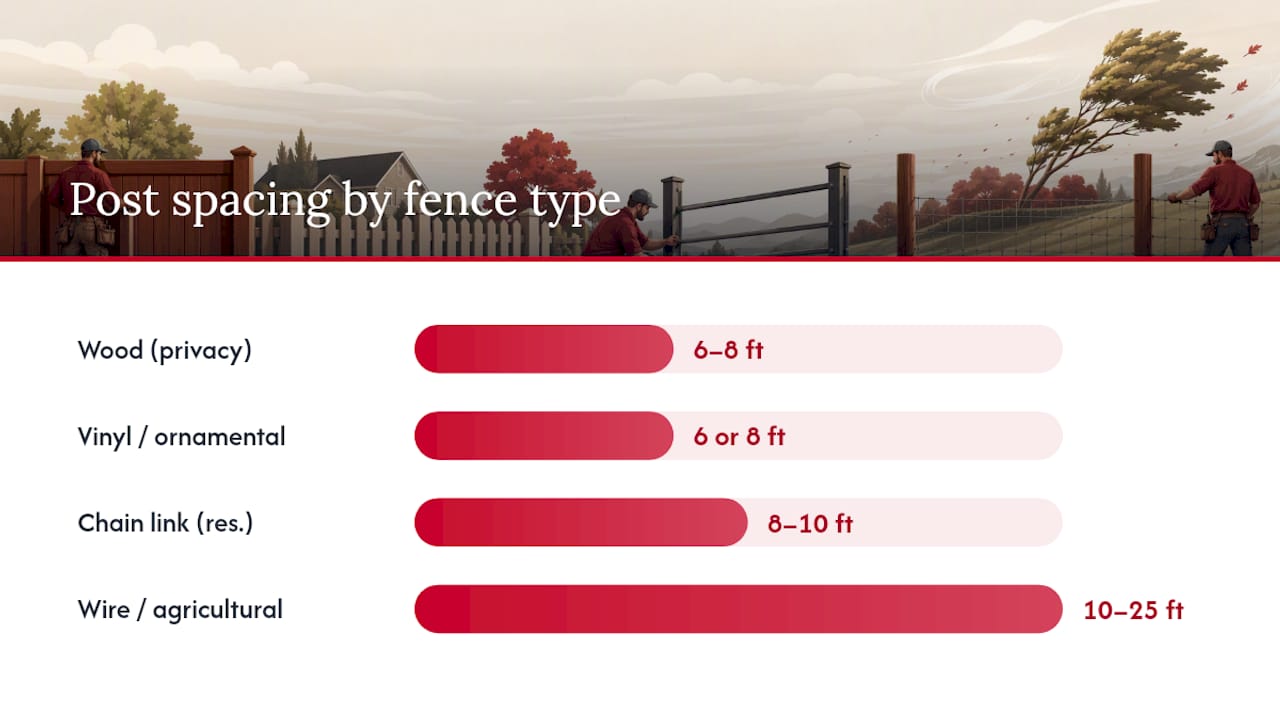
The right spacing number depends almost entirely on what you're building, since a 6-foot cedar privacy panel carries far more wind load than an open wire fence strung across a pasture.
Wood fences give you the most flexibility, and also the most room to get it wrong. Most wood privacy fences run on 6 to 8 foot on-center spacing, and 8 feet is common for standard 6-foot-tall fences on calm, stable ground. Drop to 6-foot spacing for taller fences, board-on-board designs, or anywhere wind or soft soil is a factor, according to contractor spacing standards from FenceTracer.
- Privacy fences (solid panels): 6 to 8 ft, tighter on exposed or windy lots
- Picket fences: 6 to 8 ft, since the open design sheds wind more easily
- Horizontal board fences: 6 to 7 ft, because horizontal boards need closer rail support
- Board-on-board fences: 6 ft, since doubled boards roughly double the wind surface
Family Handyman's how-to guidance echoes this same pattern: default to 8 feet for a typical wood fence, but tighten spacing on heavier or more exposed installations to keep the fence line straight over time.
Vinyl and ornamental aluminum work differently, and this trips up more homeowners than any other spacing question. These systems come as manufactured panels with a fixed width, usually 6 or 8 feet, so your post spacing isn't really a choice. It's a measurement. You match the panel dimension plus the post's own width, according to manufacturer-driven spacing guidance for vinyl and ornamental systems. Try to force a custom on-center distance and you'll end up trimming panels or leaving unsightly gaps. Measure your total run, divide by the panel width, and adjust the layout before you dig a single hole.
Chain link follows its own residential standard: 10-foot line-post spacing is typical for home installations. Commercial runs, heavier-gauge fabric, or slatted privacy inserts should tighten that to 8 feet, since the added wind surface and fabric weight put more lateral load on each post. One detail homeowners often miss: the last line post before a corner, end, or gate post should sit no more than 8 feet from that terminal post, according to the same spacing breakdown, regardless of how the rest of the run is spaced.
Wire and agricultural fencing allows the widest spacing of any fence type, running 10 to 25 feet between posts. Open wire doesn't catch wind the way solid panels do, so posts mainly need to resist tension and occasional animal pressure rather than a sail-like load. Penn State Extension's guidance on livestock fence construction confirms that wider spacing works fine for boundary and cross fencing, but recommends stepping down toward the tighter end of that range on slopes, in high-traffic livestock areas, or wherever animals are likely to push against the line.
How deep should fence posts be set?
Depth matters as much as spacing, and it's the rule most DIY installers underestimate. The baseline is the one-third rule: roughly a third of your post's total length should sit below grade. A 6-foot fence with 8-foot posts needs about 32 inches in the ground under calm conditions.
Frost changes that math completely. In any region where the ground freezes, your posts need to sit at least 6 inches below the local frost line, even if that's deeper than one-third of the post length, according to FenceTracer's depth guidance. Frost heave pushes shallow posts up and out of alignment over a single winter, which is why so many leaning fences in cold climates trace back to a footing that looked fine on installation day.
Footing diameter needs to scale with the post, not just the depth. A standard 4x4 post typically wants an 8 to 10 inch diameter hole, while a 6x6 post or a gate post does better in a 12 inch hole. For concrete estimates, an 8 inch diameter hole at 2 feet deep takes roughly one 60-pound bag, a 10 inch hole at 2.5 feet runs closer to two bags, and a 12 inch hole at 3 feet often needs three bags or more, depending on the mix you're using.
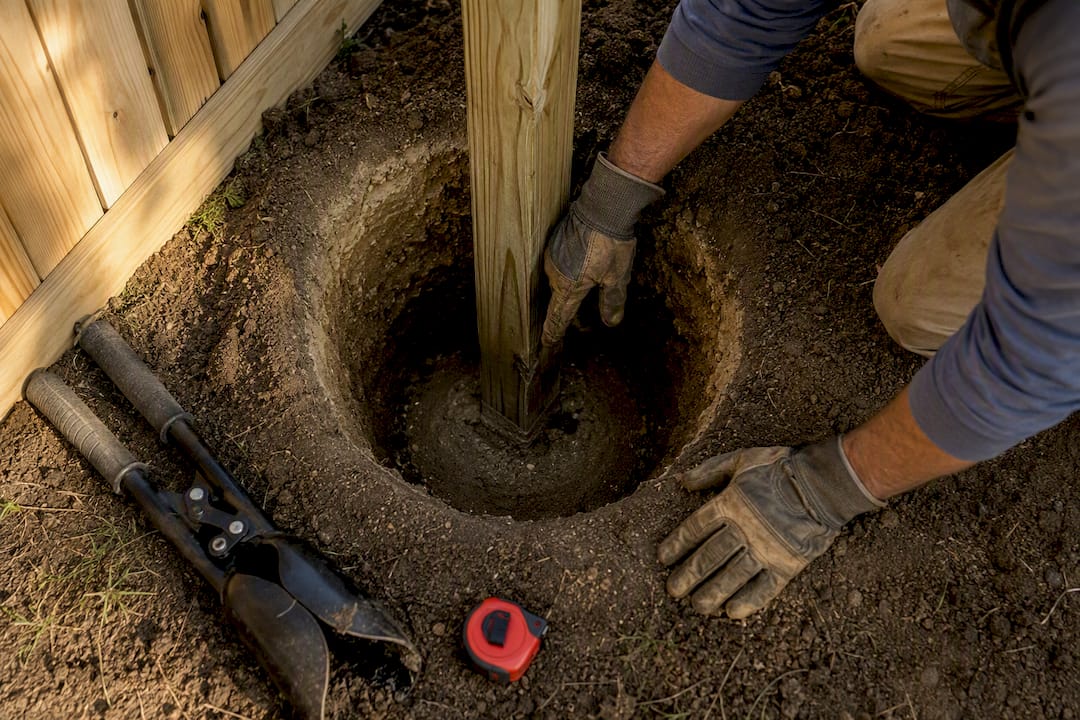
Pro Tip: Bell the bottom of your footing, widening it slightly below grade, in any frost-prone area. The wider base resists the upward push of frost heave far better than a straight-sided cylinder, and it's a five-minute step with a post-hole digger.
If you want a deeper look at how bell footings and concrete volume work together, the same logic applies to retaining wall footing design, where resisting lateral and upward forces follows nearly identical principles.
When should you adjust spacing for soil and slope?
Standard spacing charts assume decent, compacted soil. Real yards rarely cooperate that neatly, and the ground under your fence line changes the math more than most spacing calculators admit.
- Sandy soil drains fast but holds a post poorly, since loose grains slide rather than lock around the footing. Add 25 to 30% more depth than the standard chart calls for, and tighten wood privacy spacing to 6 or 7 feet rather than pushing to 8, per soil-based fence guidance.
- Clay soil grips a footing tightly when dry but expands when wet, and that seasonal shrink-swell cycle can heave or tilt posts over a few years. Widen the footing diameter for extra bearing surface, and tighten spacing if your soil report or local extension office flags expansive clay.
- Fill dirt, especially anything placed within the last year or two, hasn't fully settled and won't support a post the way native soil does. Go roughly 50% deeper than standard depth, and consider tighter spacing until the fill has a season or two to compact.
- Sloped lots force a choice between racking (angling the panels to follow the grade) and stepping (keeping panels level and stair-stepping the fence downhill). Racked fences generally tolerate standard spacing, but stepped fences on steep grades often need posts a foot or two shorter than average, per bay, to keep footing depth consistent.
Wind adds its own multiplier. Tightening line-post spacing from 10 feet to 8 feet cuts the wind load carried by each post by roughly 20%, and dropping to 6-foot spacing reduces it by close to 40%, according to wind-load modeling for fence spacing. On an exposed ridge or open lot with no windbreak, that difference is often the gap between a fence that survives a decade of storms and one that starts leaning after the first bad season.
The NRCS also frames soil suitability as a site-planning step, not an afterthought, in its fence construction guidance, which is worth checking before you finalize any layout on unfamiliar ground.
How should gate and corner posts differ from line posts?
Every line post in a fence run carries roughly the same load. Corner and gate posts don't. They absorb leverage from two directions at once, or from a swinging gate that hangs entirely off one side, so treating them the same as a standard line post is one of the most common setup mistakes.
- Upsize the post itself. Use 6x6 lumber instead of 4x4 for wood gate and corner posts, or a heavier-gauge metal post for chain link and ornamental systems.
- Set them deeper. Go 6 to 12 inches deeper than your standard line-post depth to resist the added leverage.
- Pour more concrete. Increase concrete volume by about 50% compared to a standard line post, since contractors rely on that extra mass to keep terminal posts from shifting under gate stress.
- Never stretch a bay to fit a gate. Treat the gate opening as its own dedicated bay with its own post pair, and plan the adjacent panels around that fixed width rather than compressing or stretching a run to make it fit.
- Brace heavy gates properly. Add diagonal bracing across the gate frame, and consider a steel frame insert on any gate wider than 4 feet, since sag at the latch side is almost always a bracing failure, not a post failure.
How many fence posts do you need, and what does it cost?
Counting posts is simple arithmetic once you've picked a spacing number: posts = (run length ÷ spacing) + 1, then add extra posts for every corner and gate.
| Run length | Spacing | Line posts needed | Approx. concrete bags* |
|---|---|---|---|
| 100 ft | 8 ft | 14 | 14–28 (1–2 bags/post) |
| 100 ft | 6 ft | 18 | 18–36 (1–2 bags/post) |
| — | 8 ft | 39 | 39–78 (1–2 bags/post) |
| — | 6 ft | 51 | 51–102 (1–2 bags/post) |
*Bag counts vary by hole diameter and depth; figures assume standard 4x4 line posts, not gate or corner posts.
Look at the 100-foot example: dropping from 8-foot to 6-foot spacing adds 4 extra posts and roughly a dozen more bags of concrete. That's real money, but it's also real wind resistance and rail support, especially on a taller or more exposed fence.
A complete homeowner estimate should include:
- Line posts, plus corner and gate posts sized separately
- Concrete, sized to hole diameter and depth, not just post count
- Post caps and hardware (hinges, latches, brackets)
- Rails and panel material for the full run
- A labor allowance if you're hiring out any portion of the install
Why do fences sag, lean, or develop binding gates?
Most fence failures trace back to one of three root causes, and spacing is a factor in nearly all of them.
- Sagging rails almost always mean the spacing was too wide for the rail's thickness, or the wood has weathered and lost stiffness over time.
- Leaning posts point to shallow footings, frost heave, or a footing set above the recommended one-third or frost-line depth.
- Binding or dragging gates usually mean the terminal post wasn't sized or set deep enough to hold a swinging load without shifting.
For short-term relief, you can brace a leaning post with a temporary stake, or add a mid-span support to a sagging rail while you plan a fix. Neither solves the underlying problem. A permanent fix means resetting the post at proper depth, tightening spacing on the affected bay, or replacing the undersized rail entirely.
Pro Tip: Walk your fence line every spring and check for wobble at each post base. A post that rocks even slightly at ground level is telling you the footing has loosened, and catching that early is far cheaper than rebuilding an entire bay after a storm.
How A-to-zconstruction applies these spacing rules on real jobs
As a licensed general contractor with more than 500 completed projects, A-to-zconstruction treats spacing charts as a starting point, not a final answer. Every site has its own soil, slope, and exposure, and that's exactly where a chart stops being enough.
Fill dirt, steep grades, and gate-heavy layouts are the three conditions that most often trigger an on-site evaluation before A-to-zconstruction finalizes a spacing plan. A yard with recently placed fill might look flat and ready, but without knowing how long it's had to settle, a crew can't safely assume standard depth will hold. The same goes for a fence line crossing a slope, where the choice between racking and stepping changes post length bay by bay.
A typical field decision looks like this: a homeowner wants 8-foot spacing to save on materials, but the lot sits on a wind-exposed ridge with sandy soil. The crew tightens to 6-foot spacing and adds footing depth, trading a modest material cost increase for a fence that won't need a callback in three years.
The honest trade-off between 6 ft and 8 ft spacing
If you're on the fence about spacing, and budget allows it, default to 6 or 7 feet for a wood privacy fence rather than stretching to 8. Reserve 8-foot spacing for sheltered, stable sites or manufactured vinyl and aluminum panels where the width is fixed anyway.
The extra posts cost more upfront, but the payoff shows up years later: fewer callbacks, straighter fence lines through freeze-thaw cycles, and gates that still swing cleanly after a decade. That's the real math homeowners should bring to a contractor conversation. Not "what's cheapest to install," but "what costs the least over the life of the fence."
— Jake
Get a Free Estimate for Your Fence Installation
A-to-zconstruction handles fence installation as part of a full in-house build process, which means the same crew that sets your footings also handles site grading, gate hardware, and any concrete work your layout needs, without juggling separate subcontractors for each phase.

Whether you're planning a wood privacy fence, a vinyl panel system, or a fence line that crosses uneven or fill-heavy ground, A-to-zconstruction's licensed crew can evaluate your soil and slope before a single post goes in the ground. That matters most on the sites this guide flags as risky: sloped lots, recent fill, wind-exposed ridges, and gate-heavy layouts where getting the spacing wrong means a rebuild. With more than 500 completed projects, the team has already worked through most of the site conditions a typical Utah property throws at a fence line. If your project touches on wood fence installation or needs footing and site prep handled alongside the fence itself, request a free estimate through A-to-zconstruction's structural services page and get a spacing and depth plan suited to your actual yard, not just a chart.
Sources
The spacing ranges and depth rules in this guide draw on contractor and homeowner references including FenceTracer's fence post spacing breakdown and Family Handyman's practical installation guidance, both of which cover spacing by fence type and terrain.
For agricultural and livestock fencing, Penn State Extension's fence construction resources and the NRCS fence construction guide offer soil-based and site-suitability guidance that goes beyond what a general homeowner article covers. For vinyl and ornamental systems specifically, always check your panel manufacturer's own spec sheet, since panel width varies by product line and directly determines your on-center post spacing.
- How Far Apart Should Fence Posts Be? Spacing by Fence Type | FenceTracer
- How Far Apart Should Fence Posts Be? (Family Handyman)
FAQ
How far apart should 4x4 fence posts be?
For a standard wood fence using 4x4 posts, plan on 6 to 8 feet of spacing, tightening to 6 feet for taller panels, heavy wind exposure, or soft soil.
How deep should a 20-foot fence post be in the ground?
Using the one-third rule, very long posts require a proportionally deep footing, though such post lengths are unusual for residential fencing and usually require site-specific engineering review.
How many posts do I need for 100 feet of fence?
At 8-foot spacing you need 14 line posts for a 100-foot run, and at 6-foot spacing you need 18, using the formula posts = (run length ÷ spacing) + 1, plus additional posts for any corners or gates.