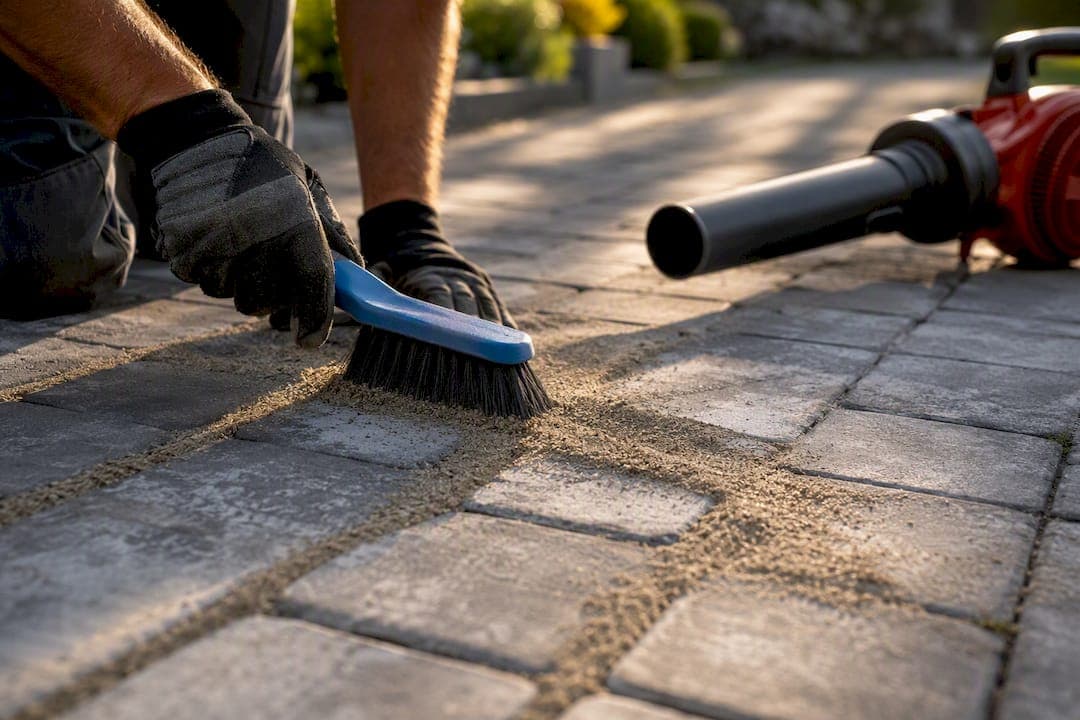
Most polymeric sand problems trace back to how the job was installed, not the product itself. If your joints show a milky haze, that's almost always a surface issue you can clean off. If sand is missing, washing out, or crumbling when you poke it, you're likely looking at a compaction or drainage problem underneath. Diagnose which one you have before you touch a hose or a broom.
TL;DR:
- Most polymeric sand failures are caused by poor installation practices, with about 80% of issues stemming from mistakes like damp joints or improper watering.
- Surface haze is easily remedied with cleaning, but washouts or soft joints indicate deeper problems such as drainage issues or base erosion that require more extensive repair.
- Proper curing involves sweeping and blowing dust before wetting, activating in light mist cycles, and avoiding heavy soaking or installation during wet weather.
- Wide joints over half an inch and shaded, damp areas often lead to faster deterioration, reducing the typical lifespan of polymeric sand to less than 5 years without maintenance.
- Minor repairs like haze or isolated washouts are DIY-friendly, but widespread or structural failures call for professional assessment and ground rebuilding.
Table of Contents
- What Causes Polymeric Sand Problems in the First Place?
- How Do You Tell Haze, Washout, and Soft Joints Apart?
- Do You Need Cleaning, a Spot Repair, or a Full Base Fix?
- How Do You Fix Haze, Washouts, and Full Joint Failures?
- How Do You Prevent Polymeric Sand From Failing Again?
- What Do Contractors Actually See on Job Sites?
- When Should You Call a Contractor Instead of Fixing It Yourself?
- When Persistent Failures Call for a Professional Fix
- Where Can You Learn More About Polymeric Sand Repair?
- Sources
- FAQ
What Causes Polymeric Sand Problems in the First Place?
Installer error and poor site prep cause the overwhelming majority of failures. Industry guidance puts that figure at roughly 80% of polymeric sand issues(https://www.hardscapemagazine.com/articles/water-polymeric-sand), which means the material itself is rarely to blame when a patio or walkway starts falling apart. The mistakes tend to repeat themselves across job sites, whether it's a weekend DIYer or a crew moving too fast.
Here's what actually goes wrong on the ground:
- Damp pavers or joints during installation. Sand starts activating the moment it hits moisture, so any dampness in the joint before you're ready triggers a premature cure and a weak bond.
- Watering it wrong. A single heavy soak from a garden hose blasts the polymer out of the joint before it can set; too little water leaves it chalky and unbonded.
- Skipping the dust removal step. Fine polymeric dust left on the paver face turns into a milky haze the instant water hits it.
- Under-compacting the joints. Sand that isn't vibrated down to full depth leaves air pockets that trap water and "choke" the joint later.
- No edge restraints or bad drainage. Runoff concentrates at low points and washes sand out over a season or two.
- Using the wrong sand for the joint width. A fine-grain product in a wide joint, or a coarse one in a narrow joint, won't compact or bond correctly.
- Installing without a dry-weather window. Rain within the first day or two undoes the cure before it finishes.
Professional installers lean on plate compactors and light misting cycles instead of a hose on full blast, and that distinction between "activating" and "soaking" the joint is where most amateur jobs go sideways, according to Hardscape Magazine's guidance on watering polymeric sand.
Pro Tip: Always sweep and blow the paver surface twice before wetting, once after sanding and once after compaction. Any dust left behind is what turns into that stubborn white haze later.
How Do You Tell Haze, Washout, and Soft Joints Apart?
Each failure type has its own fingerprint, and mixing them up leads to the wrong fix.
- Haze shows up as a milky or grayish film across the paver face, sometimes gritty to the touch. It's surface-bonded polymer that never got rinsed off before activation, not a problem inside the joint itself.
- Washout or erosion looks like missing sand, visible trails leading toward a drain or slope, and exposed paver edges. This one almost always points to runoff concentrating in one spot or the sand never activating correctly in the first place.
- Soft or crumbling joints feel powdery when you scrape a screwdriver or key across them. Press down and the material gives way instead of holding firm. That's usually incomplete activation or movement in the base underneath.
Run a quick scrape test with a flathead screwdriver on a few joints. Solid resistance means the sand cured properly. If it crumbles away like dry sand at the beach, activation failed. Map out where the trouble spots sit relative to downspouts, slopes, and shaded corners. Patterns tell you a lot: problems clustered near a downspout point to drainage, while a haze that's uniform across the whole patio points to a dust problem during install.
Do You Need Cleaning, a Spot Repair, or a Full Base Fix?
Walk the whole area before you buy anything. Note every spot where sand is missing, hazy, or soft, and pay special attention to edges, low points in the slope, and anywhere water pools after a storm.
Run these three checks on each problem area:
- Scratch test: drag a key across the joint. Firm and gritty means the sand held; loose and powdery means it didn't.
- Press test: push down with your thumb. A solid joint won't move; a failed one sinks or crumbles.
- Lift test (only if needed): if a paver rocks or shifts underfoot, lift it and check whether the bedding sand underneath looks washed out or uneven.
Match what you find to the right fix. Haze alone calls for cleaning, nothing more. One or two isolated washouts call for a spot re-sand. But if you're seeing washout in multiple locations, or pavers that rock when you step on them, that's a base problem, and patching the surface won't hold for long. As one industry breakdown puts it, polymeric sand is a jointing material, not a structural one. If the ground underneath is moving, the sand fails no matter what brand you bought.
How Do You Fix Haze, Washouts, and Full Joint Failures?
For haze, work through an escalation ladder instead of jumping to the strongest chemical first:
- Rinse with a garden hose and scrub with a stiff nylon brush.
- If that doesn't clear it, use a commercial polymeric haze remover formulated for the job.
- Still there? Try a gentle pressure wash, staying well back from the surface to avoid blasting out good joints.
- As an absolute last resort, a buffered cleaner or diluted muriatic acid can strip stubborn haze, but test it on a hidden paver first, wear gloves and eye protection, and neutralize the area afterward. Never seal a patio over unresolved haze; the sealer locks it in permanently.
For a spot washout, remove the loose material with a stiff brush and shop vac, let the joint dry completely, then refill to about 1/8 inch below the paver edge, compact it, and activate with mist cycles rather than a single soak. Skip a few sections of dry-out time and you'll be back here in a month.
For widespread or structural failure, don't just top off the old joints. Deteriorated material left underneath creates a weak seam that peels apart again within a season. Pull the affected pavers, rebuild and compact the base with crushed stone or bedding sand, reset the pavers, then re-sand and activate correctly from scratch.
During any repair, mist in cycles: a light pass first, a heavier pass once that soaks in, then a final light mist. Leaf-blow between passes to clear standing water and loose dust, and give the whole area a dry 24 to 48 hour window before anyone walks on it.
Pro Tip: Check the weather forecast three days out before starting any repair. A surprise afternoon shower on day one will undo hours of work.
How Do You Prevent Polymeric Sand From Failing Again?
Getting it right the first time comes down to a handful of habits, not luck.
- Match the sand's grain size to your joint width and check the manufacturer's spec sheet before buying.
- Fill joints to full depth and compact with a plate compactor and protective pad, never by hand-tamping alone.
- Confirm solid edge restraints and a slope that carries water away from the patio, not toward it.
- Activate in a series of light mist cycles, leaf-blowing between each pass to clear dust and standing water.
- Schedule the job for a stretch with 24 to 48 hours of dry weather, and give it extra buffer time in cold or humid climates.
- Walk the joints once a year and spot-treat any early haze or thinning before it turns into a washout.
Done right, polymeric sand joints commonly hold up for 5 to 10 years before they need attention again. That range assumes decent drainage and normal foot traffic; heavy runoff, shaded damp corners, or an unstable base will shorten it considerably. Very wide joints, over roughly half an inch, also tend to resist good compaction and are often better served by paver-specific mortar instead.
What Do Contractors Actually See on Job Sites?
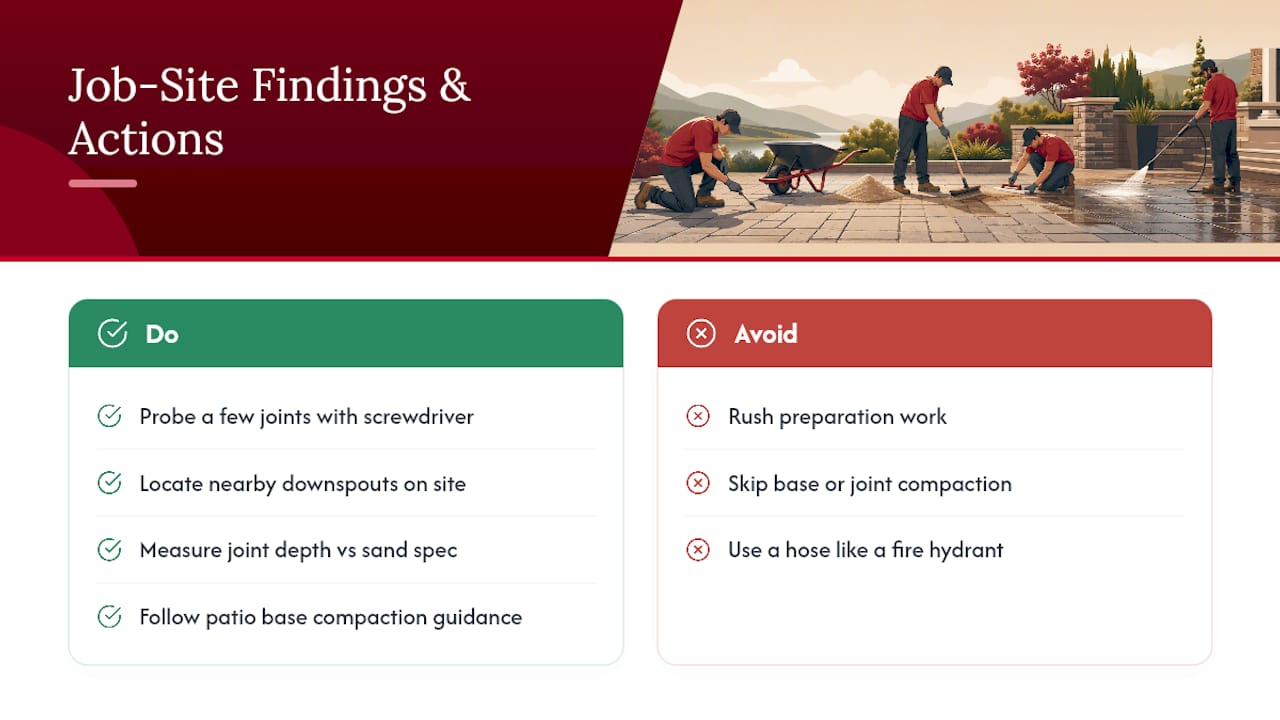
After walking hundreds of hardscape projects, many crews find the same story on nearly every failed patio: rushed prep, skipped compaction, or a hose used like a fire hydrant. Before attempting any repair, probe a few joints with a screwdriver, locate nearby downspouts, and measure joint depth against the sand bag's spec. For deeper base guidance, see patio base compaction done right.
When Should You Call a Contractor Instead of Fixing It Yourself?
Cleaning haze, patching a small isolated washout, or tightening one loose edge restraint are reasonable weekend jobs. Once pavers shift, the base has clearly washed out, or you're facing a full reset across a large area, bring in a professional and have photos, the trouble spot's location, recent weather, and your irrigation layout ready to share.
— Jake
When Persistent Failures Call for a Professional Fix
If you've run the diagnostic checks and you're staring at a base problem, patching the surface again won't solve it. Professional contractors handle the parts of a hardscape repair that go beyond a bag of sand and a garden hose: rebuilding and compacting eroded base material, resetting shifted pavers, re-sanding correctly, and sealing only after the joints have fully cured.

An inspection tells you in one visit whether you're dealing with a surface issue or a structural one, which saves you from guessing and redoing the work twice. Send photos of the trouble spots along with your address and a note on recent weather, and you'll get a faster, more accurate estimate. Start by requesting an inspection through the hardscape services page, or browse the paver patio and walkway page if you're weighing a full reset against a repair.
Where Can You Learn More About Polymeric Sand Repair?

For deeper technical detail, see the cleaning and washout guides from Hardscape Magazine, Concrete Sealer Review, and Journeyman HQ.
Sources
- Hardscape Magazine — Water and polymeric sand article
- Concrete Sealer Review — How to identify and remove poly sand haze
- Journeyman HQ — How to fix washouts in polymeric sand
- Floor Chem Depot — Downsides of polymeric sand for paver projects
- Polymeric Sand Store — How to get polymeric sand off your pavers
FAQ
What Are the Downsides of Polymeric Sand?
It's sensitive to installation technique and weather, needs periodic maintenance, and can haze or stain if dust isn't cleaned off before activation, according to Floor Chem Depot's breakdown of polymeric sand drawbacks.
What Is Better Than Polymeric Sand for Some Joints?
For joints wider than about half an inch, or bases prone to shifting, paver-specific mortar or a different jointing approach often performs more reliably than polymeric sand.
When Should You Not Use Polymeric Sand for Pavers?
Avoid it on unstable or poorly compacted bases, in consistently shaded and damp areas that never fully dry, and in very wide joints where the polymer can't bond and compact properly.
How Many Years Does Polymeric Sand Last?
Expect 5 to 10 years under good drainage and normal traffic; poor base prep or standing water can cut that lifespan well short.