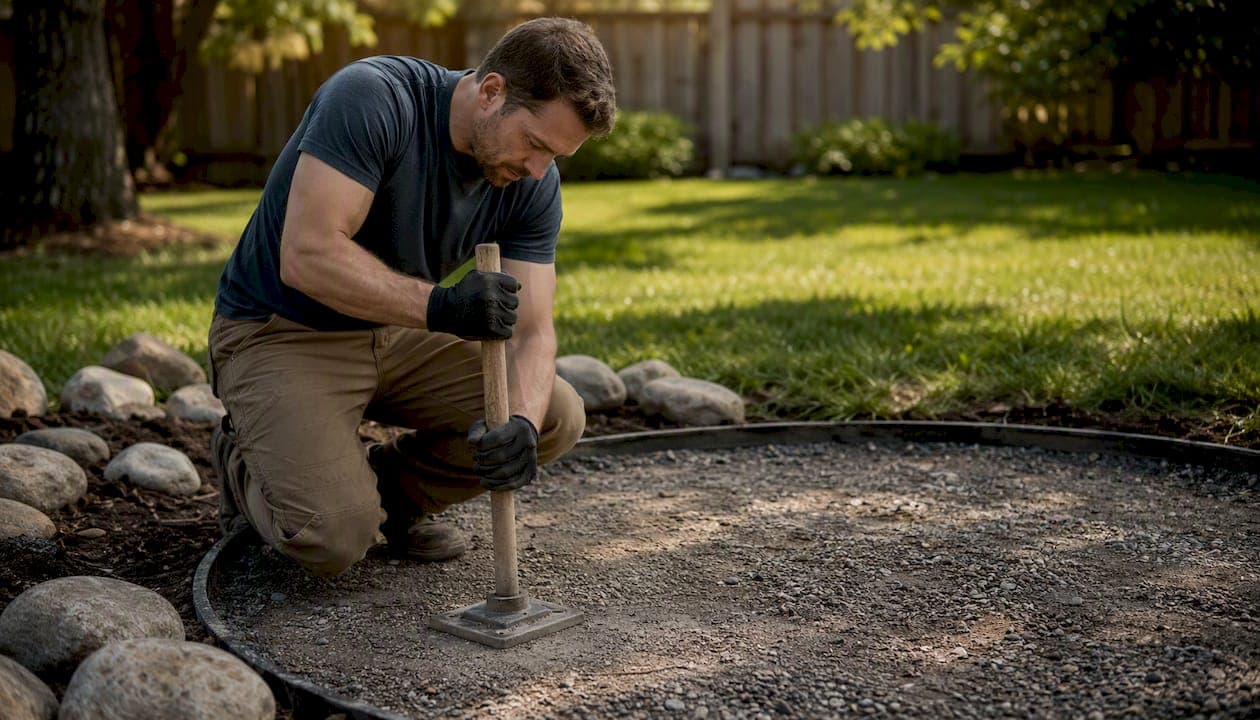
The right fire pit base depends on where you're building. For a lawn or in-ground install, compacted crushed gravel (paver base) is the go-to: it drains, levels, and holds. On an existing paver or concrete patio, a heat-dissipating mat or sacrificial paver layer protects the surface from spalling. On a deck, you need a metal heat shield with an air gap plus a fire-resistant pad — or better yet, move the fire to the yard. The single product worth knowing about if you're not rebuilding a base from scratch: the Breeo Base, a stainless-steel stand that lifts your fire pit off the surface and improves airflow underneath.
- Lawn / in-ground: 3–7 inches of compacted crushed gravel, tamped in lifts, with fire bricks lining the interior
- Paver or concrete patio: existing surface works structurally, but always add a heat-dissipating mat or sacrificial pavers to prevent cracking and staining
- Deck: metal heat shield + fire-resistant pad as a minimum; gas pit or yard relocation strongly preferred over wood-burning
Pro Tip: The most common and costly mistake is assuming a concrete or stone patio is automatically safe under a fire pit. Heat spalling — surface cracking from thermal stress — happens even on noncombustible materials. Always put a barrier between the fire and the surface.
Key Takeaways
A properly compacted gravel or paver base is the foundation every fire pit needs — and the right surface protection strategy is what keeps your patio, deck, or lawn from paying the price.
| Point | Details |
|---|---|
| Match base to surface | Gravel pad for lawn/in-ground; mat or sacrificial pavers for existing patios; heat shield + pad for decks. |
| Heat spalling is real | Even concrete and stone crack under thermal stress without a barrier between the fire and the surface. |
| Interior lining matters | Fire brick with refractory mortar or a steel ring insert protects structural blocks from direct flame. |
| Compact in lifts | Tamping gravel in 2–3 inch layers prevents settling; skipping this step is the most common DIY failure. |
| A-to-zconstruction | For permanent masonry builds or complex sites in Utah, A-to-zconstruction handles the full project in-house. |
Table of Contents
- What's the best fire pit base for your surface?
- How to build a fire pit base step by step
- Materials and tools: what to buy and how much
- Surface-specific guidance: decks, patios, and grass
- Safety rules and clearance checklist
- Typical timeline and cost: DIY vs. professional install
- How to maintain your base and fix common problems
- When to hire a licensed contractor
- The part most guides get wrong about fire pit bases
- A-to-zconstruction builds fire pit bases that last
- Sources
- FAQ
What's the best fire pit base for your surface?
The right answer comes down to three questions: What surface are you starting with? Do you want something permanent or removable? And are you burning wood or running gas?
Turf or bare ground is the most forgiving starting point. You're building from scratch, so you can do it right: excavate, compact, and create a proper foundation. A permanent gravel or paver base here will outlast any surface-protection shortcut.
An existing patio (concrete or pavers) changes the math. The structure is already there, so you're not building a foundation — you're protecting a surface. A fire pit mat or sacrificial paver layer is usually enough for occasional use. For a permanent, built-in pit on a patio, you'll want to cut out a section and install a proper firebox with a fire-rated liner.
A deck is the most restrictive surface. Wood decking is combustible, and even composite decking can warp or off-gas under sustained heat. The double-layer approach — metal heat shield plus a rated fire pit pad — is the minimum. Many contractors and fire safety experts recommend skipping wood-burning pits on decks entirely and either switching to gas or relocating to the yard.
Gas vs. wood-burning matters too. Gas pits run cooler and produce no embers, which relaxes the surface-protection requirements somewhat. Wood-burning pits generate radiant heat, flying sparks, and ash — all of which demand more robust base and clearance planning.
Quick selection checklist:
- Durability needed? Go permanent (gravel pad or concrete slab) over a mat
- Drainage a concern? Gravel base beats concrete for water management
- Renting or temporary setup? A large fire pit mat on an existing patio works
- On a deck? Gas pit or yard relocation; wood-burning requires maximum protection
- HOA or permit restrictions? Check before you dig or buy anything
Pro Tip: Size your pad wider than your fire pit's outer diameter on all sides to adequately catch ember fall and protect surrounding areas. A 36-inch pit needs a pad or base at least 84 inches across to catch ember fall.
How to build a fire pit base step by step
This sequence covers the most common DIY scenario: a permanent in-ground or paver-style fire pit on a lawn. Concrete pad and patio-inset variations are noted where the steps diverge.
Tools you'll need: marking paint or rope, spade or flat shovel, tamper or plate compactor (rental), wheelbarrow, level, masonry trowel, circular saw with masonry blade (for cutting pavers or fire brick), gloves, safety glasses.
-
Choose and mark your location. Pick a spot at least 10 feet from any structure, fence, or overhanging tree. Mark the outer edge of your pit with rope or marking paint. Add 24 inches around that perimeter for your base footprint. Check for underground utilities before you dig.
-
Excavate. For a gravel-and-paver base, dig 6–7 inches deep across the full base footprint. For a concrete pad, dig 4 inches for the slab plus 2 inches for a gravel sub-base beneath it. Keep the bottom of the excavation as flat and level as possible.
-
Add landscape fabric (gravel builds only). Lay weed-barrier fabric across the excavated area before adding base material. This keeps the gravel from migrating into the soil over time.
-
Install compacted crushed gravel in lifts. Pour 2–3 inches of paver base (crushed stone aggregate), wet it lightly, and compact with a tamper or plate compactor. Repeat until you reach your target depth. The finished gravel layer should be firm, flat, and level.
-
Screed a sand layer (paver builds). For a paver-topped base, add approximately 1 inch of coarse sand over the compacted gravel. Use screed pipes and a straight board to create a perfectly even surface. Allow the sand bed to settle before laying pavers — at least 24 hours if you're using polymeric sand.
-
Lay your base pavers or first block course. Set pavers or the first course of retaining wall blocks on the prepared base. Check level constantly. Use a rubber mallet to tap blocks into place. For a circular pit, work from the center outward.
-
Build up the wall courses. Stack your fire pit blocks or pavers, staggering joints between courses. Apply landscape adhesive between courses for a permanent build. Most standard kits run 3–4 courses high.
-
Line the firebox interior. This is the step most DIYers skip and later regret. Line the inside of the pit with fire brick set in refractory mortar, or drop in a steel fire ring insert. The liner protects your structural blocks from direct flame contact and extends the life of the pit significantly.
-
Cap and finish. Set capstones on the final course using adhesive. Let everything cure for 24–48 hours before the first fire.
For a concrete pad base: after excavating and adding your gravel sub-base, form the slab with 2x4 lumber, add rebar or wire mesh for reinforcement, pour 4-inch-thick concrete, and cut control joints every 4–6 feet. Cure for at least 7 days before placing a fire pit on it.
Materials and tools: what to buy and how much
Getting your shopping list right before you start saves a second trip to the hardware store. These quantities are calibrated for a 36-inch interior diameter fire pit with a roughly 7-foot-wide base footprint.
Base materials:
- Compacted crushed gravel (paver base): approximately 0.5 cubic yards for a 7-foot-wide, 6-inch-deep base
- Coarse sand (paver builds): one 50-lb bag per 10 square feet of surface area
- Fire brick: 25–35 bricks for a standard 36-inch round firebox interior (one course)
- Refractory mortar: one 50-lb bag covers roughly 25 fire bricks
- Steel fire ring insert: sized to your interior diameter (30-inch or 36-inch rings are most common)
- Landscape adhesive: two tubes per 10 linear feet of block course
- Landscape fabric: cut to base footprint plus 6 inches of overlap on all sides
For a concrete pad base:
- Concrete mix: approximately 0.25 cubic yards for a 7-foot-wide, 4-inch-thick slab
- Use reinforcement such as rebar or wire mesh as needed when pouring a concrete slab base
- Form lumber: 2x4 boards cut to perimeter length
Surface protection products:
- Fire pit mats: typically made from silicone-coated fiberglass, ceramic fiber, or mineral composite. Look for ratings above 1,400°F. Size up — a 36-inch pit needs at least a 60-inch mat.
- Breeo Base (stainless-steel stand): designed for decks and patios, it raises the pit off the surface and improves airflow. The X24 model is 25.3 inches in diameter and compatible with the Breeo X Series.
- Paver kits (Pavestone / RumbleStone): pre-cut blocks sized for circular fire pit layouts; include capstones and are sold by the kit at most home improvement stores.
| Material | Approx. quantity (36" pit) | Approx. cost range |
|---|---|---|
| Paver base (crushed gravel) | 0.5 cu. yd. | $25 |
| Coarse sand | 3–4 bags (50 lb.) | $25 |
| Fire brick | 25–35 bricks | $60 |
| Refractory mortar | 1 bag (50 lb.) | $25–$40 |
| Steel fire ring insert | 1 unit | $40 |
| Paver kit (Pavestone/RumbleStone) | 1 kit | $150 |
| Fire pit mat (60"+) | 1 unit | $30 |
| Breeo Base (stainless stand) | 1 unit | $100–$150 |
Surface-specific guidance: decks, patios, and grass
Decks
Wood and composite decking are combustible. Even a gas pit on a deck generates enough radiant heat to warp composite boards or ignite debris caught underneath. The minimum safe setup is a manufacturer-approved metal heat shield that creates an air gap between the pit and the deck surface, combined with a fire-resistant pad rated for high temperatures. The Breeo Base is one of the few stainless-steel stands purpose-built for this: it lifts the fire pit, improves airflow, and prevents direct radiant heat transfer to the deck surface.
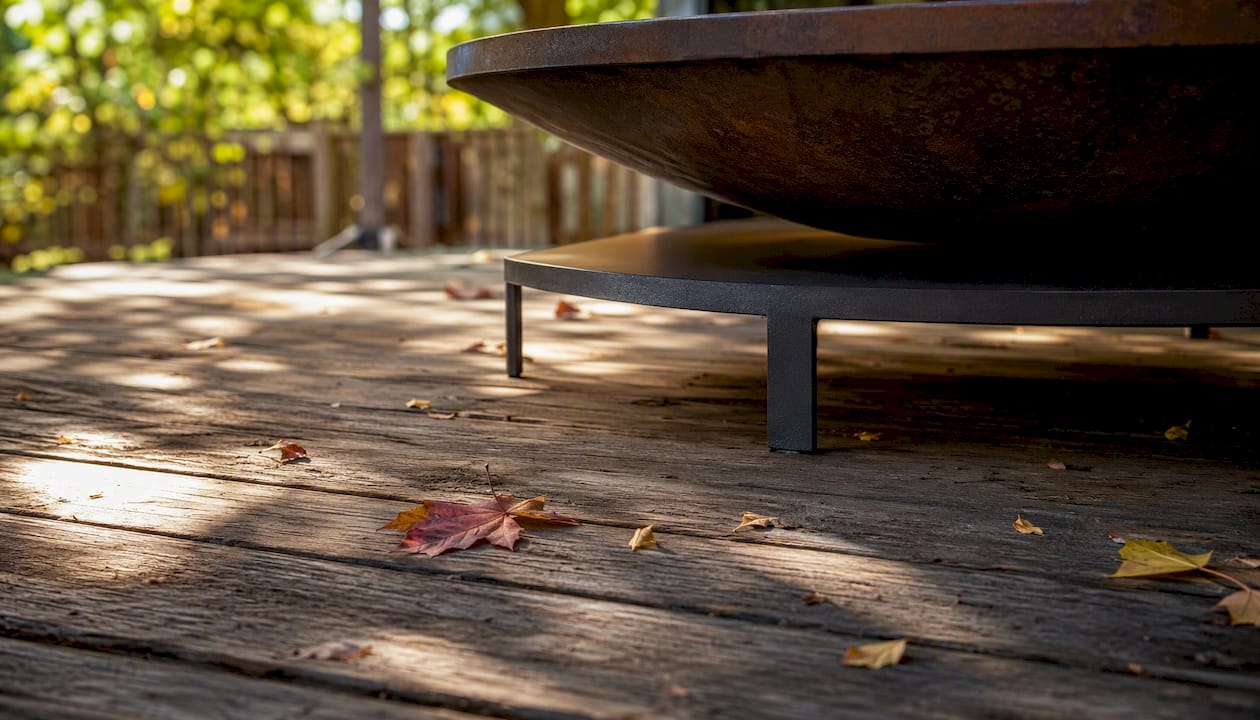
That said, most fire safety professionals and many local codes recommend against wood-burning pits on decks entirely. If you're committed to a deck fire feature, a gas pit with a dedicated gas line is the safer path. For guidance on that installation, the gas fire pit installation guide covers the key differences from wood-burning setups.
Do: use a metal heat shield with an air gap, add a rated fire pit pad, choose gas over wood-burning, check local codes before installing anything.
Don't: place a wood-burning pit directly on any decking material, use a mat alone without a standoff, or assume composite decking is fire-safe.
Pro Tip: The air gap matters more than the pad material. A pad sitting directly on decking with no standoff still allows radiant heat to conduct through. Raise the pit first, then add the pad.
Concrete and paver patios
Concrete and stone are noncombustible, so the structural risk is low. The thermal risk is real. Heat spalling — surface cracking caused by rapid thermal expansion — can ruin a patio surface even after a single season of use without protection. A fire pit mat or a layer of sacrificial pavers under the pit is the minimum. For a permanent built-in pit on a patio, cut out a section of the existing surface and install a proper firebox with a fire-rated liner rather than burning directly on the patio pavers.
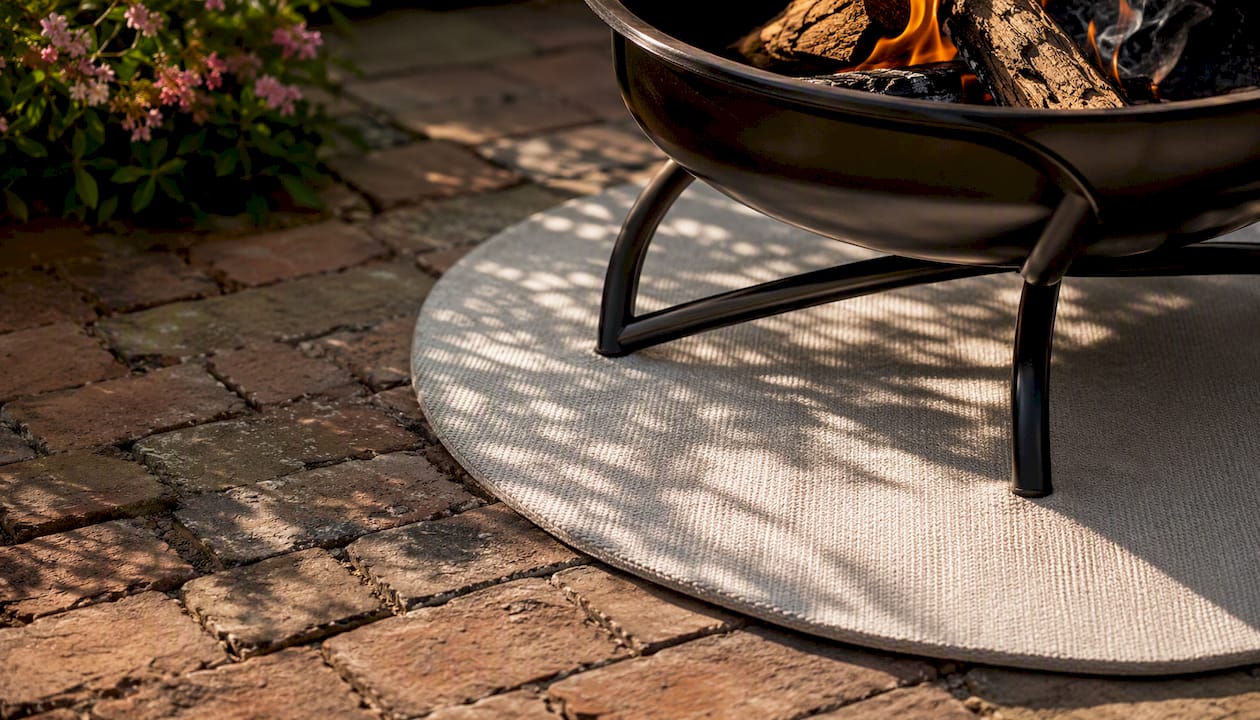
Do: use a fire pit mat or sacrificial pavers, inspect the surface for cracks after each season, consider a paver kit with a metal ring insert for a permanent installation.
Don't: assume the patio surface is automatically protected because it's stone or concrete, skip the mat "just this once," or use a fire pit mat that's smaller than the pit's outer diameter.
Grass and lawn
Grass is the most forgiving surface for a fire pit in terms of combustion risk — the soil beneath it doesn't spall — but it's the worst for long-term stability. A fire pit sitting directly on turf will kill the grass, create a muddy depression, and eventually tip as the ground softens. The right fix is a permanent gravel or paver base, as described in the build steps above. For occasional use, a large fire pit mat or a ring of patio stones creates a temporary stable surface, but neither replaces proper base prep for a fire pit you plan to use regularly.
Perforated metal stands, like those from Goldens' Cast Iron, support airflow for wood-burning pits while containing embers — a useful option for portable setups on grass when a permanent base isn't practical.
Safety rules and clearance checklist
Minimum clearances:
- 10 feet from any structure, fence, or combustible surface in all directions
- 10 feet from overhanging tree branches or shrubs
- 3 feet of clear, non-combustible ground around the pit perimeter (ember zone)
- Seating placed outside the ember zone, not directly adjacent to the pit wall
Ember and spark management:
- Always use a spark screen on wood-burning pits
- Size your base or mat to catch ember fall (at least 24 inches beyond the pit's outer edge)
- Keep a bucket of water or a garden hose within reach during every fire
- Never burn in high-wind conditions
Permits and local codes:
- Check your city or county fire code before building a permanent fire pit. Many jurisdictions require a permit for permanent outdoor fireplaces or fire pits.
- Contact your HOA if applicable — many have specific rules about fire pit placement, fuel type, and size.
- Verify setback requirements with your local building department; they vary by municipality.
- If you're adding a gas line, a licensed plumber or gas contractor is required in most states.
Emergency readiness:
- Keep a fire extinguisher rated for Class A fires within 10 feet of the pit
- Never leave a fire unattended
- Fully extinguish coals before leaving the area — ash can hold heat for hours
- Dispose of cooled ash in a metal container, not a plastic bag or trash can
Typical timeline and cost: DIY vs. professional install
DIY cost estimates (materials only):
- Gravel pad with paver kit: $200–$450 depending on kit size and gravel quantity
- Concrete pad base (poured slab): $150–$350 for materials; add $200–$500 if you rent a mixer or plate compactor
- Surface protection only (mat + stand): $130–$230 for a quality mat and stainless stand
Professional installation (labor + materials):
- Basic gravel pad and paver fire pit: $800–$2,000 depending on size and complexity
- Permanent masonry firebox with concrete base: $2,500–$6,000 or more for a custom build
- Gas fire pit with dedicated line: add $500–$1,500 for gas line work on top of base costs
Timeline:
- DIY gravel pad and paver kit: one weekend (Saturday excavation and base, Sunday block-laying and finishing)
- Concrete pad: pour on day one, cure for 7 days minimum before placing the pit
- Professional masonry build: typically 3–7 days on-site, longer if permits are required
When professional installation makes sense:
- The site has drainage problems or unstable soil that needs grading
- You want a permanent masonry firebox with a gas hookup
- The project requires a permit and inspections
- You're on a slope or near a retaining wall
- The HOA or local code requires licensed contractor sign-off
Hidden costs that catch DIYers off guard: tool rental (plate compactor runs $60–$100/day), disposal of excavated soil, and the cost of redoing a base that wasn't compacted properly the first time.
How to maintain your base and fix common problems
Seasonal maintenance by base type:
- Gravel pad: rake and re-level annually; top up with fresh gravel if the base has settled or thinned; check that drainage is still flowing away from the pit
- Paver base: sweep polymeric sand into joints each spring; re-tamp any pavers that have shifted; check for frost heave after winter
- Concrete slab: inspect for cracks each season; seal with a penetrating concrete sealer every 2–3 years; fill hairline cracks with a concrete crack filler before they widen
For ongoing guidance on hardscape maintenance, a seasonal inspection checklist covers both concrete and paver surfaces in detail.
Troubleshooting common problems:
| Problem | Likely cause | Repair approach |
|---|---|---|
| Surface cracking (spalling) | Thermal shock without a barrier | Add a fire pit mat or sacrificial pavers; seal the surface |
| Pit tilting or settling | Insufficient compaction during base prep | Excavate, re-compact base, re-level and reset blocks |
| Standing water around pit | Poor drainage or low spot in base | Regrade surrounding area; add a French drain if needed |
| Fire brick cracking | Thermal cycling without refractory mortar | Remove damaged bricks; reset with refractory mortar |
| Weeds growing through gravel | Landscape fabric missing or degraded | Pull weeds, add pre-emergent, replace fabric layer |
When to call a professional: if the pit has shifted more than an inch, if you see structural cracks in the block wall (not just the mortar joints), or if standing water is a recurring problem after rain, a contractor can assess whether the base needs to be rebuilt from scratch. Cosmetic repairs on a failing base rarely hold.
When to hire a licensed contractor
Some fire pit projects are genuinely DIY-friendly. Others look simple until you're two feet into the ground and realize the soil is clay, the site drains toward the house, and the HOA wants stamped drawings.
Hire a pro when:
- The site has drainage issues, a slope, or unstable soil
- You want a permanent masonry firebox (block, brick, or stone)
- A gas line is part of the project
- A permit is required and inspections are involved
- The project is part of a larger patio or hardscape build
How to evaluate a contractor:
- Verify their general contractor or masonry license with your state licensing board
- Confirm they carry general liability and workers' compensation insurance
- Ask for references from similar outdoor masonry or hardscape projects
- Request a written scope of work that includes materials, timeline, and warranty terms
- Ask whether they handle permit applications or expect the homeowner to do it
Questions worth asking before you sign:
- Who handles the permit, and what's included in the fee?
- What's the warranty on the base and the firebox?
- Will you provide as-built drawings or a site diagram?
- How do you handle drainage if the site has water issues?
A reputable contractor will provide a written proposal, a clear timeline, and a point of contact for the duration of the project. If a contractor can't answer the permit question clearly, that's worth noting. For complex sites, foundation and drainage expertise is as important as masonry skill — the base is what determines whether the pit lasts five years or twenty.
The part most guides get wrong about fire pit bases
That ratio should be flipped; for expert fire features design & installation in Phoenix & Scottsdale, AZ, consider professional guidance on proper bases and features.
The block pattern, the capstone color, the decorative gravel fill — none of it matters if the base settles unevenly after the first winter. A fire pit that tilts is a fire pit that's dangerous. And a patio surface that spalls after one season of use is an expensive lesson in thermal physics that a $40 mat would have prevented.
The conventional advice also undersells the interior lining. Most beginner guides mention fire bricks as optional. They're not. Standard concrete blocks and retaining wall blocks are not rated for direct flame contact. Without a fire brick liner or a steel ring insert, you're watching your structural blocks degrade from the inside out — usually within two or three seasons of regular use.
The other thing worth saying plainly: decks are genuinely risky for wood-burning fire pits, and the industry has been slow to say so directly. A mat and a standoff reduce the risk. They don't eliminate it. If you're serious about a fire feature on your deck, a gas pit with a proper installation is the right answer — not a wood-burning pit with a protective pad and crossed fingers.
Build the base right, line the firebox, and match your surface protection to the actual risk. Everything else is aesthetics.
A-to-zconstruction builds fire pit bases that last
Plenty of homeowners can handle a gravel pad and a paver kit over a weekend. But when the project involves a permanent masonry firebox, a gas line, a sloped site, or a patio that needs to be cut and rebuilt around the pit, the margin for error shrinks fast.

A-to-zconstruction is a licensed general contractor in Utah with an in-house crew that handles every phase of a fire pit project: excavation and drainage, brick and stone masonry, paver base prep, and finishing. No subcontractor handoffs, no scheduling gaps between trades. If the project needs a permit, they handle it. If the site needs grading before the base goes in, that's in-house too. For homeowners who want a fire pit done once and done right, get a quote from A-to-zconstruction and see what a full-scope build looks like from a single contractor.
Sources
- What to Put Under a Fire Pit on Grass, Decking and Pavers - Living out the back
- What Do You Put Under Fire Pit on Deck » Fireplace Adviser
- How to Build a Fire Pit | Lowe's
- Installing a Paver Patio and Fire Pit From the Ground Up
FAQ
What is the best base for a fire pit?
Compacted crushed gravel (paver base) is the best foundation for most in-ground and lawn fire pit builds. It drains well, levels easily, and supports masonry blocks without settling when tamped in layers.
What can I use as a base for a fire pit on an existing patio?
A fire pit mat made from silicone-coated fiberglass or ceramic fiber protects concrete and paver patios from heat spalling and staining. For a permanent installation, cut out a section of the patio and build a proper firebox with a fire-rated liner.
What should I put underneath my fire pit on a deck?
A manufacturer-approved metal heat shield that creates an air gap, combined with a fire-resistant pad, is the minimum for a deck installation. Many fire safety experts recommend gas pits over wood-burning on decks, or relocating the fire pit to the yard entirely.
What should a fire pit sit on?
On grass or bare ground, a fire pit should sit on a compacted gravel or paver base. On a concrete or paver patio, add a heat-dissipating mat or sacrificial pavers. On a deck, use a stainless-steel stand like the Breeo Base plus a rated fire pit pad to prevent direct heat transfer to the decking surface.