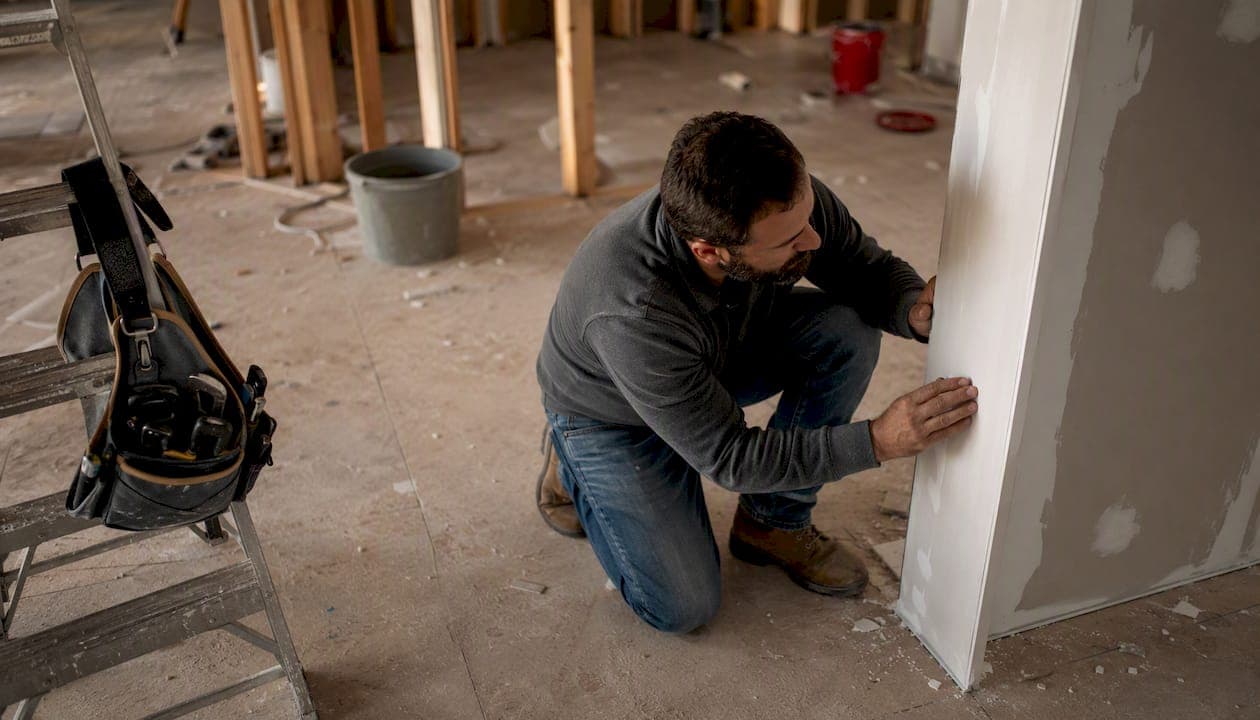
A construction punch list (also called a snag list or deficiency list) is a formal document that records every incomplete or non-conforming item that must be corrected before final payment is released. The moment your contractor believes the project is substantially complete, the clock starts. Here is what to do right now:
- Record each item with its exact location, a one-line description, and a timestamped photo.
- Assign responsibility to a specific trade or subcontractor, not just "the GC."
- Set a due date for each fix, tied to your contract's cure period.
- Upload to a shared tracker or schedule a formal punch walk within 24–72 hours.
One more thing worth flagging early: under AIA A201 General Conditions and most U.S. construction contracts, retainage (commonly 5–10% of the contract value) stays held until punch-list items are resolved. The punch list is not a formality. It is the gate to final payment.
Key Takeaways
A construction punch list tied to AIA A201 and retainage is the single most important document controlling final payment on any U.S. construction project.
| Point | Details |
|---|---|
| Start a rolling punch list early | Begin capturing items during finish work, not the final week, to reach zero items at handover. |
| Document with timestamped photos | A photo, plan reference, and timestamp for each item eliminates "already fixed" disputes. |
| Assign one owner per item | Ambiguous assignments are how items fall through the cracks; name the specific trade responsible. |
| Link items to retainage | Retainage of 5–10% is held until the list clears; treat punch-list closure as a cash-flow priority. |
| A-to-zconstruction manages closeout | A-to-zconstruction's in-house Utah crew handles punch walks, trade fixes, and final sign-off under one contract. |
Table of Contents
- What is a construction punch list?
- Why punch lists matter beyond quality control
- When is a punch list created, and what does your contract say?
- Who prepares the punch list and who is responsible for what?
- What items typically appear on a punch list?
- How to create, assign, and close punch-list items step by step
- What fields should your punch list template include?
- Which tools should you use for punch list management?
- Punch list best practices and mistakes to avoid
- How punch-list resolution affects your schedule and final payment
- How a licensed contractor runs punch lists from start to finish
- What experienced contractors know about punch lists that owners often miss
- A-to-zconstruction handles punch-list closeout for Utah projects
- Sources
- FAQ
What is a construction punch list?
A punch list is a document that captures every remaining item of incomplete or deficient work that must be addressed before the project is officially handed over. Procore describes it as a list of final corrections, tests, and removals required before handover, used to control sign-off and payment.
The term "punch list" traces back to the practice of physically punching a hole next to each item on a paper list once it was resolved. You will also hear it called:
- Snag list (common in the UK and internationally)
- Deficiency list (used in some commercial contracts)
- Punchout list (informal U.S. usage)
- Correction list (used in some AIA contract forms)
Punch list vs. checklist: A generic construction checklist is a pre-task or safety reference. A punch list is a contractual document tied to substantial completion and final payment. The difference matters legally. A checklist tells workers what to do. A punch list records what was not done correctly and who must fix it before money changes hands.
Why punch lists matter beyond quality control
Most contractors think of the punch list as a quality tool. It is also a financial and legal one.
Systematic tracking of minor items like paint touch-ups, hardware, and switches directly affects final payment timing and client satisfaction. Neglect increases dispute risk. A single missed cabinet hinge or an unpainted door jamb can give an owner grounds to withhold retainage, delay occupancy, or trigger a warranty dispute.
The stakes show up in four specific areas:
- Project closeout: Open items block the certificate of substantial completion, which starts the warranty clock and triggers final payment.
- Occupant readiness: Unresolved safety or operational items (smoke detectors, HVAC controls, exit lighting) can delay a certificate of occupancy.
- Warranty start date: In most contracts, the warranty period begins at substantial completion. A delayed sign-off pushes that date and leaves the contractor exposed longer.
- Reputation: A client who moves in and finds 30 unresolved items will not refer you. A clean punch list at handover is one of the strongest signals of a professional contractor.
Retainage is the financial lever owners use to enforce resolution. Owners commonly hold 5–10% of the contract value until punch-list items are cleared. For a $500,000 project, that is $25,000–$50,000 sitting in limbo until the list hits zero.
When is a punch list created, and what does your contract say?
The typical trigger is the contractor's notice of substantial completion: the point at which the work is sufficiently complete that the owner can use it for its intended purpose, even if minor items remain. That notice kicks off the formal punch-list process.
Under AIA A201 General Conditions, the contractor prepares the list of items to be completed or corrected, and the architect inspects to verify substantial completion. Final payment follows confirmation of resolution or another agreed arrangement. Many contracts incorporate punch-list procedures through the certificate of substantial completion, not a separate clause.
The AIA A201 framework: The contractor submits a written notice of substantial completion. The architect inspects within a reasonable time and either issues the certificate or notifies the contractor of items that must be resolved first. The contractor then prepares the punch list, and the architect verifies completion. Final payment is released after the architect issues the final certificate for payment.
The typical timeline looks like this:
Pre-final inspection → Initial punch walk → Correction period → Re-walk → Sign-off → Final payment
For residential new construction, final walk-throughs commonly occur 24–72 hours before closing, and multiple walkthroughs are standard on larger builds. Re-walks are typically scheduled as soon as the contractor confirms all items are resolved, not on a fixed calendar date.
Pro Tip: Tie your re-walk schedule to a written confirmation from the GC that all items are complete, not to a calendar date. A date-based re-walk with unfinished items wastes everyone's time and resets the clock.
Who prepares the punch list and who is responsible for what?
Responsibility is shared, but coordination typically falls to the general contractor. The GC owns the list as a management document, even when the architect or owner initiates items.
| Role | Records Items | Fixes Items | Verifies Completion |
|---|---|---|---|
| Owner | Yes (owner-observed items) | No | Yes (final acceptance) |
| Architect / Designer | Yes (design compliance items) | No | Yes (design-related items) |
| General Contractor | Yes (primary list manager) | Yes (self-performed work) | Yes (before submitting to architect) |
| Subcontractors | Sometimes (trade-specific finds) | Yes (their scope) | No (GC verifies before architect) |

Owner-driven items often involve finish selections, substitutions, or items that deviate from the approved drawings. When design compliance is in question, the architect takes the lead on verification. The GC should never close an architect-flagged item without written confirmation from the design team.
What items typically appear on a punch list?
Trade-grouped examples give you the fastest way to train your eye during a punch walk. Here is what to look for by category:
Carpentry and finishes
- Paint touch-ups, drips, and missed areas
- Trim gaps, nail holes, and caulk lines
- Cabinet doors that do not align or close flush
- Flooring transitions and threshold strips
Mechanical, electrical, and plumbing (MEP)
- HVAC filters installed, thermostats programmed and tested
- Electrical outlets and switches tested with a plug tester
- Plumbing fixtures checked for leaks, proper drainage, and water pressure
- Exhaust fans verified operational
Glazing and openings
- Windows and doors operating smoothly, locking correctly
- Weather stripping gaps and screen installation
- Hardware (handles, hinges, closers) torqued and aligned
Exterior and sitework
- Grading and drainage verified away from the foundation
- Concrete flatwork checked for cracks, control joint placement, and surface finish
- Fencing panels plumb and gates swinging freely
- Exterior lighting operational
Landscaping
- Sod or seed coverage complete, irrigation heads adjusted and tested
- Retaining walls plumb and drainage outlets clear
- Cleanup: debris, excess material, and construction waste removed
Items to test during every punch walk:
- Smoke and CO detectors (test button and interconnect)
- GFCI outlets in wet areas
- Garage door auto-reverse function
- All appliances on their first full cycle
- Attic and crawl space access panels
Pro Tip: For every item you record, capture a photo tied to the plan sheet reference and a timestamp. A photo plus a plan coordinate plus a timestamp is the trifecta that eliminates "I thought that was already fixed" disputes.
How to create, assign, and close punch-list items step by step
The process in one line: capture every item → assign it to one responsible party → repair it → verify the fix → close it with documentation.
-
Prepare before the punch walk. Pull the contract drawings, specifications, and approved submittals. Know what "correct" looks like before you walk the site. Assign one person to record items in real time.
-
Conduct the punch walk systematically. Move room by room or zone by zone. Never skip a space. Bring a plug tester, a level, a flashlight, and a camera. The Autodesk punch list guide recommends recording item ID, location, description, responsible party, dates, status, and attachments for every item.
-
Document each item completely. Write a short, specific description ("paint drip on east wall of bedroom 2, approx. 18 inches above baseboard"). Add the plan sheet reference, the spec section if applicable, and at least one photo.
-
Assign one responsible party per item. Not "the GC" generically. Name the trade: "electrical sub," "painting contractor," "GC self-perform." Ambiguous assignments are how items fall through the cracks.
-
Set realistic due dates. Tie them to your contract's cure period. If the contract says 30 days, work backward from that deadline and assign internal milestones.
-
Track progress in a shared system. Every open item should be visible to the responsible party and the verifier. Paper lists left in a trailer do not notify anyone.
-
Schedule the re-walk only after written confirmation. The GC confirms all items are resolved in writing. The architect or owner then re-walks and either closes items or reopens them with a new description.
-
Issue final sign-off documentation. The architect issues the certificate of substantial completion (or final completion, depending on contract stage). The GC collects lien waivers, as-built drawings, O&M manuals, and warranty documents as part of the closeout package.
Pro Tip: Require a before-and-after photo for every closed item, with the verifier's name and the date in the file name. Tie the photo to the specific spec clause the item violated. If a dispute arises six months later, that file is your defense.
What fields should your punch list template include?
Modern punch lists include item ID, location, description, responsible party, dates, status, and attachments. Here is the full field set for a production-ready template:
Required fields: Item ID, Location (building/floor/room), Short Description, Trade or Responsible Party, Spec/Drawing Reference, Priority (Safety / Operational / Finish), Due Date, Status (Open / In Progress / Resolved / Verified), Verifier Name, Verification Date, Photos or Attachments.
Sample row:
| Field | Sample Entry |
|---|---|
| Item ID | PL-047 |
| Location | Building A, Level 2, Room 214 |
| Description | Paint drip on east wall, 18 in. above baseboard |
| Responsible Party | Painting subcontractor |
| Spec / Drawing Ref | Spec Section, Sheet A-201 |
| Priority | Finish |
| Due Date | March 14, 2026 |
| Status | Open |
| Verifier | J. Harris (Architect) |
| Verification Date | (pending) |
| Photos | PL047_before.jpg |
To scale this template for a multi-building project, add a "Building" column and a "Floor" column, then filter by trade to generate trade-specific reports. Most mobile punch-list apps accept a CSV import of this structure, so you can start in a spreadsheet and migrate without re-entering data.
Which tools should you use for punch list management?
The right tool depends on project size and team capability. A spreadsheet works for a single-family remodel with one subcontractor. It breaks down fast on a 40-unit residential building with six trades.
Mobile apps that support plan markup and timestamped photos are the most effective tools for closeout because they eliminate ambiguity about location and completion status. Fieldwire by Hilti notes that contractors using software to assign tasks see faster closeouts because trades receive trade-specific reports with location details.
Comparison of tooling categories:
Procore is the dominant enterprise platform for commercial construction in the U.S. Its punch-list module ties directly to the submittal log, RFI log, and drawing set, so a verifier can pull the approved spec in the same screen where they close an item. For smaller residential projects, that level of integration is more than you need.
Entry-level field apps give you photo capture, plan pins, and trade notifications without the enterprise price tag. The tradeoff is limited reporting and fewer integrations with accounting or scheduling software.
Whatever tool you choose, confirm it supports timestamped photos and sends automatic notifications to the assigned trade when an item is opened or updated. Those two features alone cut re-walk cycles significantly.
Punch list best practices and mistakes to avoid
Do these:
- Start a rolling punch list from the first day of finish work, not the last week of the project. Autodesk's research confirms that early capture reduces the volume of last-minute fixes and helps reach a zero punch list at handover.
- Assign one person to own the list. Not a committee. One person who tracks every item, chases every trade, and schedules every re-walk.
- Centralize all evidence (photos, notes, verification signatures) in one place. A shared folder with a consistent naming convention beats a mix of texts, emails, and paper notes.
- Triage items by priority: Safety items first (anything that affects life safety or occupancy), then Operational items (HVAC, plumbing, electrical function), then Finish items (paint, trim, hardware).
Avoid these:
- Waiting until the final week to start capturing items. By then, trades have demobilized and scheduling fixes costs more time and money.
- Accepting vague descriptions like "fix wall in hallway." Every item needs a location, a specific deficiency, and a spec reference.
- Ignoring low-cost recurring items. A $12 door hinge that keeps appearing on re-walks signals a systemic installation problem, not a one-off. Address the root cause.
- Closing items without physical verification. A trade saying "it's done" is not verification. Walk it, photograph it, sign it off.
How punch-list resolution affects your schedule and final payment
Resolution timelines vary by project size. A single-family home might close its punch list in a week. A large commercial project with dozens of open items across multiple trades can take 30–60 days, especially when specialty subcontractors have demobilized.
The financial connection is direct. Retainage, commonly 5–10% of the contract value, is held by the owner until punch-list items are resolved. That means the contractor is effectively financing the owner's quality assurance program until the list hits zero.
Payment scenario: On a $300,000 remodel with 10% retainage, $30,000 sits in the owner's account until the punch list is cleared. If resolution drags for 45 days because one subcontractor is slow to return, the GC carries that cash shortfall for six weeks. Multiply that across two or three concurrent projects and the cash-flow impact is significant.
Practical steps to avoid payment delays:
- Negotiate a realistic cure period in the contract before work starts. Thirty days is common; shorter is better for the GC.
- Separate the retainage release into two stages: one at substantial completion (partial release) and one at final completion (balance). Many owners will agree to this.
- Never let a single low-priority finish item hold up retainage for a major operational system that is fully functional. Document the item, escrow a small amount if needed, and release the rest.
How a licensed contractor runs punch lists from start to finish
A professional contractor does not wait for the owner to hand over a list of complaints. The GC builds the punch list proactively, starting at the first sign of finish work.
Here is the operational workflow A-to-zconstruction uses on Utah projects:
-
Pre-walk preparation. Pull the contract drawings, approved submittals, and spec sections for every trade still active. Confirm the punch-list template is loaded in the field app and assigned to the site superintendent.
-
Rolling capture during finish phase. The superintendent logs items as they appear, assigns them to the responsible trade, and sets a due date. Trades receive an automatic notification with the item description, location, and photo.
-
Pre-final GC walkthrough. Before inviting the owner or architect, the GC walks every space and closes every item the crew can self-verify. The goal is to hand the owner a list that is already 80–90% resolved.
-
Owner or architect punch walk. Walk with the owner or architect, record any additional items they identify, and add them to the tracker in real time. No paper. No "I'll add it later."
-
Trade scheduling and repair. Assign each new item immediately. Prioritize safety and operational items. Schedule trades in a logical sequence (MEP before finishes, finishes before final clean).
-
Verification and sign-off. The GC verifies each fix with a before-and-after photo and a verifier signature. The architect or owner re-walks only items they flagged. Final sign-off is documented in writing.
-
Closeout package assembly. As-built drawings, O&M manuals, warranty documents, lien waivers, and the completed punch list with all verification photos are delivered as a single package. This is what triggers the architect's final certificate and the owner's final payment.
A-to-zconstruction's in-house crew model means the same team that built the project handles the punch-list fixes. No waiting for a subcontractor to return a call. No scheduling gaps between trades. For site preparation and masonry repair items, which commonly appear on exterior punch lists, the crew is already on site.
What experienced contractors know about punch lists that owners often miss
The conventional wisdom is that a punch list is something you deal with at the end of a project. That framing is the source of most punch-list problems.
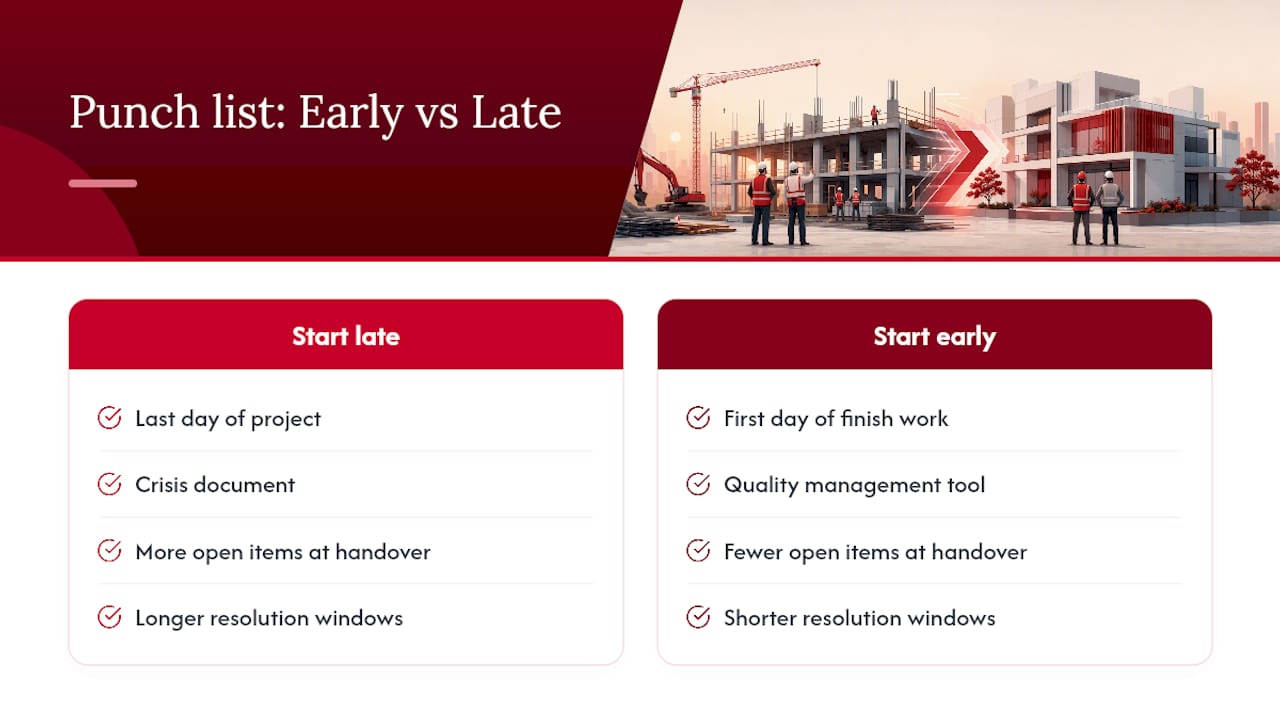
A punch list that starts on the last day of a project is a crisis document. A punch list that starts on the first day of finish work is a quality management tool. The difference in outcome is not subtle. Projects that maintain a rolling list throughout construction consistently reach handover with fewer open items, shorter resolution windows, and fewer disputes over what was agreed.
There is also a misunderstanding about who the punch list protects. Owners assume it protects them from a contractor walking away with unfinished work. That is true. But a well-managed punch list protects the contractor just as much. It creates a documented record of what was complete at substantial completion, what was added during the owner's walk, and what was verified after repair. Without that record, any item the owner raises six months later looks like a punch-list item that was never closed. With it, the contractor can show exactly when the item was opened, who fixed it, and who signed off.
The other thing most articles skip: the punch list is a negotiating document. Owners sometimes add items during the walk that are outside the original scope. A contractor without a clear record of what the contract required has no basis to push back. A contractor with a spec reference on every item can respond to a scope dispute in minutes, not days.
A-to-zconstruction handles punch-list closeout for Utah projects
Punch-list management is where projects either finish clean or drag on for weeks. A-to-zconstruction handles the entire closeout process in-house: punch walks, trade assignments, fix verification, and final sign-off documentation, all coordinated by a single licensed GC team in Utah.

No juggling multiple subcontractors or chasing callbacks. A-to-zconstruction's crew covers concrete, masonry, earthwork, landscaping, and remodeling under one roof, so punch-list fixes across trades get scheduled and resolved without the gaps that slow down typical multi-sub projects. For residential and commercial clients across Utah, that means a faster path from open items to final payment.
Ready to close out your project cleanly? Request a consultation or contact the A-to-zconstruction team to discuss your project's closeout needs.
Sources
- Punch list
- Construction Punch Lists Explained
- What Is a Construction Punch List? | Autodesk
- What Is a Punch List in Construction? | Fieldwire by Hilti
- Construction punch list: definition, best practices guide & template | Revizto
- Monday
- Final walk‑through before closing | Zillow
FAQ
What is the difference between a punch list and a checklist?
A checklist is a pre-task reference tool with no contractual weight. A punch list is a formal document tied to substantial completion and final payment, recording specific deficiencies that must be corrected before the contractor receives the remaining contract balance.
What items are typically on a construction punch list?
Common items include paint touch-ups, trim gaps, hardware alignment, HVAC testing, plumbing fixture checks, electrical outlet verification, door and window operation, exterior grading, and cleanup of construction debris. Items are grouped by trade and prioritized by safety, operability, and finish.
Who prepares the punch list in construction?
The general contractor typically prepares and manages the punch list as the primary coordination document. Under AIA A201 General Conditions, the contractor submits the list and the architect verifies substantial completion before final payment is released.
What is an example of a punch list item?
A typical example: "PL-047 — Building A, Room 214 — Paint drip on east wall, 18 in. above baseboard — Painting subcontractor — Priority: Finish — Due: March 14, 2026 — Status: Open." Each item includes a location, description, responsible party, priority, and due date.
What is substantial completion vs. final completion?
Substantial completion is the point at which the work is complete enough for the owner to use it for its intended purpose, even if minor items remain. Final completion means every punch-list item is resolved, all closeout documents are delivered, and the architect has issued the final certificate for payment.