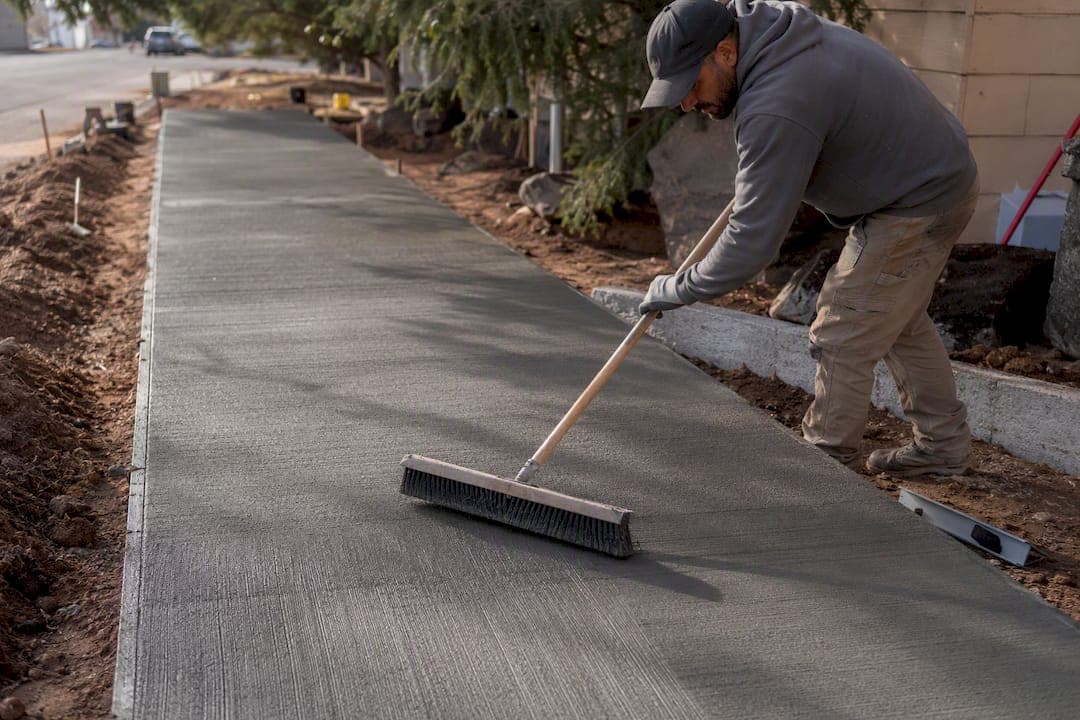
A broom finish is a brushed texture dragged into fresh concrete with a stiff broom, and its main job is traction. Contractors specify it for exterior slabs that get wet, walked on, or driven over: driveways, sidewalks, pool decks, and ramps.
- Best for: driveways, walkways, pool decks, patios, loading ramps
- Main benefit: slip resistance in rain, snowmelt, and pool splash zones
- What determines success: timing (the workable window after floating) and the right broom bristle for the job
Broom finishes typically land around a 0.8 to 1.1 coefficient of friction, well above the range most codes want for wet exterior walkways. Miss the timing window by even ten minutes, though, and you get shallow, weak grooves or torn, raveled ridges instead of a clean texture.
Key Takeaways
Broom finish concrete delivers a coefficient of friction around 0.8 to 1.1 through fine grooves brushed into the surface right after final floating, and getting there depends entirely on correct timing and mix design.
| Point | Details |
|---|---|
| Definition and benefit | A broomed texture raises slip resistance to roughly 0.8–1.1 COF, ideal for wet exterior slabs. |
| Timing is everything | Broom right after the final float passes a finger or trowel test; too early or late ruins the grooves. |
| Match broom to use | Fine bristle suits pool decks, standard fits driveways, coarse works best on ramps. |
| Cost and durability | Broom finish typically runs $3 to $5 per square foot installed, cheaper than stamped or exposed aggregate. |
| Work with a full-service crew | A-to-zconstruction pours, finishes, and seals broom finish slabs with one in-house team and offers test panels before the full job. |
Table of Contents
- What Is a Broom Finish in Concrete Work?
- How to Broom Finish Concrete: Step by Step
- Which Broom Type Gives the Best Texture?
- Why Did My Broom Finish Come Out Uneven?
- Broom Finish vs Smooth or Stamped: Which Is Right for You?
- Can You Stain or Seal a Broom Finish?
- Contractor Checklist: What a Broom Finish Project Should Include
- Why Most Broom Finish Advice Skips the Part That Actually Matters
- Get a Broom Finish Done Right the First Time
- Sources
- FAQ
What Is a Broom Finish in Concrete Work?
A broom finish is the texture created when a stiff bristled broom is pulled across concrete right after final floating, leaving fine parallel grooves in the surface. The American Concrete Institute treats broom finishing as a standard textured surface achieved at a specific point in the finishing sequence, and stresses that timing after the final float is the variable that makes or breaks the result.
A brushed or broomed finish produces grooves that raise the coefficient of friction to roughly 0.8–1.1, a range regularly specified for exterior pedestrian slabs where wet-weather traction matters.
Many municipal codes require textured finishes on exterior walkways and ramps specifically to reduce slip-and-fall liability, which is why broom finish shows up so often on public sidewalks. Mix design matters here too. A slump around 4 to 5 inches with 5% to 7% air entrainment gives finishers a workable surface without excess bleed water, which otherwise fights the broom and blurs the grooves.
How to Broom Finish Concrete: Step by Step
Getting a clean broom finish is less about the broom and more about everything that happens before it touches the slab. Here's the sequence a finishing crew actually follows.
- Prep the site. Set forms to grade, plan positive drainage away from structures, and detail edges before the truck arrives.
- Order the right mix. Aim for a 4 to 5 inch slump, moderate cement content, and 5% to 7% air entrainment if freeze thaw cycles are a concern, since coarser aggregate gradations can cause the broom to skip across protruding stones.
- Place and screed. Strike off, then bull float to embed aggregate and pull fines to the surface.
- Test for readiness. Press a finger or trowel into the surface. If it leaves a print about a quarter inch deep without sinking, the slab is ready for brooming.
- Broom at roughly a 45 degree angle. Use long, consistent strokes with even pressure, overlapping each pass slightly. Never push the broom, only pull it toward you.
- Work in sections. Finish edges first, then the field, and reassess timing every few feet on larger pours since concrete sets unevenly across a slab.
- Cure immediately. Apply a curing compound or wet cure right after brooming to prevent surface shrinkage cracks.
- Seal later. Wait roughly 28 days for full cure before applying a penetrating sealer.
Pro Tip: Broom a small test panel first if you're unsure about timing or mix. It costs almost nothing and saves you from re-pouring an entire driveway because the grooves came out too shallow.
Which Broom Type Gives the Best Texture?
Bristle stiffness changes both the look and the grip of the finish, so matching broom to use case matters more than most DIYers assume.
- Fine bristle: shallow, tight grooves, COF around 0.75, best for pool decks and patios where bare feet need comfort along with grip.
- Standard bristle: medium grooves, COF near 0.85, the default choice for driveways and sidewalks.
- Coarse bristle: deep, aggressive grooves, COF around 1.05, suited to industrial ramps and loading areas where traction outweighs appearance.
- Pattern choice: straight strokes are the standard look; cross-hatch and swirl patterns add visual interest but take more finishing skill to execute evenly.
- Material: polypropylene bristles hold up well for most jobs; horsehair gives a finer, softer texture; wire brooms are reserved for aggressive industrial texturing and are rarely used residentially.
Purpose-built concrete brooms outperform yard brooms because their bristle spacing is engineered for consistent groove formation rather than sweeping debris.
Why Did My Broom Finish Come Out Uneven?
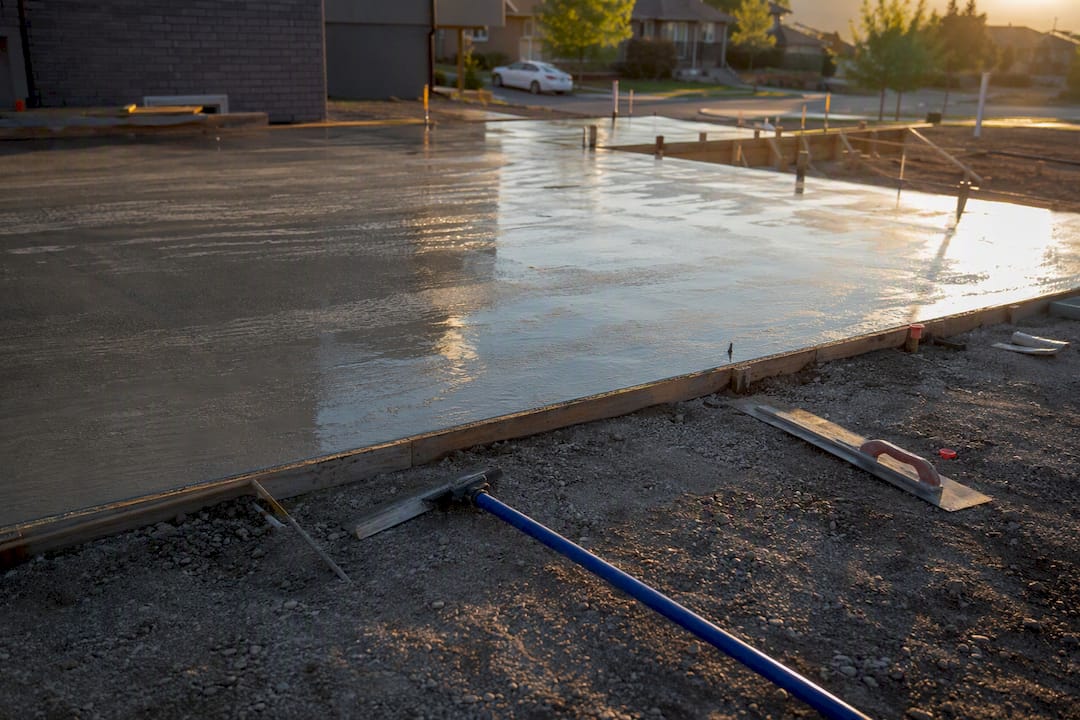
Most broom finish failures trace back to timing, not skill. Brooming too early, while the surface is still soft, drags aggregate and produces streaky, torn grooves. Brooming too late, after the surface has started to set, leaves grooves that are barely visible and offer little slip resistance.
- Shallow grooves: usually caused by brooming too early or using a mix with too high a slump.
- Raveling or torn ridges: typically means the crew waited too long, or the mix was too dry for the ambient temperature.
- Streaking or lap lines: often comes from inconsistent broom pressure or two finishers working out of sync on a wide slab.
- Reversible fixes: re-floating and re-brooming works if caught within minutes of the first pass.
- Irreversible fixes: grinding down the surface or applying a bonded overlay is the only option once concrete has hardened past workability.
Hot weather accelerates set time and shortens your window; cold weather can introduce frost that ruins texture entirely, so heated enclosures or non-chloride accelerators are worth planning for on winter pours.
Pro Tip: If you see bleed water sitting on the surface, wait it out before brooming. Brooming through standing water is the single fastest way to ruin an otherwise good pour.
Broom Finish vs Smooth or Stamped: Which Is Right for You?
Broom finish trades decorative flexibility for durability and grip, which is exactly why it dominates exterior flatwork despite looking plainer than stamped or exposed aggregate concrete.
| Factor | Broom Finish |
|---|---|
| Slip resistance | High, COF roughly 0.8–1.1 depending on bristle |
| Installed cost | Lower than decorative finishes, commonly $3 to $5 per square foot |
| Appearance | Utilitarian, uniform texture; limited decorative range without staining |
| Durability | High, holds up well to freeze thaw and heavy foot or vehicle traffic |
| Coating compatibility | Good, but may need light grinding before certain topical coatings adhere evenly |
If the appearance needs to carry more visual weight, stamped or exposed aggregate concrete makes sense. For a driveway, sidewalk, or pool deck where safety and budget matter more than looks, broom finish is hard to beat.
Can You Stain or Seal a Broom Finish?
Broom texture takes stain and color surprisingly well, since the grooves hold pigment and create subtle depth instead of a flat, one-note color. The main risk is blotchiness, which usually comes from uneven surface porosity rather than the stain itself, so a test panel is worth the extra hour.
- Stain application: works best on a fully cured slab, applied evenly and tested on a small section first to catch blotching before it's permanent.
- Sealer choice: penetrating sealers preserve the texture and slip resistance; topical sealers change the sheen and can slightly reduce traction.
- Timing: wait roughly 28 days for full cure before sealing, and reseal every few years depending on traffic and weather exposure.
- Deicing salt: penetrating sealers reduce salt scaling in freeze thaw climates, a real concern anywhere winters bring regular plowing and salting.
- Repairs: minor surface damage can often be patched or skim coated; deeper cracking or widespread raveling usually calls for grinding or professional assessment.
Routine care is light. Broom finished slabs generally need only periodic washing and resealing every few years to stay in good shape.
Contractor Checklist: What a Broom Finish Project Should Include
Every broom finish project A-to-zconstruction handles follows the same discipline, whether for a driveway or a commercial ramp.
- Pre-pour: confirm mix spec and slump, verify air content for the climate, pour a test panel, detail edges, and confirm drainage slope.
- On-pour: assign finishers to synchronized lanes on wide slabs, select broom bristle for the intended use, and set a timing plan tied to weather conditions.
- Post-pour: schedule curing immediately, plan sealing around the 28 day mark, and walk the finished slab for quality before final sign-off.
Homeowners planning a concrete driveway installation can use this same checklist when vetting bids, and it lines up closely with the general project sequencing described in this residential construction checklist.
| Stage | Key Action |
|---|---|
| Pre-pour | Confirm mix, slump, air content, and pour a test panel |
| On-pour | Match broom bristle to use case and stick to the timing plan |
| Post-pour | Cure immediately, seal near 28 days, inspect before sign-off |
Why Most Broom Finish Advice Skips the Part That Actually Matters
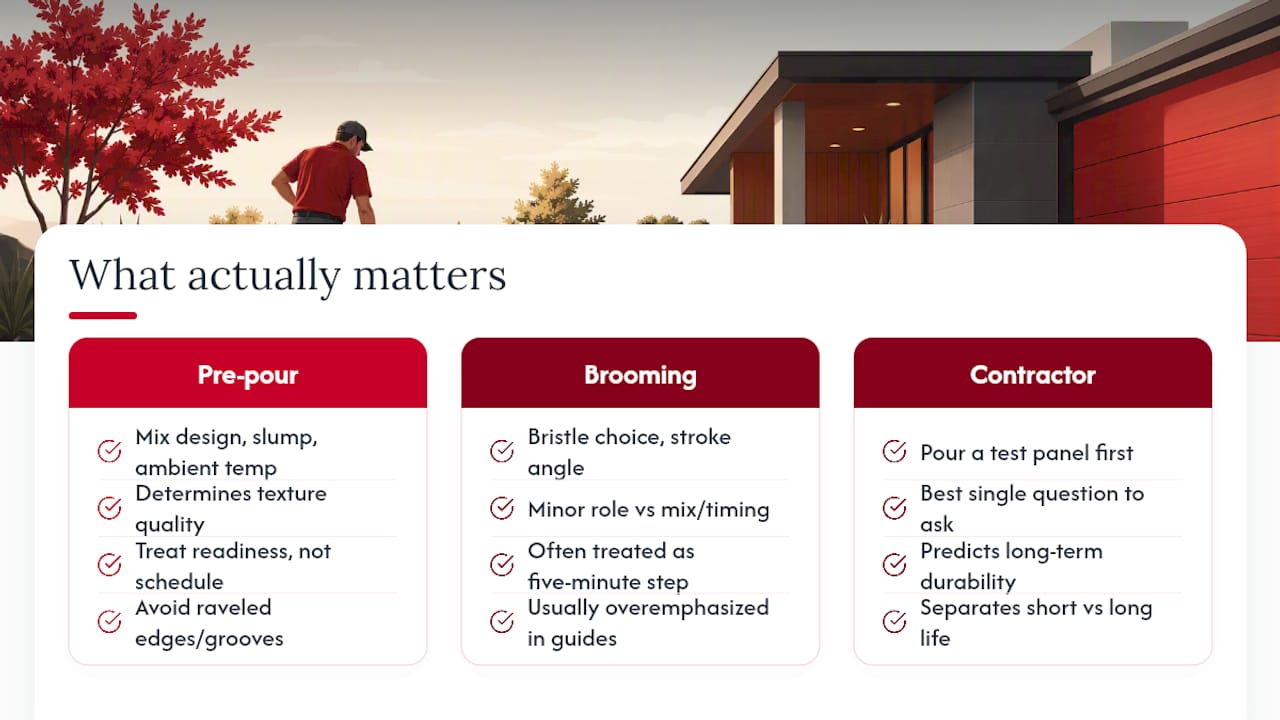
Most articles on broom finish treat it as a five-minute step: pour, float, drag a broom, done. That framing undersells how much the result depends on decisions made before the broom ever touches the slab. Mix design, slump, and ambient temperature do more to determine texture quality than the brooming technique itself.
The conventional advice also underweights timing variability. A slab that sets in 20 minutes on a 95 degree August afternoon might take an hour on a cool, overcast morning. Crews who treat brooming as a fixed-schedule task, rather than a readiness-based one, are the ones who end up with raveled edges or grooves too shallow to matter.
If you're hiring this out, the single best question to ask a contractor isn't "do you do broom finish." It's whether they'll pour a test panel first. That one habit, more than bristle choice or stroke angle, separates a slab that looks good for two years from one that still grips well after ten winters of salt and plow blades.
Get a Broom Finish Done Right the First Time
A-to-zconstruction handles concrete flatwork, hardscape, and finishing as one in-house crew, so the same team that pours your slab is the one brooming, curing, and sealing it, with no handoff gaps between subcontractors. That matters most on timing-sensitive work like broom finish, where a delay between pour and texture can cost you the whole slab.

When you request an estimate, ask for the mix spec, slump target, and whether a test panel is included before the full pour. A-to-zconstruction builds that into every quote for driveways, sidewalks, and pool decks, along with a sealing schedule once the concrete has cured. If your project also involves patios, retaining walls, or an outdoor kitchen, the same hardscape team can scope it together instead of juggling separate contractors. Get in touch through the concrete services page for Cedar City to request a quote and lock in a pour date.
Sources
FAQ
What is a broom finish in concrete?
A broom finish is a textured surface created by dragging a stiff broom across fresh concrete right after final floating, producing shallow parallel grooves that improve slip resistance.
When should I broom finish concrete?
Broom finishing happens right after final floating, once the surface holds a finger or trowel print without the print sinking in, typically within a narrow window that shrinks in hot weather and stretches in cool conditions.
What are the disadvantages of broom finish concrete?
Broom finish has a plainer, more utilitarian look than stamped or exposed aggregate concrete, and it can need light surface prep before some topical coatings will adhere evenly.
Is broom finish concrete better than smooth finish concrete?
For exterior surfaces exposed to rain, pool splash, or foot traffic, broom finish is generally the better choice because its texture provides far more slip resistance than a smooth trowel finish, which becomes dangerously slick when wet.
Can A-to-zconstruction pour a test panel before the full driveway?
Yes, A-to-zconstruction includes test panels as part of its estimating process for broom finish projects to confirm mix, slump, and texture before committing to the full pour.