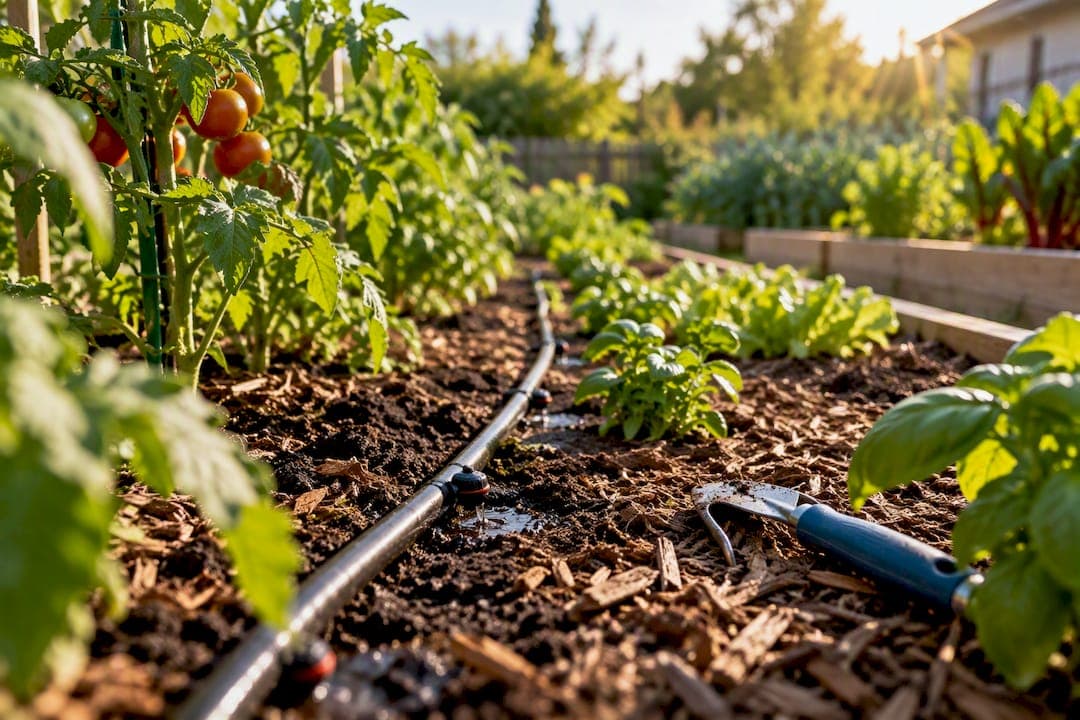
The best drip irrigation design starts with a zoned layout: a 3/4 inch mainline or hose bib as your point of connection, short 1/2 inch laterals feeding pressure-compensating emitters, and a head-end assembly with a filter and pressure regulator. Before buying a single fitting, measure the flow and pressure at your water source, sketch your planting areas into hydrozones, and decide whether the job fits a weekend DIY project or needs a licensed hand. Every design decision after that follows standards laid out in the NRCS microirrigation code and regional extension guidance.
TL;DR:
- Keep total flow on a single lateral under 200 gallons per hour to prevent pressure loss, splitting into additional zones or upsizing mainlines if exceeded.
- Soil texture determines emitter spacing: 6 to 12 inches for sandy soils, 12 to 18 inches for loam, and 18 to 24 inches for clay, with emitter type tailored to plant layout.
- Measure your water source pressure and flow first, then design zones accordingly, ensuring each zone matches your source capacity and adheres to regional standards.
- Use pressure-compensating emitters for sloped or long runs to maintain consistent flow, and regularly clean filters and flush lines to avoid clogging issues.
- Complex systems with multiple valves or grading issues require professional installation, as DIY setups should only cover simple beds with one or two zones for reliable operation.
Table of Contents
- How Do You Map Out a Drip Irrigation Layout?
- What Components and Flow Limits Keep a Drip System Working?
- How Should Soil Type Guide Emitter Spacing?
- How Many Zones Does a Home Drip System Need?
- What Steps Verify a Drip System Works Before You Walk Away?
- When Does a Drip Design Need a Licensed Contractor?
- What Homeowners Get Wrong About Drip Design
- Ready for Professional Drip Irrigation Installation?
- Where to Find the Official Design Standards
- Sources
- FAQ
How Do You Map Out a Drip Irrigation Layout?
Every workable drip irrigation system starts on paper, not in the trench. Grab a tape measure, a notepad, and walk your yard before you touch a single fitting.
- Locate your point of connection (POC). Mark the hose bib or irrigation valve you'll tap into, then measure distances to each planting bed, tree, and any impervious surface like a patio or driveway.
- Group plants into hydrozones. Cluster plants with similar water needs and root depths. Shrubs and perennials in one zone, vegetable beds in another, a young tree grouping in a third. Mixing a thirsty tomato bed with drought-tolerant sage on the same valve wastes water on one or starves the other.
- Choose a layout pattern. Line-source tubing works well for row crops and hedges, where emitters sit inline along a single run. Point-source emitters suit individual shrubs or trees where you want water concentrated at the root ball. A grid pattern, with crossing laterals every 12 to 18 inches, handles dense groundcover or lawn-replacement plantings.
- Decide on placement depth. Most home systems run tubing on the surface under two to three inches of mulch. That keeps repairs simple. A shallow burial of two to four inches works where foot traffic or mowing is a concern, though clogged emitters are harder to spot.
A rough sketch with dimensions, even a hand-drawn one, saves you from guessing later when you're calculating pipe runs or troubleshooting a dry patch. The AMWUA landscape drip guidelines recommend keeping this drawing as part of your permanent record, alongside a materials list, since it becomes your reference point during troubleshooting and future planting changes.
What Components and Flow Limits Keep a Drip System Working?
Before you size a single zone, find out what your water source can actually deliver. Attach a pressure gauge to your spigot to read static pressure in PSI, then time how long it takes to fill a five-gallon bucket to calculate gallons per minute (GPM). Both numbers determine how many zones you can run and how large each one can be.
Every head-end assembly needs the same basic stack of parts:
- A backflow preventer to stop irrigation water from siphoning back into your drinking supply.
- A filter, mesh or disc, sized to your emitter type, since drip emitters clog easily with sediment.
- A pressure regulator set to typical drip operating pressure, usually between 15 and 30 PSI according to the UC ANR fact sheet on drip system tuning.
- A controller and valves to automate and separate zones.
Once components are in place, apply what irrigation suppliers call the 200 rule: keep total flow on any single 1/2 inch lateral under roughly 200 gallons per hour (GPH). Multiply each emitter's rated GPH by the number of emitters on that line to check your total. Cross 200 GPH and friction loss starts degrading pressure at the far end of the run, so split into an additional zone or upsize your mainline diameter instead.
Pro Tip: Treat the 200 rule as a first-pass filter, not gospel. Confirm your actual run length against the manufacturer's maximum-run chart, since elevation changes of roughly 2.3 feet cost about 1 PSI and can tip a borderline design into uneven watering.
Pressure-compensating emitters make hitting that target far easier on sloped or long-run designs, since they hold flow steady even as line pressure varies.
How Should Soil Type Guide Emitter Spacing?
Soil texture decides how far water spreads sideways from each emitter, which means your emitter spacing plan is really a soil plan in disguise. Run a simple jar test first: fill a clear jar a third full of soil, add water, shake, and let it settle overnight. The layered bands of sand, silt, and clay tell you what you're working with.
- Clay soils hold water and spread it wide but slow. Space emitters 18 to 24 inches apart, since water moves laterally more than it drains down.
- Loam soils spread water in a fairly even cone. Space emitters 12 to 18 inches apart for balanced coverage.
- Sandy soils drain fast and spread narrow. Space emitters 6 to 12 inches apart, or double up emitters near each plant, since sand pushes water straight down before it can spread sideways.
For emitter type, inline drip tubing with pre-spaced emitters is the practical choice for vegetable beds and dense plantings, a point the UC ANR food garden guide makes directly: keep vegetable bed layouts simple with 1/2 inch or 1/4 inch inline tubing. Individual point-source emitters make more sense for widely spaced shrubs or trees, where you want water targeted at a specific root zone rather than spread along a line.
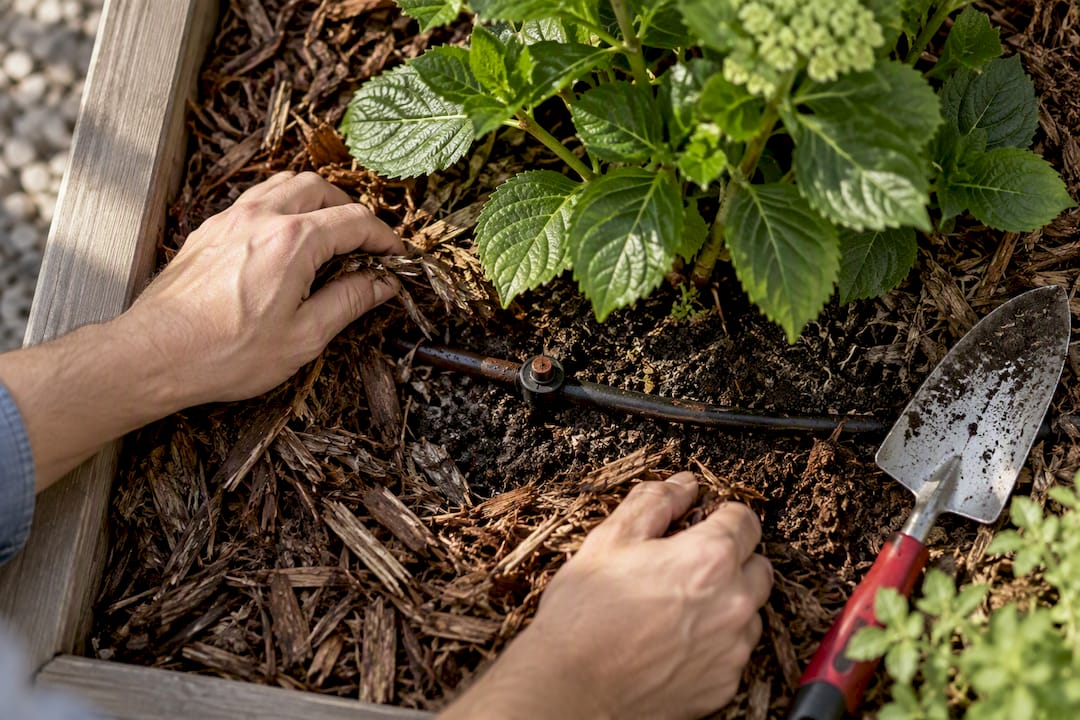
Surface tubing under mulch stays easy to inspect and repair, and that visibility pays off over the life of the system since clogged or damaged emitters get caught early instead of silently underwatering a plant for weeks.
How Many Zones Does a Home Drip System Need?
Zone count comes down to matching total demand against what your water source can supply. Here's the practical sequence:
- Add up GPH per zone. Total the flow of every emitter on a valve, and keep it within both your source's GPM capacity and the 200-rule limit per lateral.
- Set the controller basics. Most drip zones run far longer than sprinkler zones, often 30 to 60 minutes, and benefit from cycle-and-soak scheduling on clay soils to avoid runoff.
- Add monitoring where it earns its keep. A simple flowmeter catches a burst line before it floods a bed, and a soil moisture sensor prevents overwatering during cool spells.
- Adjust schedules by season and plant age. New plantings need frequent, shorter runs to establish roots; mature, well-established beds shift to longer, less frequent watering that encourages deep roots.
What Steps Verify a Drip System Works Before You Walk Away?
A design isn't finished until it's tested. Skipping startup checks is how small mistakes turn into dead plants three weeks later.
- Check local rules first. Confirm backflow device requirements and any permit needs before you dig or connect to a permanent water line.
- Install in sequence. Backflow preventer, then filter, then pressure regulator, then mainline, submains, laterals, and finally emitters with end-line flush caps.
- Flush before capping. Run water through open lateral ends to clear debris, then cap them.
- Test pressure and flow. Measure pressure loss from the first emitter to the last on each lateral, and record flow per valve as your baseline.
- Document everything. Keep an as-built map with your original sketch, noting any changes made during installation.
Pro Tip: Clean filters and flush lines at the start of each growing season, and check pressure readings twice a year. A slow pressure drop across a season usually means a clogging filter, not a leak.
When Does a Drip Design Need a Licensed Contractor?
Some projects outgrow a weekend DIY approach fast. Complex hydraulics across multiple valves, permit requirements, grading conflicts near foundations, or a design that needs a guaranteed as-built record are all signals to call a professional rather than troubleshoot blind.
A licensed general contractor based in Cedar City, Utah, has completed numerous projects across residential and commercial properties. They integrate every project phase under one roof, from initial sketch to final testing, which matters most on properties where irrigation routing overlaps with grading, hardscape, or planting work. This contractor specializes in irrigation and sprinkler system installation and repair, and provides free sprinkler and irrigation estimates across Utah.
What Homeowners Get Wrong About Drip Design
Most guides overcomplicate drip irrigation design with hydraulic math that home gardeners never need to run by hand.
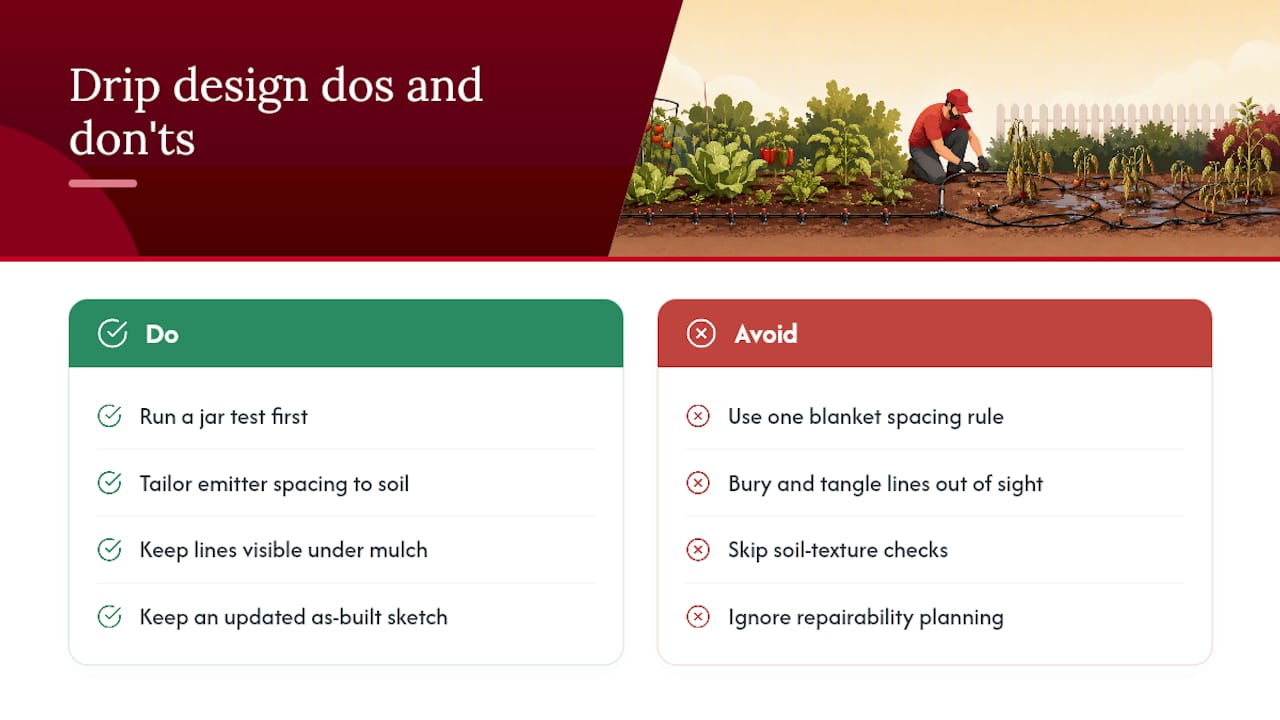
Where conventional advice actually falls short is spacing. Too many guides give one blanket emitter-spacing number and ignore soil texture entirely, which is backwards. A sandy raised bed and a clay-heavy backyard border need completely different emitter counts to wet the same size root zone. Run the jar test before you buy a single emitter. It costs nothing and saves you from a redesign in July.
If there's one thing to prioritize above all else, it's repairability. A buried, tangled system that no one can trace after two seasons isn't efficient. It's a future headache. Keep lines visible under mulch, keep your sketch updated, and treat the as-built map as seriously as the installation itself.
— Jake
Ready for Professional Drip Irrigation Installation?
Designing a drip system on paper is one thing. Getting the trenching, valve wiring, and pressure testing right on the first try is another, especially when your irrigation plan has to work around existing hardscape, grading, or a mature landscape. This contractor handles irrigation and landscaping installation as part of one coordinated project, so your drip system, sod, and xeriscaping get built by the same crew instead of three separate contractors working around each other.

For a free estimate, have your site sketch ready along with access details for the yard and, if you've already checked it, your spigot flow and pressure readings. That single measurement often decides how many zones your property needs. Request your free sprinkler and irrigation estimate and get a design built around how your property actually performs, not a generic template.
Where to Find the Official Design Standards
- NRCS Microirrigation Standard (Code 441) for filtration and pressure specs
- AMWUA Landscape Drip Guidelines for plan and testing requirements
- UC ANR Food Garden Drip Guide for vegetable bed emitter charts
- USU Extension DIY Drip Guide for step-by-step install sequencing
Sources
- Drip irrigation in the food garden — UC ANR
- Irrigation system, microirrigation (Code 441) — NRCS
- Tuning up your drip irrigation system: pressure regulation, system design, and scheduling — UC ANR (2023 fact sheet)
FAQ
How Do You Lay Out a Drip Irrigation System?
Start by marking your point of connection, then sketch distances to each bed and group plants into hydrozones by water need. From there, choose line-source tubing for rows, point-source emitters for individual shrubs or trees, or a grid pattern for dense groundcover, and route 1/2 inch laterals off a 3/4 inch mainline.
What Is the 200 Rule for Drip Irrigation?
The 200 rule caps total flow on a single 1/2 inch lateral at around 200 gallons per hour to limit friction loss and preserve uniform pressure. If your emitter count pushes past that number, split the run into a new zone or upsize the mainline instead of overloading one line.
What Is a Major Downside to Drip Irrigation?
Drip emitters clog easily with sediment or mineral buildup, which means filters need regular cleaning and lines need periodic flushing to keep flow uniform. Skipping that maintenance is the single most common reason a drip system underperforms within its first year.
How Deep Should Drip Irrigation Lines Be?
Most home drip lines sit on the surface under two to three inches of mulch, which keeps them easy to inspect and repair. A shallow burial of two to four inches works where foot traffic is a concern, though buried emitters are harder to check for clogs or damage.
Should I Design the System Myself or Hire a Contractor?
Simple beds with one or two zones are manageable as a DIY project using extension guides for reference. Properties with multiple valves, grading conflicts, or permit requirements are better handled by a licensed contractor like A to Z Construction, which offers free irrigation estimates across Utah.