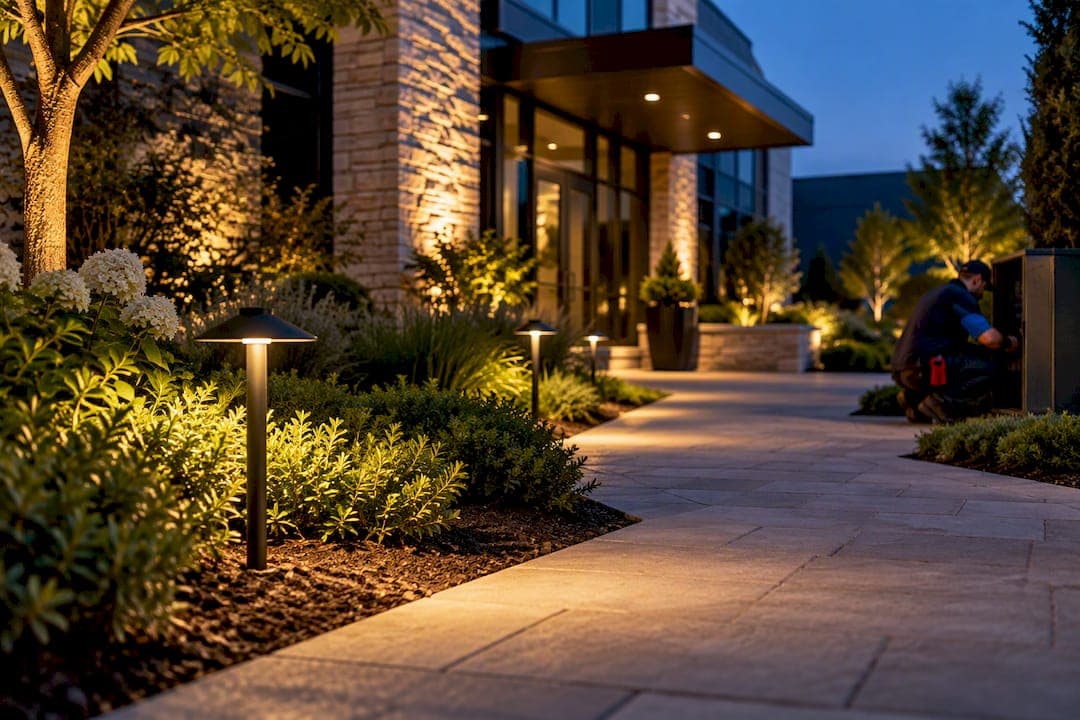
Low-voltage landscape lighting is the right call for nearly every homeowner lighting a walkway, garden bed, or small backyard feature. A 12-volt system runs cool, buries shallow, and lets you do most of the wiring yourself without an electrician. This guide walks through the parts you need, how to size everything correctly, the exact steps for a weekend install, and what to do when a fixture goes dim six months later.
TL;DR:
- Longer wire runs beyond 150 feet or multiple zones may cause voltage drop issues, requiring split transformers or more complex layouts.
- A transformer rated at least 20 to 25% above your total fixture wattage ensures sufficient headroom for future expansion and avoids overloading.
- Using heavy-gauge wire, hub or star wiring layouts, and higher transformer taps can fix voltage drop problems and keep fixtures illuminated evenly.
- Dim fixtures often indicate voltage drop, which can be fixed by upsizing the wire, shortening runs, or adjusting the transformer tap, rather than replacing fixtures.
- For complex projects involving hardscape, multiple zones, or permitting, hiring a licensed contractor ensures proper sequencing, compliance, and cohesive integration.
Table of Contents
- What Is Low Voltage Landscape Lighting and When Should You Use It?
- What Parts Make Up a Low Voltage Lighting System?
- How Do You Size and Wire the System Correctly?
- How Do You Install Low Voltage Lighting in a Weekend?
- Why Are Some Lights Dim and How Do You Fix Them?
- What Should You Buy: a Kit or Individual Parts?
- When Should You Hire a Licensed Contractor?
- How Do You Maintain a Low Voltage System Long Term?
- What Does Low Voltage Lighting Cost to Run?
- What Standards Apply to Commercial Landscape Lighting?
- How Do You Design Lighting for a Commercial Property?
- The Real Priority Order Most Guides Get Backwards
- Get a Free Estimate for Integrated Lighting and Hardscape
- Sources
- FAQ
What Is Low Voltage Landscape Lighting and When Should You Use It?
Low-voltage landscape lighting runs on a transformer that steps household 120V power down to 12V before it ever reaches your fixtures or cable in the yard. That 12V side falls under what electricians call Class 2, and it's the reason you can bury the wire shallow and handle the wiring yourself instead of calling in a licensed electrician for every splice. The transformer's primary connection to your home's 120V circuit still needs to meet standard electrical code, and local rules on burial depth vary, so check with your city before you start digging.
LED fixtures make this system worth building in the first place. A well-designed LED outdoor luminaire delivers more even light with less power draw than older HID sources, and many are rated for 50,000 hours or more before they need replacing. That's roughly 45 years of dusk-to-dawn use on a photocell. Compare that to a halogen landscape bulb burning out every year or two, and the math on LED fixtures isn't close.
Low-voltage systems fit best in these situations:
- Lighting garden paths, stair treads, and walkways where you need soft, even illumination rather than a floodlight
- Uplighting trees, statues, or architectural features as accent points
- Small to mid-size residential yards where total wire runs stay under a few hundred feet
- Any project where you want to add or move fixtures later without rewiring a whole circuit
Where low-voltage falls short: very long runs (think a quarter-acre estate with fixtures 300 feet from the transformer) start fighting voltage drop hard enough that you're better off splitting into multiple transformers or hiring someone to design a zoned system. High-output area lighting for a large parking lot or sports court is also outside what a 12V residential setup was built to do.
What Parts Make Up a Low Voltage Lighting System?
Five components make up every low-voltage setup, and skimping on any one of them is usually what causes a callback six months later.
The transformer converts your 120V household power to 12V and is the engine of the whole system. Most residential units offer multi-tap outputs, typically ranging from 12V to 15V, so you can push extra voltage to fixtures on a long run without frying the ones close to the transformer. A safe rule of thumb is to keep your total connected wattage at or below 80% of the transformer's rating, which leaves headroom for a hot summer day and for adding a few more fixtures down the road.
Wire gauge determines how far power can travel before it sags. Direct-burial cable comes in a few common gauges:
- 10 AWG: heaviest, best for long main runs or high fixture counts
- 12 AWG: a solid middle ground for most residential layouts
- 14 AWG: fine for shorter runs with fewer fixtures
- 16 AWG: only for very short branch runs near the transformer
Fixtures break down into path lights (typically 2 to 7 watts each with a wide, downward beam), spotlights and floodlights (4 to 20 watts, narrow to wide beam for uplighting), step and deck lights (low profile, 1 to 3 watts), and well lights for grazing a wall or tree trunk. Choosing warm white LEDs in the 2700K to 3000K range gives you that classic gas lamp glow instead of the bluish tint that makes a yard look like a parking garage.
Connectors and controls round things out. Waterproof, gel-filled connectors seal each splice against moisture and soil contact, and a timer or photocell handles the daily on/off cycle so you're not flipping a switch every evening. Some newer systems add app-based smart controls, which is a nice convenience but not a requirement for reliability.
Pro Tip: Buy your transformer with real headroom, not just enough to cover today's fixture count. Adding four path lights next spring shouldn't mean buying a whole new transformer.
How Do You Size and Wire the System Correctly?
This is the section that separates a lighting system that still looks great in five years from one where the fixtures at the far end of the yard are barely glowing by next summer.
Start with the wattage math. Add up the rated wattage of every fixture you plan to install. Say you've got ten path lights at 5 watts each (50 watts) and two spotlights at 20 watts each (40 watts) for a total of 90 watts. Following the 80% loading guideline, you'd want a transformer rated for at least 112 watts, and most installers round up 20 to 25% above the calculated load to land on a standard 150 watt unit rather than trying to find something rated at exactly 113.

Voltage drop is the enemy of even lighting. Every foot of wire between the transformer and a fixture drops the voltage slightly, and by the time you reach fixture number twelve on a 150-foot daisy chain, that fixture might be running at 9 volts instead of 12. Installers target 10.5 to 12 volts at each fixture measured under load, and there are four ways to fix a low reading: upsize the wire gauge, shorten the run, switch from a daisy chain to a hub or star layout where multiple shorter cables run from a central junction, or bump the transformer to a higher tap. Multi-tap outputs and smart feed layout are the two tools installers reach for first because they solve the problem without redoing the wire.
Four common layouts handle wiring differently:
- Daisy chain: fixtures wired one after another in a line, simplest to install but most prone to voltage drop at the end
- Hub or star: multiple cable runs radiate out from a central junction box, keeping each run shorter and more even
- Loop: the cable runs out and back to the transformer, feeding voltage from both ends and balancing the drop
- Multi-tap: uses the transformer's higher voltage outputs to compensate for a long single run
Spacing and aiming matter as much as wiring. Path lights generally look best spaced 6 to 8 feet apart, staggered on alternating sides of a walkway rather than lined up like runway markers. Aim spotlights so the beam hits the target, not your neighbor's window or your own front door, and angle path lights downward to wash the ground rather than shine straight out at eye level. That's the difference between a yard that looks designed and one that looks like a used car lot.
Transformer placement needs a few basics: mount it at least 12 inches off the ground on an exterior wall, keep it away from sprinkler heads and low spots where water pools, and plug it into a GFCI-protected outlet. The 120V feed to that outlet is the one part of this project where hiring an electrician, if you're not confident with household wiring, is worth the cost.
How Do You Install Low Voltage Lighting in a Weekend?
A typical residential setup, front walk plus a few accent lights, is realistic to complete over a weekend as long as you're not touching the 120V primary wiring yourself.
-
Plan and test before you dig. Lay fixtures on the ground in their approximate positions and walk the layout at night with the transformer temporarily connected. This is your chance to catch spacing mistakes and glare problems before anything is buried.
-
Mount the transformer. Fix it to an exterior wall on a dry surface, well above grade, and plug it into a GFCI outlet.
-
Run your main cable. Dig a shallow trench, commonly around 6 inches deep for direct-burial cable, though you should confirm the depth your local code requires. Lay the cable loosely rather than pulling it taut, leaving a little slack, or "service loop," at each fixture location in case you need to reposition later.
-
Mount and connect fixtures. Stake path lights and spotlights at their planned spots, then make each connection with a waterproof, gel-filled connector. Test the voltage at that fixture with a multimeter before covering the splice; catching a bad connection now saves you digging it back up in October.
-
Bury the cable and backfill. Once every connection tests good, cover the trench and tamp the soil down.
-
Commission the system at night. Turn everything on after dark, walk the yard, and fine-tune the aim on spotlights and uplights. Check voltage at your farthest fixture; if it reads below 10.5 volts, move that run to a higher transformer tap rather than assuming the fixture is faulty.
-
Program the timer or photocell. Set your on and off times, or let a photocell handle dusk-to-dawn automatically, and you're done.
Pro Tip: Test every splice with a multimeter before you bury it. A loose gel connector is invisible once it's under two inches of soil and mulch, and it's the single most common reason a "working" system goes dark at one fixture three months later.
Why Are Some Lights Dim and How Do You Fix Them?
Most low-voltage problems trace back to one of four causes, and none of them require replacing the whole system.
Dim fixtures at the far end of a run almost always mean voltage drop. Measure the voltage at that fixture under load. If it's below 10.5 volts, move that circuit to a higher tap on the transformer, upgrade to a heavier wire gauge on that run, or split it into a hub layout so the fixture isn't waiting at the end of a long daisy chain.
A section of lights that works intermittently or has gone completely dark usually points to a bad splice. Trace back from the last working fixture to the first dark one; that connector is almost always the culprit. Cut it out, strip the wire fresh, and replace it with a proper burial-rated gel connector rather than electrical tape, which fails underground within a season.
The whole system won't turn on. Check the GFCI outlet first; a tripped breaker there kills power to everything downstream. Next, confirm the timer or photocell settings haven't reset, and verify the transformer's tap wiring wasn't accidentally bumped during a fixture adjustment.
Glare or light spilling where you don't want it is a fixture problem, not a wiring problem. Adjust the aim, swap to a narrower beam angle, or add a simple shield or hood to the fixture. A poorly aimed spotlight shining into a window is the number one complaint neighbors bring up, and it's a five-minute fix.
What Should You Buy: a Kit or Individual Parts?
A boxed starter kit, typically a transformer, a spool of wire, and a fixed set of fixtures, works fine for a simple front walk with six to eight path lights and nothing fancy. It's cheaper up front and takes the guesswork out of matching components.
Once you're lighting a custom patio, a multi-zone yard, or anything paired with hardscape work, buying individual parts almost always pays off. Kit transformers tend to be lower quality with fewer tap options, and kit wire is often a lighter gauge than you'd choose for a longer run. Buying fixtures suited to the specific job and heavier direct-burial cable costs more initially but expands more easily and lasts longer.
Four things worth prioritizing your budget toward:
- A quality, multi-tap transformer with a stainless housing and photocell built in, rather than the cheapest plastic unit on the shelf
- IP-rated LED fixtures with a solid-cast housing (brass, copper, or heavy-duty polymer) rather than thin stamped metal that corrodes in a season
- Direct-burial copper cable in the correct gauge for your run length, not whatever came bundled in a kit
- Gel-filled waterproof connectors for every single splice, no exceptions
Where you can save: fixture styling and finish. A basic bronze path light does the same job as an ornate one costing three times as much. Where you should never cut corners: the transformer and the connectors, because those two components are what fail first when they're cheap, and both are buried or mounted where you won't notice a slow failure until half your yard is dark.
When Should You Hire a Licensed Contractor?
DIY works well for a straightforward front walk or a handful of accent lights. Bring in a licensed contractor when you're dealing with permitting questions, runs longer than a typical residential lot, or a project that needs to integrate with irrigation lines, retaining walls, or a paver patio already going in. A to Z Construction coordinates lighting alongside earthwork and grading on the same project, which matters because trenching for lighting after a patio or wall is already built usually means tearing something up. Sequencing it all under one crew avoids that rework entirely.
How Do You Maintain a Low Voltage System Long Term?
A little seasonal attention keeps a well-built system running for a decade or more without a single service call.
Check fixture lenses and housings twice a year, ideally at the start of spring and fall. Dirt, hard water spots, and grass clippings dull the beam more than people expect, and a lens wipe with a soft cloth restores most of the lost brightness instantly.

Trim back growth around uplights and well lights. Landscaping grows into fixtures faster than most homeowners track, and a spotlight buried in a spreading shrub by July isn't doing anything for your curb appeal.
Inspect exposed cable after freeze-thaw cycles. Ground heaving over winter can pull a shallow-buried cable up near the surface, especially at trench edges, where it's vulnerable to a lawnmower or edger. A quick walk-through each spring catches this before it becomes a cut wire.
Test voltage annually at your farthest fixture, especially in year two or three, since connector corrosion and minor resistance increases creep in slowly. Catching a drift from 11.5 volts down to 10 volts early is a five-minute tap adjustment, not a rewiring project.
Clean transformer vents and check the photocell sensor for dust or spiderwebs, since a blocked photocell can misjudge dusk and either turn lights on late or not turn them off at all.
Replace failing LED fixtures individually rather than waiting for a whole run to degrade. Because LEDs dim gradually rather than burning out abruptly, a fixture running noticeably dimmer than its neighbors after a few years is worth swapping rather than nursing along.
What Does Low Voltage Lighting Cost to Run?
The efficiency case for LED low-voltage lighting comes down to watts per fixture and how many hours a year you're actually running them. A typical residential system with a dozen fixtures averaging 5 watts each draws about 60 watts total, roughly the same as a single old-style incandescent floodlight bulb, and that's running your entire front and back yard.
Run that system on a dusk-to-dawn photocell for around eight hours a night, and you're looking at a modest addition to your monthly electric bill, generally a few dollars, depending on local utility rates. Compare that to a halogen-based system of the same size, which can draw three to five times the wattage for the same light output, and the annual cost difference adds up fast even before you factor in bulb replacement.
The bigger savings show up in maintenance, not the electric bill. LED fixtures rated for 50,000 hours mean you're not climbing around garden beds swapping bulbs every year the way you would with older halogen or incandescent landscape lights. Over a decade, that's the real cost saving: fewer bulbs bought, fewer trips out to the yard with a ladder and a flashlight, and a system that keeps performing at close to its original output for most of its rated life instead of dimming noticeably year over year.
What Standards Apply to Commercial Landscape Lighting?
Commercial properties face a different bar than a residential front yard. Business owners, property managers, and HOA boards installing lighting across a parking area, storefront frontage, or shared common space need to think about code compliance and liability in a way homeowners generally don't.
Low-voltage power units and luminaires used in these installations are evaluated under UL standards such as UL 1838 for low-voltage landscape lighting and UL 2108 for low-voltage lighting systems, which test for fire and shock risk. NEC Article 411 governs lighting systems operating under 30 volts and is the code section most inspectors reference when signing off on a commercial low-voltage install. Any commercial property should also confirm local jurisdiction requirements, since permitting and inspection rules for common-area lighting are often stricter than for a single residential lot.
Beyond code, commercial installations usually call for a documented maintenance plan, since a dark walkway or unlit stairway on a business property carries liability exposure that a homeowner's dim path light simply doesn't. Photometric planning, spacing calculations that guarantee even illuminance across a walkway or lot, also matters more at commercial scale, where uneven lighting creates both safety and aesthetic problems across a much larger footprint than a residential yard.
How Do You Design Lighting for a Commercial Property?
Good commercial landscape lighting design balances two things that pull against each other: making the property look inviting after dark and making sure every walkway, entrance, and parking area is genuinely safe to navigate.
Layer the light rather than flooding the space. A strong design uses three tiers: functional lighting for stairs, walkways, and parking (the safety layer), accent lighting on signage, trees, or architectural features (the character layer), and softer ambient washes near seating or entry areas (the welcome layer). Relying on one bright layer alone tends to create harsh contrast and dark pockets right next to overlit zones.
Match color temperature to the brand, not just the budget. A boutique retail storefront often benefits from a warmer 2700K to 3000K tone that reads as upscale and welcoming, while a larger commercial complex with signage and wayfinding needs might use a slightly cooler tone for better nighttime visibility and legibility.
Plan for consistent uniformity, not just enough total light. A parking lot with three bright fixtures and long dark gaps between them feels less safe than one with more evenly spaced, moderate output fixtures, even if the total lumen count is identical. Even spacing and consistent aiming matter more than raw brightness at commercial scale.
Design for maintenance access from the start. Commercial properties change landscaping, add signage, and adjust parking layouts more often than a single-family yard does, so a lighting layout built with accessible junction points and modest expansion capacity in the transformer saves a redesign down the line.
The Real Priority Order Most Guides Get Backwards
Most DIY lighting guides spend their word count on fixture aesthetics, warm white bulbs, brushed bronze finishes, path light spacing, and treat the electrical fundamentals as an afterthought buried in a footnote. That ordering is backwards. The fixture you pick is the least likely thing to cause a problem in year two. Voltage drop, a cheap connector, and an undersized transformer are what actually fail.
If you take one thing from this guide, it's this: buy the boring parts first. A quality multi-tap transformer and gel-filled connectors for every splice cost more than the bargain-bin versions, but they're the difference between a system that still looks great in five years and one where you're troubleshooting dim fixtures every spring. Fixture style is reversible. A bad splice buried under six inches of mulch is not something you'll want to dig up twice.
The other thing worth saying plainly: DIY has a real ceiling. It's the right call for a front walk, a modest backyard, a handful of accent lights. Once a project involves long runs, multiple zones, or coordination with a patio or retaining wall going in at the same time, that's where a licensed contractor's earthwork and lighting coordination earns its cost, not because the wiring gets harder, but because sequencing it wrong with other trades means tearing up finished hardscape to fix a lighting mistake.
— Jake
Get a Free Estimate for Integrated Lighting and Hardscape
Some contractors handle landscape lighting as part of the same project as your patio, retaining wall, or planting beds, not as a separate afterthought hired out to a different crew. That matters because trenching for cable after a paver patio is already down means cutting into finished work, and coordinating lighting with hardscape and landscaping from day one avoids that entirely.

If your project involves more than a simple front walk, a backyard with a new patio, a multi-zone yard, or lighting that needs to work with irrigation and grading already planned, a single point of contact managing every phase saves you the headache of scheduling three different subcontractors. Reach out to A-to-zconstruction for a free estimate on your landscape lighting and hardscape project, and see the landscaping services page for the full scope of what gets coordinated under one crew.
Sources
- LED Outdoor Area Lighting Fact Sheet — U.S. DOE
- Low-voltage landscape lighting field guide: design and install — Anvilfield
- How to Install Low-Voltage Landscape Lighting (12V) — Big Frog Supply
FAQ
Is Low Voltage Landscape Lighting Safe to Install Yourself?
Yes, the 12V side of the system is Class 2 and generally safe for homeowners to wire, mount, and bury. The 120V connection between your home's power and the transformer should meet standard electrical code, and if you're not comfortable with that part, hiring an electrician for just that step is a reasonable middle ground.
How Deep Do You Need to Bury Low Voltage Wire?
Most low-voltage cable is buried around 6 inches deep, though exact requirements vary by local code, so check with your municipality before trenching. Burying it shallower than recommended risks damage from lawn equipment or foot traffic.
Why Are My Farthest Landscape Lights Dimmer Than the Rest?
This is almost always voltage drop from the wire run being too long or too light a gauge for the load. Installers fix it by measuring voltage at the fixture under load and then upsizing the wire, switching to a hub layout, or moving that run to a higher transformer tap.
How Big a Transformer Do I Need for My Yard?
Add up the total wattage of all your fixtures, then choose a transformer rated 20 to 25% higher than that total so it never runs above about 80% capacity. This headroom keeps the unit running cooler and leaves room for adding fixtures later.
Should I Buy a Lighting Kit or Individual Parts?
A kit works well for a simple, small installation like a short front walk with a handful of path lights. For custom layouts, multi-zone yards, or anything paired with hardscape work, buying a quality transformer, proper-gauge cable, and individual fixtures separately typically performs better and lasts longer.
When Should I Hire a Contractor Instead of DIY?
Hire a licensed contractor when your project involves long wire runs, multiple lighting zones, permitting questions, or coordination with hardscape and irrigation already going in. A-to-zconstruction handles landscape lighting alongside earthwork and hardscape under one crew, which avoids the rework that comes from trenching after other work is finished.