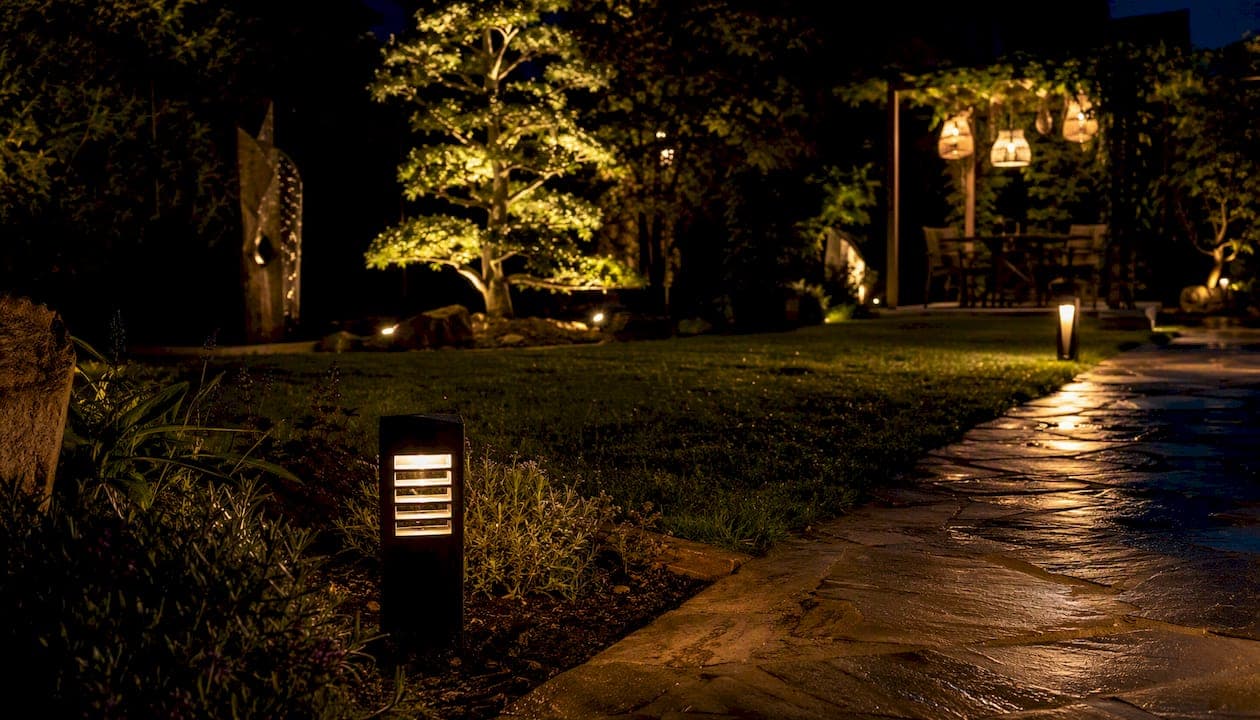
The core landscape lighting types every homeowner needs to know are spotlights/uplights, path lights, floodlights, deck and step lights, in-ground/well lights, wall-wash lights, downlights/moonlighting fixtures, hardscape recessed lights, underwater lights, and decorative string or lantern lights. The smartest way to choose among them is to match each fixture to one of the four professional lighting layers: ambient, task, accent, and decorative. Start there, and the product choices get much simpler.
Three go-to combos that cover most residential yards:
- Small yards: path lights along walkways + low-wattage uplights on one or two specimen plants
- Larger properties: moonlighting fixtures in tree canopies + accent spotlights on architecture and planting beds
- Patios and hardscape: LED strip lights recessed into risers or retaining walls + step lights at every grade change
Key Takeaways
Matching each fixture to the right lighting layer, checking lumens and IP ratings, and testing placement before you trench are the three decisions that separate a well-designed system from one that gets redone in two years.
| Point | Details |
|---|---|
| Map fixtures to four layers | Assign ambient, task, accent, and decorative roles before buying any fixture. |
| Use warm color temperatures | Stick to 2,700K–3,000K for residential exteriors to flatter plants and architecture. |
| Check IP ratings carefully | Use IP65+ for exposed fixtures, IP67 for in-ground lights, and IP68 for underwater. |
| Test before you trench | Use temporary clamp lights at dusk to confirm placement before burying cable. |
| A-to-zconstruction for complex jobs | Licensed crew handles line-voltage, permitting, and integrated hardscape lighting in Utah. |
Table of Contents
- What are the four lighting layers, and which fixtures do they use?
- Which landscape lighting fixture types should you actually use?
- What specs do you actually need to check before buying?
- How do you plan placement and avoid the most common mistakes?
- DIY or hire a pro? Installation, maintenance, and realistic costs
- Why hire a licensed contractor for landscape lighting?
- What installers know that product listings won't tell you
- A-to-zconstruction handles lighting and hardscape as one project
- Sources
- FAQ
What are the four lighting layers, and which fixtures do they use?
Landscape lighting is organized into four primary layers: ambient, task, accent, and decorative. A professional plan integrates all four, and understanding them keeps you from buying a cart full of spotlights and wondering why the yard still looks flat.
Ambient is the base layer. It provides general visibility across a space without a strong directional source. Think soft post lights, wall-wash fixtures along a fence line, or a lantern at the entry. The goal is comfortable, low-glare brightness that lets people move around safely.
Task lighting targets specific activities: cooking at an outdoor kitchen, walking down steps, reading on a covered porch. Deck lights, step lights, and under-counter fixtures all live here. Brightness matters more than mood in this layer.
Accent is where most of the visual drama comes from. Spotlights, uplights, and bullet lights aimed at trees, architectural features, or garden sculptures create the focal points that make a yard look designed rather than just lit. Uplighting highlights vertical features and creates drama, while downlighting provides functional, natural-looking task illumination. Layering both gives the most versatile result.
Decorative fixtures are the personality layer. String lights, decorative lanterns, and low-voltage path lights with ornamental housings contribute mood and style rather than raw lumens.
| Layer | Example fixtures | Why you'd use them |
|---|---|---|
| Ambient | Post lights, wall-wash, soft path lights | General visibility, low-glare base brightness |
| Task | Step lights, deck lights, under-counter fixtures | Functional illumination for specific activities |
| Accent | Spotlights, uplights, well lights, bullet lights | Highlight trees, walls, architecture, focal plants |
| Decorative | String lights, lanterns, ornamental path lights | Mood, style, and visual warmth |
Pro Tip: Darkness is part of the design. Top installers deliberately leave areas unlit to create contrast and depth. A yard where every square foot is equally bright looks like a parking lot. Let shadows do work.
Which landscape lighting fixture types should you actually use?
Here is a plain-language breakdown of each fixture class, what it does well, where to put it, and what to watch for.
Spotlights and uplights
Primary uses: Highlighting specimen trees, architectural columns, front-door surrounds, garden sculptures, and tall shrubs. These are the workhorses of the accent layer.
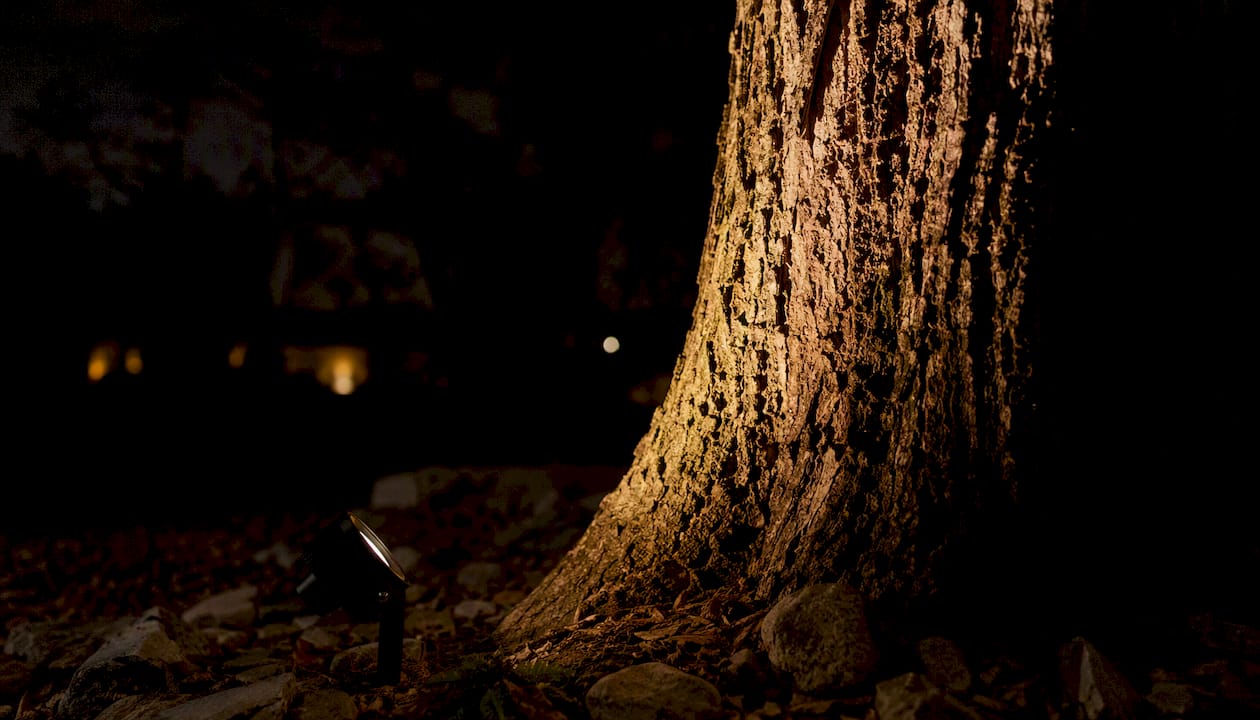
Placement rule: Position the fixture 1–3 feet from the base of the target and aim upward at roughly a 30–45 degree angle. For a narrow tree trunk, a tighter beam (15–30°) keeps light on the bark rather than spilling into the canopy.
Caution: Glare is the main risk. Aim away from sightlines and use shielded or hooded fixtures. Most are low-voltage and DIY-friendly with a transformer kit.
Floodlights
Primary uses: Wide-area security coverage, illuminating large walls or the broad face of a garage, and general backyard brightness. They belong in the ambient and task layers.
Placement rule: Mount 8–10 feet high and angle downward. A 120° beam angle covers a wide swath; narrow it to 60–90° when you want more throw distance.
Caution: Floodlights are the most common source of light trespass onto neighboring properties. Aim carefully and use motion sensors to limit runtime.
Path and walkway lights
Primary uses: Wayfinding along driveways, garden paths, and entry walks. They sit in the task and ambient layers simultaneously.
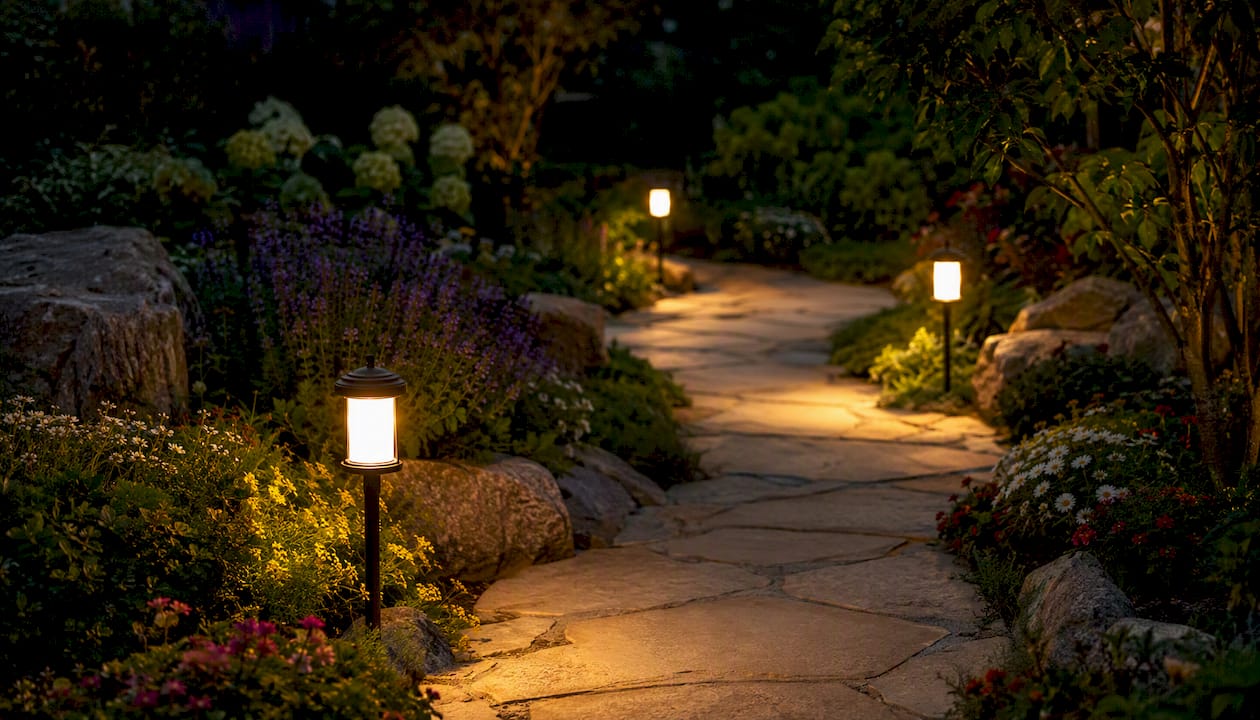
Placement rule: Alternate fixtures on opposite sides of the path rather than lining them up like a runway. Professional installers often space path fixtures 20 feet apart or more to avoid the over-lit look homeowners regret. Mounting height is typically 18–24 inches.
Caution: Most path lights are low-voltage and easy to DIY. Check that the fixture head shields the bulb from direct view to prevent glare at eye level.
Post and bollard lights
Primary uses: Marking driveway entrances, property edges, and larger garden paths where a taller fixture reads better architecturally.
Placement rule: Space bollards 6–8 feet apart for consistent coverage. Post lights at entries work best when they match the home's exterior style.
Caution: Taller bollards (24–48 inches) can create glare if the diffuser is clear rather than frosted. Line-voltage post lights require a licensed electrician.
In-ground and well lights
Primary uses: Uplighting trees and flagpoles from grade level, illuminating driveways from below, and accenting hardscape features flush with the surface.
Placement rule: Set the fixture so the lens sits at or just below grade. Aim the beam at the target feature, not straight up.
Caution: These fixtures sit in standing water and freeze-thaw cycles. Specify IP67 and marine-grade seals for in-ground applications, and use corrosion-resistant housings in climates with hard winters. Site prep for in-ground fixtures often requires trenching, which is worth factoring into your installation plan.
Pro Tip: Two well-placed 200-lumen uplights on a specimen tree will outperform a single high-output flood for architectural effect. Beam angle and surface reflectance matter more than raw lumens.
Deck and step lights
Primary uses: Safety at grade changes, ambient glow on deck surfaces, and subtle accent lighting on risers and railings.
Placement rule: Install step lights in the riser face, not the tread, so the light casts downward and illuminates the step without blinding anyone walking up. Space them every other step on long staircases.
Caution: These fixtures are often line-voltage when integrated into a deck's electrical system. Low-voltage versions exist and are DIY-friendly, but verify the IP rating (IP65 minimum for exposed outdoor use).
Wall-wash lights
Primary uses: Grazing textured stone or brick walls to reveal surface detail, softly illuminating fence lines, and providing ambient fill across large vertical surfaces. Pairing wall-wash fixtures with brick or stone masonry creates a particularly striking effect.
Placement rule: Mount 12–18 inches from the wall surface and aim parallel to it. The closer the fixture, the more texture it reveals; farther away produces a smoother wash.
Caution: Wide beam angles (60–120°) work best here. Narrow spots create hot spots rather than an even wash.
Downlights and moonlighting fixtures
Primary uses: Mounted high in tree canopies or on overhead structures to cast light downward, simulating moonlight. Excellent for general lawn illumination and creating natural-looking shadows through foliage.
Placement rule: Mount at 15–25 feet for the most convincing moonlight effect. Use a wide beam (60–120°) and a warm color temperature so the light reads as natural rather than artificial.
Caution: Requires access to the canopy for installation, which usually means a licensed contractor and proper rigging. Moonlighting and uplighting are distinct strategies: uplighting makes trunks and canopies pop from below; moonlighting handles general lawn and path illumination from above.
Underwater and water feature lights
Primary uses: Illuminating ponds, fountains, waterfalls, and pool edges from below the waterline.
Placement rule: Submerge the fixture at the base of a waterfall or fountain jet and aim upward through the water. For ponds, position lights to illuminate fish and plants rather than pointing toward viewers.
Caution: These require IP68 ratings and should always be installed by a licensed electrician. Never use standard outdoor fixtures near or in water.
Hardscape recessed and linear lights
Primary uses: LED strip lights or recessed puck lights set into retaining walls, stair risers, paver edges, and outdoor kitchen counters. They define the hardscape structure at night.
Placement rule: Recess the fixture flush with the surface so the light source itself is hidden. The goal is to see the glow, not the fixture.
Caution: Installation happens during the hardscape build, not after. Retrofitting recessed lights into an existing retaining wall is significantly harder than planning for them upfront.
String lights and decorative lanterns
Primary uses: Overhead ambiance on patios, pergolas, and garden dining areas. Pure decorative layer.
Placement rule: Hang string lights at 8–10 feet overhead with a slight catenary sag for a relaxed look. Anchor to posts, pergola beams, or eye hooks in masonry.
Caution: Most string lights are line-voltage. Use outdoor-rated, wet-location fixtures and plug into a GFCI outlet.
What specs do you actually need to check before buying?
LED and halogen are the two main bulb types used in landscape lighting. LED wins on nearly every practical measure: it uses a fraction of the power, lasts far longer, and produces less heat. Halogen still appears in some older transformer systems and specialty fixtures, but for new installs, LED is the clear choice. Pick LEDs with a CRI of 80 or higher so plant colors and stone textures render accurately.
Here are the spec labels to read on any product page:
- Lumens (not watts): Watts measure power draw; lumens measure actual light output. Path lights typically need 50–150 lumens; accent uplights 200–400 lumens; floodlights 700–1,300 lumens.
- Color temperature (Kelvin): Residential exteriors favor 2,700K–3,000K, which reads as warm white and flatters both plants and architecture. Avoid 4,000K+ (cool white) for most residential uses.
- CRI (Color Rendering Index): Aim for CRI 80+. Higher CRI means colors look more natural under the light.
- Beam angle: Narrow (15–30°) for spotlighting a single trunk or sculpture; medium (30–60°) for general uplighting; wide (60–120°) for wall-wash and flood applications.
- IP rating: IP65 minimum for any exposed outdoor fixture; IP67 for in-ground and well lights; IP68 for underwater fixtures.
- Voltage: 12V low-voltage systems are DIY-friendly and safe. Line-voltage (120V) requires a licensed electrician.
| Application | Target lumens | Color temperature |
|---|---|---|
| Path and walkway | 50–150 lm | 2,700K–3,000K |
| Accent/uplight | 200–400 lm | 2,700K–3,000K |
| Wall-wash | 200–400 lumens | 2,700K–3,000K |
| Flood/security | 700–1,300 lm | 3,000K–4,000K |
Smart controls, timers, and motion sensors change how you size a system. A motion-activated floodlight can run at higher lumens because it only fires when needed. Dimmable LED drivers let you dial back path lights after midnight. If you plan to add smart controls later, confirm the transformer or driver supports 0–10V dimming or PWM dimming before you buy.
How do you plan placement and avoid the most common mistakes?
Start by walking the property at dusk and writing down the job each zone needs: safety at the front steps, accent on the oak tree, task lighting at the grill. That list drives every placement decision.
Placement checklist:
- Mark focal points first (specimen trees, architectural features, water elements) before placing any ambient or path fixtures.
- Keep uplights 1–3 feet from the base of the target; move farther back for wider canopies.
- Space path lights on alternating sides, not parallel rows, and start wider than you think necessary. Restraint is the professional standard: the airport-runway look comes from spacing fixtures too close together.
- Aim fixtures away from windows and neighboring properties to prevent glare and light trespass.
- Use shielded or hooded fixtures wherever a light source falls within a normal sightline.
Focal point hierarchy matters. Pick two or three features per zone to highlight and leave the rest dark. A single well-lit oak tree reads as intentional; five equally lit shrubs reads as clutter. Balance beam angles so the brightest fixture in a scene is roughly three times the lumens of the fill fixtures around it.
Pro Tip: Before you trench a single cable, test the layout with temporary clamp lights or battery-powered lanterns. Walk the yard at dusk, take smartphone photos, and adjust positions. Moving a clamp light costs nothing; moving a buried cable costs time and money.
DIY or hire a pro? Installation, maintenance, and realistic costs
Low-voltage vs. line-voltage at a glance
Low-voltage (12V) systems run off a plug-in transformer and use lightweight cable that can be staked or buried a few inches deep. Most homeowners can install a basic path-light or uplight kit in an afternoon. Vendor kits simplify basic layouts and include the transformer, cable, and connectors. Line-voltage (120V) work requires a licensed electrician or general contractor in every state, and most municipalities require a permit for new outdoor circuits.
Maintenance checklist
- Clean fixture lenses twice a year; dirt and oxidation cut output noticeably.
- Check gaskets and seals annually, especially after a hard winter.
- Replace LED modules when output drops or color shifts; most last 25,000–50,000 hours.
- Inspect cable connections and ground stakes each spring after freeze-thaw cycles.
- Test GFCI outlets monthly; outdoor GFCI protection is required by the National Electrical Code for all outdoor receptacles.
Safety notes
Every outdoor circuit needs GFCI protection. Use only fixtures rated for wet or damp locations as labeled. Route low-voltage cable away from irrigation lines and edging paths to prevent accidental cuts. Any new outdoor circuit or sub-panel work triggers a permit in most Utah jurisdictions.
Ballpark costs
A small DIY low-voltage kit covering basic walkway lighting and a few uplights may cost a few hundred dollars in materials. A professionally installed low-voltage system for a mid-size yard with several fixtures and buried cable can range in the low thousands depending on complexity. Larger projects involving line-voltage circuits, moonlighting in mature trees, or integrated hardscape lighting can cost significantly more. Timelines range from a single day for a simple kit install to one to two weeks for a full hardscape-integrated build.
Why hire a licensed contractor for landscape lighting?
A licensed general contractor brings more than a truck and a shovel. For any project involving line-voltage wiring, permit pulls, trenching through existing hardscape, or fixtures integrated into retaining walls and patios, the coordination between trades is where DIY plans typically break down.
A-to-zconstruction handles landscape lighting in Utah as part of its full-service landscaping and hardscape offering. Here is how a typical project runs:
- Site visit and design: Walk the property, identify focal points, map the four lighting layers, and produce a fixture plan with transformer sizing.
- Permitting: Pull any required permits for line-voltage circuits before work begins.
- Site prep and trenching: Grade and trench for buried cable runs, coordinating with any concurrent hardscape or earthwork scopes.
- Fixture installation and wiring: Mount, aim, and connect all fixtures; install transformer or panel connections.
- Testing and handoff: Walk the completed system at dusk, adjust aiming, and hand off operating instructions.
With 500+ completed projects and an in-house licensed crew, A-to-zconstruction manages every phase under one contract. No subcontractor scheduling gaps, no finger-pointing between trades when a conduit run conflicts with a retaining wall footing.
What installers know that product listings won't tell you
A few things that show up on every well-executed job but rarely appear in fixture spec sheets:
- Space path lights wider than the package suggests. The "every 8 feet" recommendation on most boxes produces a runway. Start at 12–15 feet and adjust from there.
- Use 2,700K for everything near the house and reserve 3,000K for perimeter or security fixtures. Mixing color temperatures in the same sightline looks unintentional.
- Narrow-beam uplights (15–25°) on specimen trees look cleaner than wide floods. The tight beam makes the tree pop; a wide flood just brightens the whole bed.
- Graze textured walls from 12–18 inches away. Farther back and you lose the shadow detail that makes stone and brick interesting at night.
- Stainless steel and powder-coated aluminum fixtures outlast brass in high-UV, freeze-thaw climates. Brass patinas gracefully in coastal settings but can corrode faster in Utah's dry heat and cold winters.
- Never over-wire a transformer. Leave 20–25% capacity headroom so you can add fixtures later without replacing the unit.
A-to-zconstruction handles lighting and hardscape as one project
Lighting a yard well is straightforward when the hardscape is already built with conduit runs and junction boxes in place. When it is not, retrofitting fixtures into finished stone walls or paver patios means cutting, patching, and hoping the color matches. A-to-zconstruction solves that by handling hardscape and outdoor construction alongside the lighting plan from day one, so recessed step lights, wall-wash fixtures, and buried cable runs are built in rather than bolted on.

The process is simple: one call, one crew, one contract. A-to-zconstruction covers the site visit, design, permitting, trenching, fixture installation, and final walkthrough. No juggling separate landscaping and electrical contractors. For Utah homeowners ready to move from planning to installation, request a free hardscape and lighting estimate and get a clear scope and price before any work begins.
Sources
- Types of Landscape Lighting | Vision Outdoor Lighting
- Landscape Lighting Guide | Outdoor Lighting Tips at Lumens
- Landscape lighting essentials | Fine Homebuilding
- How to Choose the Best Landscape Lighting for Your ... | VOLT Lighting
- Types of Outdoor Lighting: What Each One Does and Where It Belongs | J Allen Homes
FAQ
What are the main types of landscape lighting fixtures?
The core types are spotlights/uplights, path lights, floodlights, in-ground/well lights, deck and step lights, wall-wash lights, downlights/moonlighting fixtures, hardscape recessed lights, underwater lights, and decorative string lights. Each maps to one of the four professional lighting layers: ambient, task, accent, and decorative.
Which landscape lighting type is easiest to install yourself?
Low-voltage path lights and uplight kits are the most DIY-friendly options. They run on a 12V transformer, use lightweight cable, and require no permit or licensed electrician in most jurisdictions.
What color temperature works best for residential outdoor lighting?
Warm white in the 2,700K–3,000K range is the standard recommendation for residential exteriors. It flatters both plant material and architecture and reads as natural rather than clinical.
When should uplighting and downlighting be used together?
Uplighting works best on vertical features like trees, columns, and walls where you want drama and definition. Downlighting from tree canopies or overhead structures provides natural-looking general illumination and shadow patterns. Using both in the same space creates depth that neither technique achieves alone.
When does a landscape lighting project require a licensed contractor?
Any work involving line-voltage (120V) circuits, new outdoor electrical panels, or permits requires a licensed electrician or general contractor. Projects that integrate lighting into hardscape construction, such as retaining walls or paver patios, also benefit from a single licensed crew to coordinate both scopes.