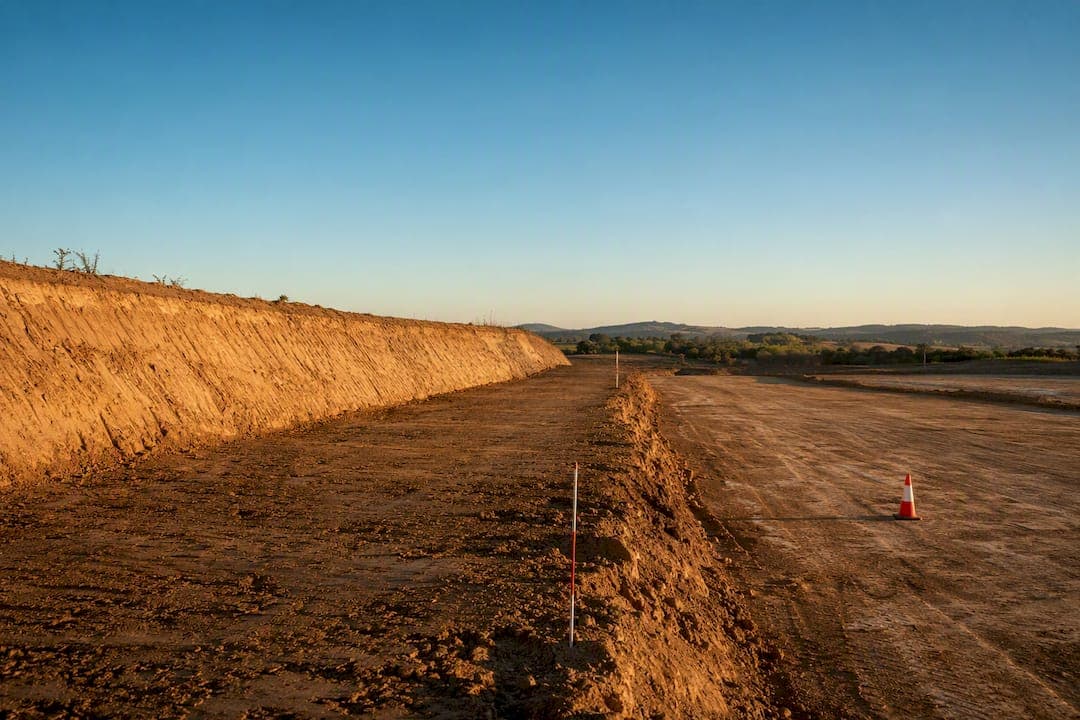
Cut and fill grading is the controlled exchange of earth between high and low points on a site to reach the elevations a design calls for. Whether that dirt balances on-site or needs trucking in or out comes down to three things: which calculation method you use, how you account for shrink and swell between bank, loose, and compacted states, and how tightly you control compaction. Get any one of those wrong and the EPA's grading guidance, ASTM Proctor targets, and A to Z Construction's own field experience all point to the same outcome: expensive surprises at rough grade.
TL;DR:
- Using accurate survey data and site-specific soil factors is crucial, as errors in volume calculation can lead to significant project cost overruns.
- Selecting the appropriate calculation method depends on site complexity, with digital surface models preferred for irregular terrains over manual cross-sections.
- Proper compaction practices, including lift thickness and moisture testing, directly impact volume estimates and long-term structural stability.
- Controlling haul distances and coordinating material exchanges can significantly reduce earthwork costs beyond just cutting and filling expenses.
- In-house coordination of survey review, geotech work, and grading ensures consistency, reduces errors, and minimizes costly rework during excavation.
Table of Contents
- What Is Site Grading and Why Does the Cut/Fill Balance Matter?
- Which Cut and Fill Calculation Method Should You Use?
- How Do You Convert Bank, Loose, and Compacted Volumes?
- How Does Compaction Practice Affect Final Grading Volumes?
- What Drives Cut and Fill Costs Beyond the Dirt Itself?
- How Do You Read a Cut-and-Fill Map Before You Bid?
- What Field Practices Prevent Grading Failures?
- A Contractor's Pre-Job Checklist for Cut and Fill Work
- Why Accurate Takeoffs Are the Cheapest Insurance on a Grading Job
- Get an Accurate Grading Plan From A to Z Construction
- Sources
- FAQ
What Is Site Grading and Why Does the Cut/Fill Balance Matter?
Cut means removing soil from an area above design elevation. Fill means adding soil to an area below it. A "balanced" site moves just enough cut material to fill the low spots, with little or nothing hauled in or out.
Rough grading gets the site within a foot or so of finish elevation and establishes drainage direction. Finish grading refines that surface, typically to a tolerance of 0.1 foot or tighter, ready for paving, foundations, or turf. The distinction matters because a site that's "close enough" at rough grade can still fail at finish grade if drainage slopes weren't set correctly the first time.
Grading choices directly affect water movement and structural performance:
- Poor slope direction on a rough grade sends stormwater toward foundations instead of away from them.
- Under-compacted fill beneath a slab settles unevenly months after occupancy.
- Cut into native soil can expose unstable material that needs a geotechnical engineer's sign-off before anyone builds on it.
Bring in a geotechnical engineer whenever cuts exceed a few feet, fill will support a structure, or the soil report flags expansive clay or high water tables.
Which Cut and Fill Calculation Method Should You Use?
Three methods dominate practice, and picking the right one depends on site size, terrain complexity, and how much survey data you actually have.
- Average end area (cross-sections). You take elevation cross-sections at regular stations, usually every 25 to 100 feet depending on how much the terrain changes, then average the cut or fill area between consecutive sections and multiply by the station spacing. It's fast, it's been the standard for linear projects like roads and utility corridors for decades, and it loses accuracy fast on irregular terrain between stations.
- Grid method. You overlay a grid on the site, at existing and proposed elevations, at each intersection. Smaller cells (25 by 25 feet versus 100 by 100) capture more terrain variation but multiply data entry and sampling effort. Cell size that's too coarse can hide localized humps or depressions that cost you at rough grade.
- TIN/prismoidal surface comparison. Software builds a triangulated irregular network from survey or LiDAR/drone points for existing and proposed conditions, then subtracts one surface from the other. This is the method behind most cut-and-fill takeoff software today, and accuracy depends entirely on survey point density. Different programs can return different volumes from the same data because algorithms handle triangulation and edge conditions differently, according to background on TIN methodology.
Manual cross-sections still work fine for a short driveway or a simple pad. Once a site has more than an acre of irregular terrain, or the bid depends on getting volumes within a few percent, a 3D digital terrain model workflow earns its cost.
How Do You Convert Bank, Loose, and Compacted Volumes?
A cubic yard cut from the ground doesn't stay a cubic yard once it's moved. Bank volume is soil in its natural, undisturbed state. Loose volume is that same soil after excavation, when it's fluffed up with air pockets and takes up more space in a truck bed. Compacted volume is what you get after the fill is placed and mechanically compacted, usually denser than the original bank state.
Typical loose swell for common earth runs roughly 10 to 25 percent above bank volume, and clay-heavy soils can swell even more. That range is why a "balanced" cut-and-fill number on paper can still leave you short at the pile.
Practical conversion steps:
- Multiply bank cubic yards by the soil's swell factor to estimate truckloads needed for haul-off.
- Apply the project geotech's shrink factor (compacted volume divided by bank volume) to figure out how much bank material you actually need to achieve a compacted fill volume.
- Always use the soil-specific factor from your geotechnical report rather than a generic industry number. Sand, clay, and rock behave completely differently.
- Recheck volumes any time the soil report changes mid-project. A revised classification can turn a balanced site into one needing import overnight.
Even a site that looks perfectly balanced in bank-volume terms can still require importing structural fill if the on-site material doesn't meet compaction specs for a slab or footing.
How Does Compaction Practice Affect Final Grading Volumes?
Compaction spec choices change how much fill you actually need, and how well it performs once loaded. Loose lifts placed too thick simply won't compact through their full depth, no matter how many passes a roller makes.
- Lift thickness. Most specs call for 6 to 12 inches of loose material per lift before compaction, thinner for cohesive clay, thicker for well-graded granular fill.
- Proctor standards. ASTM D698 (standard Proctor) and ASTM D1557 (modified Proctor) define laboratory maximum dry density at optimum moisture. Structural fill under foundations often targets 95 percent of modified Proctor; pavement subgrades commonly run 95 to 98 percent; landscape fill areas can drop to 85 to 90 percent depending on local specs.
- Field verification. Nuclear density gauges give same-day results and dominate modern testing; sand-cone tests remain the reference method where nuclear equipment isn't practical. Testing frequency and documentation requirements are usually spelled out in the project's earthwork specification.
- Moisture and equipment. Soil compacted too dry or too wet won't reach target density even with the right roller. Sheepsfoot rollers suit cohesive soils; smooth-drum vibratory rollers suit granular material.
Pro Tip: Pull a moisture sample before you start compacting a new lift, not after the roller has already made three passes. Correcting moisture on compacted material wastes far more time than conditioning it beforehand.
What Drives Cut and Fill Costs Beyond the Dirt Itself?
A mass-haul diagram plots cumulative earthwork volume along a project's length, showing exactly where cut exceeds fill and where the reverse is true. It's the tool that turns a spreadsheet of cut/fill numbers into an actual hauling plan.
- Identify the free-haul zone. This is the distance within which moving material costs nothing extra beyond the base excavation price, often set by the specification or bid documents at a fixed radius.
- Calculate overhaul beyond that zone. Once material moves past the free-haul distance, haul distance and overhaul become a direct cost driver, typically priced per cubic yard per station of extra distance.
- Look for design-side savings before committing to haul routes. Small adjustments to pad elevation can shift hundreds of cubic yards from import to balance, since even a few inches across a large footprint multiplies fast.
- Consider material exchange agreements with nearby sites. Coordinating with a project down the road that needs the fill you'd otherwise export can eliminate both your export cost and their import cost.
Haul distance, not excavation itself, is usually what separates a competitive earthwork bid from an expensive one.
How Do You Read a Cut-and-Fill Map Before You Bid?
Cut-and-fill maps use color ramps, typically warm colors for cut and cool colors for fill, layered over contour lines and spot elevations. Depth callouts at key points tell you the actual cut or fill amount at that location, not just the direction.

Cross-sections let you sanity-check a software takeoff by hand. If the average end area calculation from two adjacent stations doesn't roughly match what the color map shows between them, something's off in the surface data.
For Civil 3D users specifically, a few checks catch most takeoff errors before they become bid errors:
- Confirm the TIN surface export used the correct point group and didn't pull in duplicate or stray survey points.
- Verify vertical datum matches between the existing and proposed surfaces. A mismatched datum silently shifts every volume calculation.
- Check that units (feet versus meters, cubic yards versus cubic meters) are consistent across the whole model.
- Run the volume dashboard against a manual cross-section spot-check at three or four representative stations.
- Confirm boundary and limits-of-disturbance lines match the actual permitted grading envelope.
What Field Practices Prevent Grading Failures?
Sequencing matters as much as calculation accuracy. The order that avoids the most rework: strip and stockpile topsoil, rough grade to design subgrade, install underground utilities and erosion controls, then bring the site to finish grade.
- Manage stockpiles and disturbance limits deliberately. Keep stockpiles outside drainage paths, and stabilize them with seed or matting if they'll sit longer than a few weeks, consistent with EPA erosion-control guidance.
- Screen for unsuitable material early. Organic topsoil, debris, or high-plasticity clay found during cut needs a decision: reprocess it, haul it off and replace with engineered fill, or treat it with lime or cement stabilization under geotechnical direction.
- Proof-roll before final placement. Rolling a loaded dump truck or roller over the subgrade reveals soft spots that look fine visually but pump under load. Undercut and replace those zones before the next lift goes down.
- Watch for settlement and erosion after the first rain. Both point back to the same two root causes almost every time: insufficient compaction or a lift that was too thick to compact through its full depth.
A Contractor's Pre-Job Checklist for Cut and Fill Work
Before A to Z Construction crews break ground on a grading job, a short list gets checked every time, because the mistakes that cost the most money are the ones discovered after mobilization.
- Confirm the survey and design elevations match the geotechnical report's benchmark and datum.
- Lock in the shrink/swell factor with the geotech, not a generic industry assumption.
- Schedule field density test points before compaction starts, not after a lift is already down.
- Map the haul route and confirm free-haul limits against the bid.
- Flag stockpile locations that stay clear of drainage paths and property lines.
A simple field note template covers rough-grade elevations at key stations, proof-roll observations with location and remediation taken, and a running log of compaction test results by lift number. Keeping survey, geotech, and grading crew under one roof, rather than coordinating separate subcontractors, is what cuts down on the hand-off errors that turn a clean takeoff into a change order.
Why Accurate Takeoffs Are the Cheapest Insurance on a Grading Job
The gap between a profitable grading job and a money-losing one usually isn't the dirt. It's the assumptions baked into the takeoff before anyone shows up with equipment. A shrink factor pulled from a generic chart instead of the actual geotech report, a TIN surface built from a survey with duplicate points, a haul distance nobody double-checked against the free-haul line. Every one of those is invisible on paper and expensive in the field. Good communication between the surveyor, the geotech, and the crew running the equipment catches these before the first cut, not after the third change order. If your project is at that stage, A to Z Construction can walk through the numbers with you.
— Jake
Get an Accurate Grading Plan From A to Z Construction
A to Z Construction runs excavation and grading in-house, which means the crew doing your survey review, geotech coordination, and compaction testing is the same crew doing the cutting and filling. No handoffs, no subcontractor scheduling delays, no gap where a shrink factor gets lost between the estimator and the operator.

A site consult starts with a review of your survey and any existing geotechnical report, then a staged plan that covers rough grade, utility installation, and finish grade with compaction testing built into the schedule. From there you get one point of contact through completion, whether the job is a residential pad or a commercial site prep package. If you're planning a grading project in Utah and want numbers you can actually bid against, request a site estimate and get a plan built around your soil and your site, not a generic template.
Sources
For permit and specification questions, the EPA's land grading BMP fact sheet covers erosion and stormwater control requirements. For calculation methodology, Calichi Design Group's breakdown of cut-and-fill methods and Noblyn's mass-haul guide are solid technical starting points. Project-specific compaction targets should always come from your job's own earthwork specification, since ASTM D698 and D1557 targets vary by fill application.
- EPA — Land Grading Best Management Practices (BMP) fact sheet
- Calichi Design Group — Cut and Fill Earthwork Calculations Explained
- Soil Depot — Cut and Fill Explained
- Noblyn — Cut and Fill Calculations
- Anvilfield — Landscape site grading and earthwork field guide
FAQ
How Do You Calculate Cut and Fill Volume?
You compare existing and proposed elevations using average end area, grid sampling, or a TIN surface-to-surface comparison, then apply a shrink/swell factor to convert bank volume into the loose or compacted volume you're actually ordering or placing.
How Do You Read a Cut-and-Fill Map?
Color ramps typically show cut in warm tones and fill in cool tones, layered over contour lines with spot elevation and depth callouts at key points. Cross-check the map against a manual cross-section at a few stations before trusting the software's total volume.
What Does "Cut and Fill" Mean in Construction?
Cut is soil removed from ground above design elevation, and fill is soil added to ground below it. Grading crews aim to balance the two so the site needs little or no imported or exported material.
How Do You Calculate the Cut and Fill Factor in Civil 3D?
Civil 3D calculates volumes by subtracting a TIN surface built from existing survey points from a proposed design surface, then applies whatever shrink/swell factor you enter in the volume dashboard settings. Always verify the point group, vertical datum, and units before trusting that output, since algorithm and data-quality differences between software packages can shift the reported volume.
What Does A to Z Construction Charge for Excavation and Grading?
Pricing depends on site size, soil conditions, and haul distance, so A to Z Construction does not publish a flat rate for excavation and grading. Current estimates are available by requesting a site consult through the company's website.